Page 14 of 23 FirstFirst ... 4910111213141516171819 ... LastLast
Results 131 to 140 of 225

Thread: Project: Tempest SXR

  1. #131
    Resident 100HP water-cannon operator SXRguyinMA's Avatar
    Join Date
    Jun 2008
    Location
    MA
    Posts
    5,865

    Default Re: Project: Tempest SXR

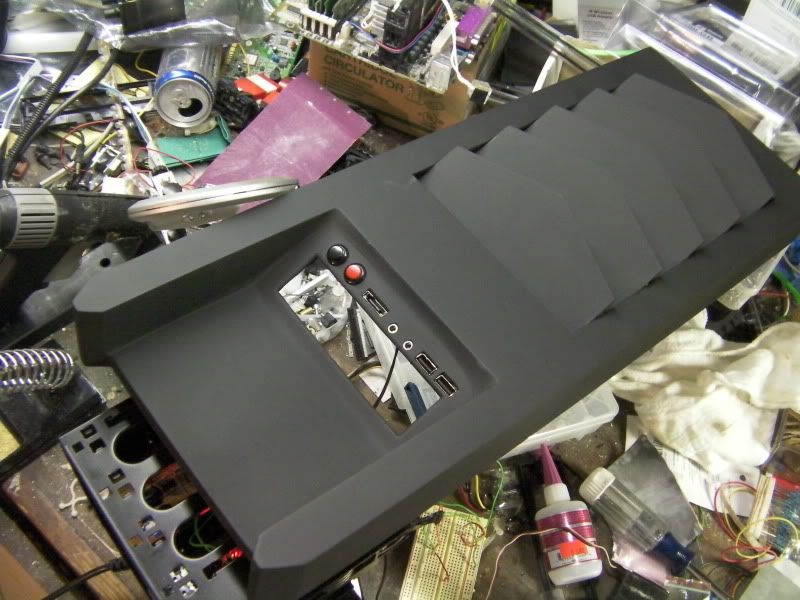
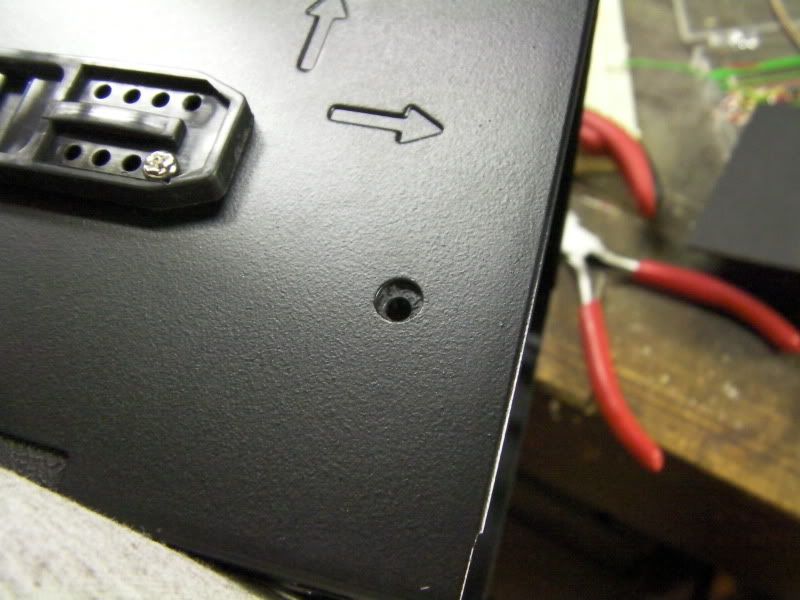
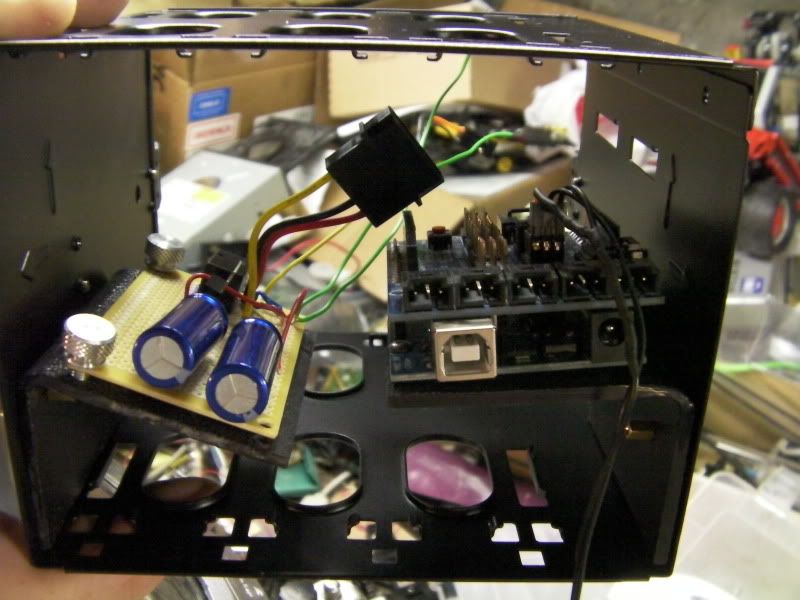
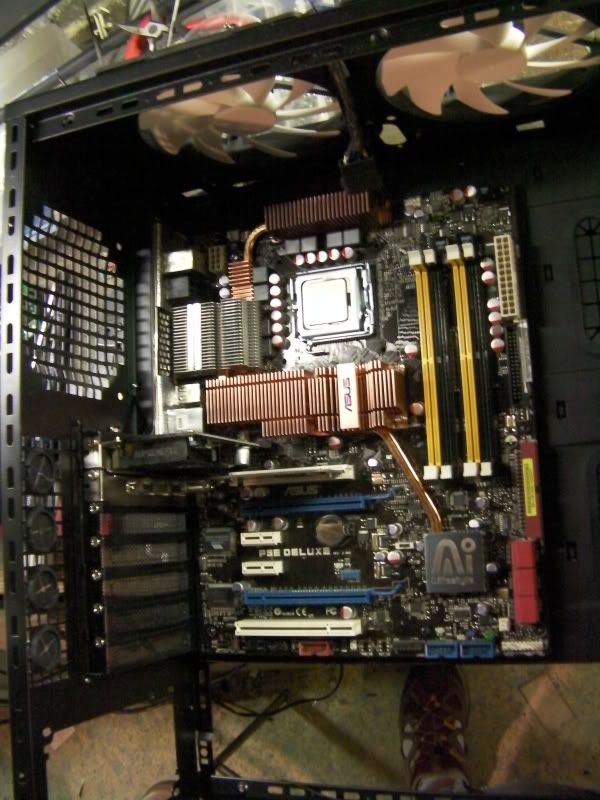
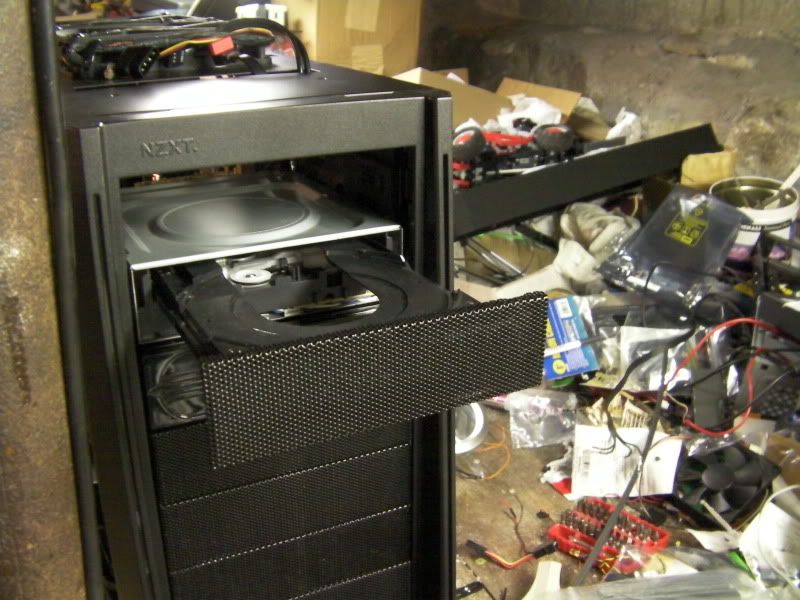
    I was thinking a gloss black, but I think I'll just leave it all flat black. I want to find some decals @ the hobby shop from a model airplane or something that says "hot exhaust" or something to that effect to put on the housing itself near the vents

  2. #132
    Resident 100HP water-cannon operator SXRguyinMA's Avatar
    Join Date
    Jun 2008
    Location
    MA
    Posts
    5,865

    Default Re: Project: Tempest SXR

    Alright update time! Sorry it took so long, we had a friend from Australia stay with us for a bit so I didn't want to spend visiting time modding lol.

    So after the top panel had plenty of time to dry, I went about hot-gluing in the i/o panel


    Followed by the power and reset buttons


    I left the Sentry 2 panel out for now as I'm using it in my current computer, so it will be one of the final things that gets installed.

    Now at this point I started placing everything in it's spot to check fitment. Dummy me forgot that I was going to add standoffs to the Arduino board, and hadn't planned on making the secondary power board for the Arduino (see this thread - HUGE thanks again to crenn for making that possible), so needless to say they wouldn't fit under the top panel where I originally wanted them. So I hdd to find a new place.

    Well the Tempest EVO comes with 2 HDD racks that hold 4 HDDs and take up 3 5.25" slots each. I was only planning on using one of these as I only had 2 drives max that I was going to put into this case. So I went about making the Arduino and power board fit into one of these HDD cages.

    The Arduino code is set so that when the computer shuts off it takes 5v away from pin 5 on the Arduino, thus telling it to shut the louvers. Well if the Arduino powers off at the same time as the computer this will not happen. So with crenn's help (and a lot of it) we got this circuit built up. It uses a 5v relay, a 5v regulator, a 15ohm resistor, a 5v zener diode, and 2 10F 2.5v capacitors. Basically 5v from the PSU powers the relay and sends 5v to the Arduino's sense pin. Then 12 comes into the relay, out to a 5v regulator, then through the resistor and diode to the caps where it charges them to a total of 5v. When the computer shuts off, the caps have enough juice to keep the Arduino on and run the servo long enough to shut the louvers. Then the Arduino will just bleed off the rest of the voltage until the caps are drained. When the computer is powered on, it takes ~5 mins to fully charge the caps.

    In the breadboard:


    And soldered up:


    Now onto the mounting. I had these scrap pieces of stiff plastic laying around (that I was actually using for soft-jaws for my vice) that I thought would work perfectly.


    Now the HDD cage had a hole in one side already, so I just lined up the plastic and drilled it.


    On the other side I had to drill a hole in the side of the cage.


    And using small 4-40 SS screws to hold the boards to the plastic.


    And both boards mounted inside the HDD cage. This shot will be the inside-the-case side, and there will be a 120mm fan in front of this for an intake, and the HDD(s) will be an identical cage underneath this with another 120mm fan.


    The thumbscrews are there temporarily because I had to change a few things on the power board so it'd work properly, and these were easy to get in and out quickly.

    Having the USB on the inside will make calibrating the Arduino a lot easier. This way once the case is fully assembled I can change the Arduino's code based on the actual temps the case sees.

    Pretty much all that is left is to finish wiring up the LEDs in the top 140mm fans, and figure out any other kind of case or ambient lighting I want, then take the buttons and such from my current switch panel and transfer them into one of the Tempest's front mesh panels, and re-stealth the DVD drive with a Tempest front mesh panel as well, then final assembly! I'm hoping to have it completely finished within 2 or 3 weeks

  3. #133
    Resident 100HP water-cannon operator SXRguyinMA's Avatar
    Join Date
    Jun 2008
    Location
    MA
    Posts
    5,865

    Default Re: Project: Tempest SXR

    Alright so I'm going to be working on this tonight so expect and update tonight or tomorrow sometime. i also managed to break my touch panel for my Sentry 2 fan controller (dammit!) and was trying to figure out how to get a replacement panel. Well I sent them a message on facebook, and had someone there tell me to email someone inside NZXT, so I did (and of course included a link to this worklog) . Well just a short while ago I received an email back stating that they're sending me a whole replacement fan controller! They're out of stock for now but they'll ship it out to me next week!

    So a HUGE Thanks goes out to NZXT!!! They not only have incredible products but have top notch customer support! Thanks again NZXT!!

  4. #134
    Resident 100HP water-cannon operator SXRguyinMA's Avatar
    Join Date
    Jun 2008
    Location
    MA
    Posts
    5,865

    Default Re: Project: Tempest SXR

    Alright I got some more work done tonight!

    I made up a harness for the last 4 RGB LEDs in the top 140mm fans. Every time I wire up another set I do it differently and improve upon the last version. For instance, since first doing them in Armor Redux, I've found that if you shed an old cat5 cable, the 8 wires inside are PERFECTLY suited for wiring LEDs. And they're already twisted pairs, which is very nice.

    Then comes making the actual harness. The first 140mm fan I did on this case had each LED wiring section in it's own sleeving which all got joined together. This one I did tonight has all the wiring in one continuous harness. It was a lot more work on my part to do but the end result is much nicer.

    Here is the second completed harness:


    And a close up of each wiring joint. I simply cut small sections of sleeving, then went progressively bigger as the wiring bundle got bigger.


    And the 4-pin molex on the end:


    And here it is installed on the fan. All I had to do was put a small dab of hot glue over each LED to make sure it wouldn't pop out as they are pretty loose in their spots.


    And a shot of both fans mounted to the case:


    I also sleeved the 3-pin fan harness for each as well.

    I also got the Asus P5E Deluxe from Trace (thanks again) mounted in it's final resting spot. I've got my old Pentium D930 in there just to make sure no dust or anything gets in the socket. Once my Q6600 comes out of this Abit board it'll get lapped and put into the Asus board. Then that D930 will go into my Abit board and be turned into an HTPC at some point.


    And I also sleeved the 3-pin harness for the rear 120mm Exhaust fan and installed it into the case with a vib. dampener. (no pics of that, but it's pretty self-explanatory).

    That's it for tonight. Hopefully within the next few days I can take apart my current rig and start swapping some hardware! The two 120mm RGB fans that are in the front of my armor are going to go into the front of the Tempest (this will save me from having to wire up 2 more RGB fans, and the LED ones that come with the Tempest have 3mm LEDs, so I can't convert those).

    Now the only thing I'm still debating on is whether or not to transfer my third clear 120mm fan into the Tempest side panel to replace the blue LED one, or swap out the blue LED one for a plain black and white NZXT one without the LEDs.

  5. #135
    Fox Furry crenn's Avatar
    Join Date
    Apr 2005
    Location
    In the shadows behind you
    Posts
    4,067

    Default Re: Project: Tempest SXR

    I'm guessing this mod is nearing an end?
    Antec Sonata II | Pioneer DVR-212
    Good news! You can follow my website or follow me on twitter!

  6. #136
    Resident 100HP water-cannon operator SXRguyinMA's Avatar
    Join Date
    Jun 2008
    Location
    MA
    Posts
    5,865

    Default Re: Project: Tempest SXR

    It's getting there

    Once my replacement fan controller shows up from NZXT I'll be ready to do the final transfer of the hardware.

    In the meantime I got some more work done tonight!

    I started off by re-stealthing my DVD drive into the Tempest. i popped off the Tt faceplate that was hot-glued on, and found that it was rather simple to get the NZXT faceplate installed. I simply used the 3 tabs along the top that are meant to hold to foam in, and the 2 tabs on the side that hold the plate into the front panel. I just bent them as needed and adjusted them.


    Drive closed:


    And opened:


    The next task was to transfer the buttons, switch and LED from the Tt faceplate into the NZXT faceplate. This went quick, as I simply traced the holes from the Tt plate onto the NZXT plate, and re-drilled them.

    Switches in the panel:


    Then I had to cut the foam to fit around the components as I had to do with the Tt plate.


    One thing I noticed was the difference in density between the NZXT foam and the Tt foam.

    NZXT foam on left, Tt on right:


    This should help trap more dust than the Tt units did

    And the panel installed:


    And a shot with the top panel temporarily placed into position:


    And of course a vid (click on pic for vid)


    Now one thing you'll notice is that the DVD faceplate doesn't sit quite flush. This is due to the mounting location for the drive. It actually needs to be mounted between the provided mounting holes. I'm going to work on fixing this without having to do more drilling on this case (it's super thick and has killed 2 of my drill bits so far lol).

    That's it for now. My computer is currently without the switch panel and DVD drive, but that's ok, they're not needed right now. As soon as my new fan controller shows up then it'll be teardown time! I'll lap the proc and install the hardware and do all the cable management at that time.

  7. #137
    Will YOU be ready when the zombies rise? x88x's Avatar
    Join Date
    Oct 2008
    Location
    MD, USA
    Posts
    6,334

    Default Re: Project: Tempest SXR

    It looks good. I was wondering if you had extended the ODD eject button.

    As a side note, you can embed photobucket videos by enclosing the 'forum' link they provide in [ m ] [ / m ] tags (take out the spaces, obviously).
    That we enjoy great advantages from the inventions of others, we should be glad of an opportunity to serve others by any invention of ours, and this we should do freely and generously.
    --Benjamin Franklin
    TBCS 5TB Club :: coilgun :: bench PSU :: mightyMite :: Zeus :: E15 Magna EV

  8. #138
    Resident 100HP water-cannon operator SXRguyinMA's Avatar
    Join Date
    Jun 2008
    Location
    MA
    Posts
    5,865

    Default Re: Project: Tempest SXR

    Quote Originally Posted by x88x View Post
    It looks good. I was wondering if you had extended the ODD eject button.

    As a side note, you can embed photobucket videos by enclosing the 'forum' link they provide in [ m ] [ / m ] tags (take out the spaces, obviously).
    I can't find any 'forum' link. they give 'email', 'direct link', 'html' and 'img', and I tried every one with the code and none worked

  9. #139
    Overclocking Guru Trace's Avatar
    Join Date
    Aug 2007
    Location
    California
    Posts
    2,077

    Default Re: Project: Tempest SXR

    Is that the motherboard I sold you that I spy?
    Quote Originally Posted by Lothair View Post
    I guess it's just widely used and has had some of the best people in the world work on it, costing a ridiculous amount of money, for no actual reason. :/
    Have you checked out the front page lately?
    Projects:
    Moe's Tavern | Sponsored by: Mimo Monitors, Crucial, Thermaltake
    Book Of Knowledge

  10. #140
    Resident 100HP water-cannon operator SXRguyinMA's Avatar
    Join Date
    Jun 2008
    Location
    MA
    Posts
    5,865

    Default Re: Project: Tempest SXR

    yes, yes it is

Posting Permissions

  • You may not post new threads
  • You may not post replies
  • You may not post attachments
  • You may not edit your posts
  •