Page 7 of 10 FirstFirst ... 2345678910 LastLast
Results 61 to 70 of 96

Thread: Battlestar Galactica Mod

  1. #61
    Modding the World, One Case at a Time Boddaker's Avatar
    Join Date
    Jun 2005
    Location
    Northern CA
    Posts
    818

    Default Re: Battlestar Galactica Mod

    Thanks guys! You all rock!

    So since I obviously won't be finishing this case by this next weekend (PDXLAN11), I'm still
    going to bring it up and just throw my system into it as is. I just had to fab up a special hard drive
    mount for the dual Raptors.

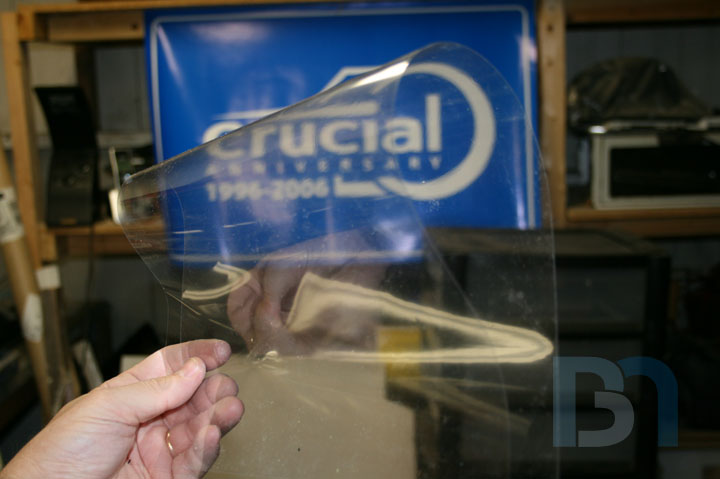
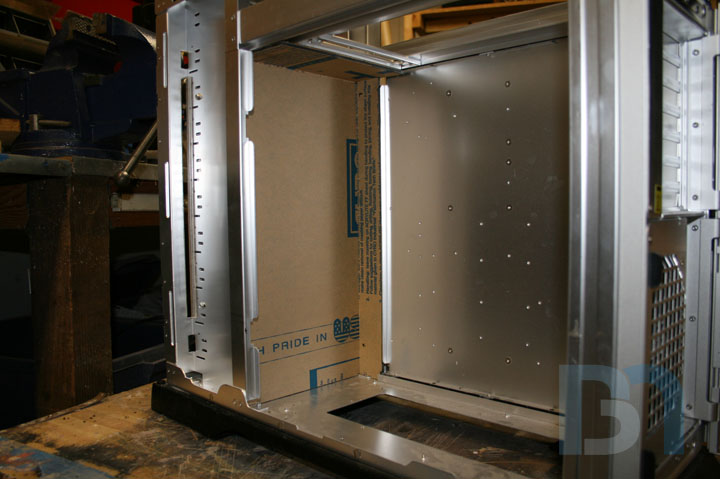
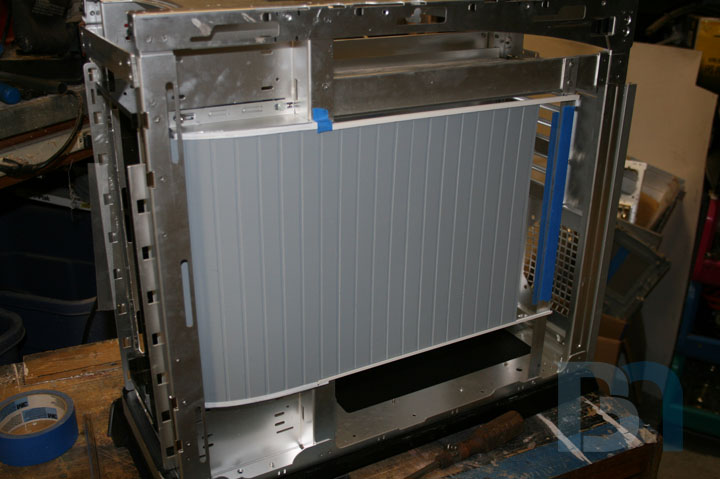
    I cut some solid black acrylic pieces and fit them into the case.


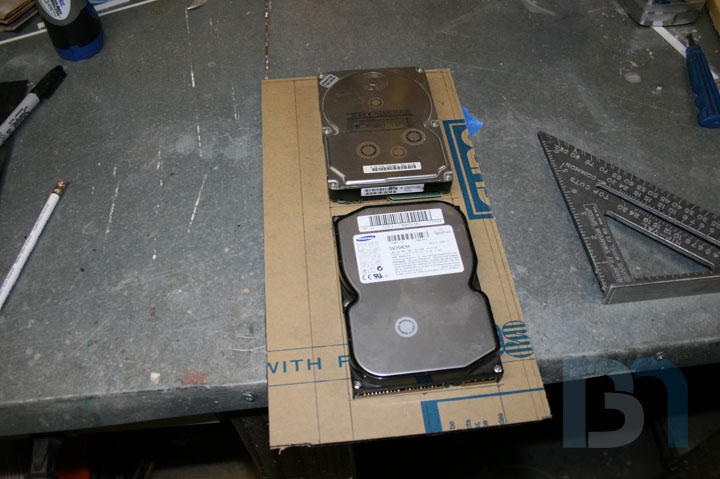
    Then I took the largest piece and cut sections out for the drives. I used a couple spare drives as templates.


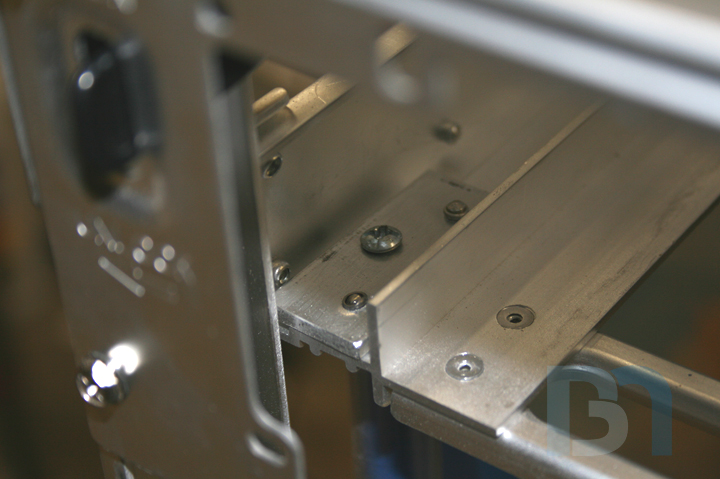
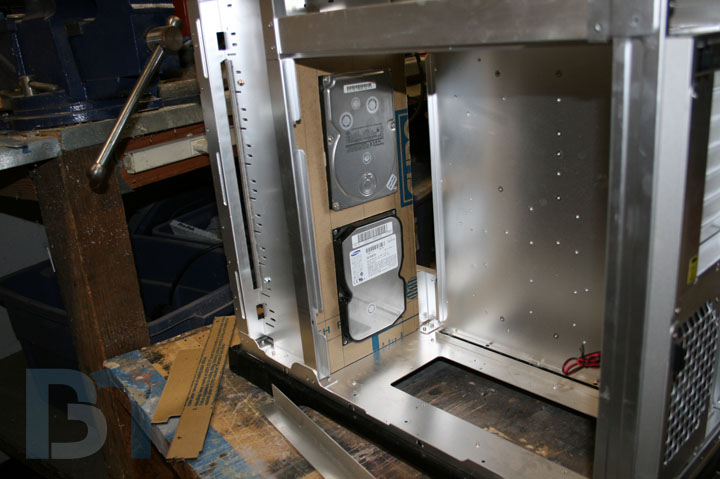
    Here they are positioned in the case.


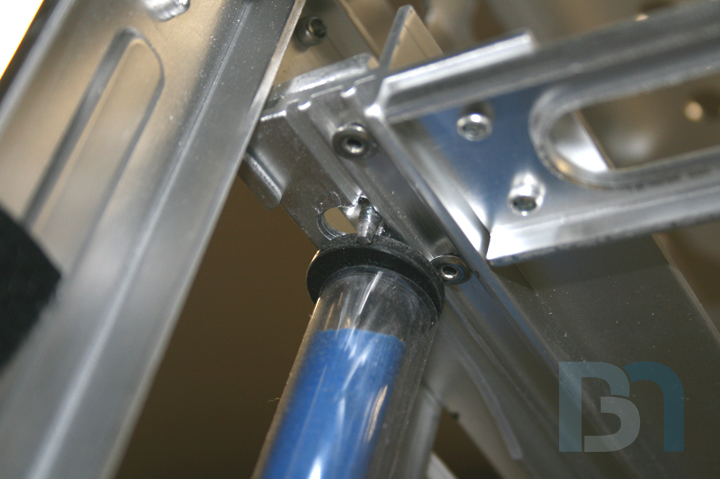
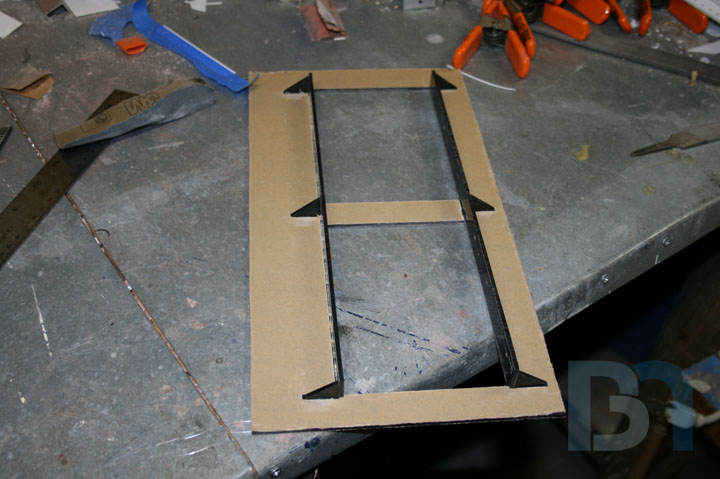
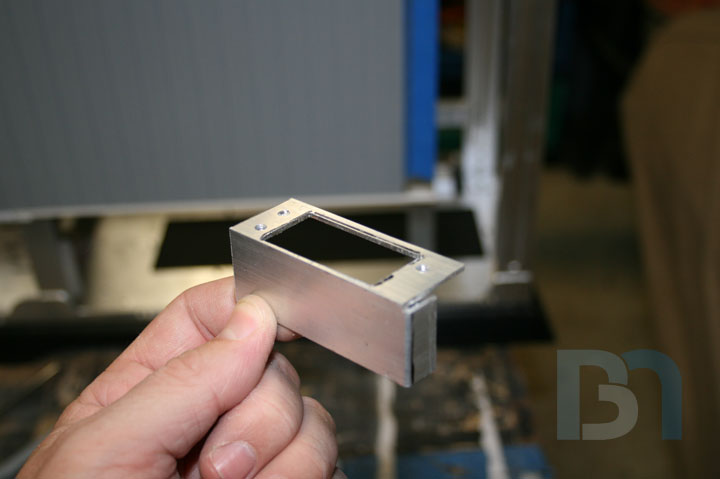
    Then I cut two more strips of acrylic, drilled the mouning holes, glued them to the main piece,
    and added some triangle gussets for strength.


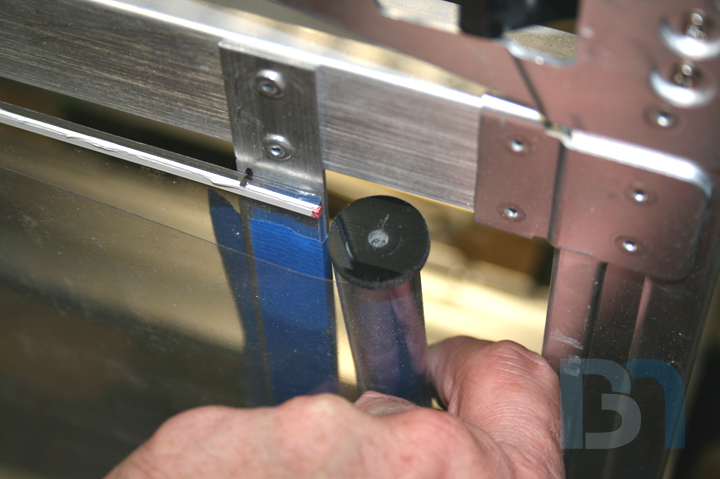
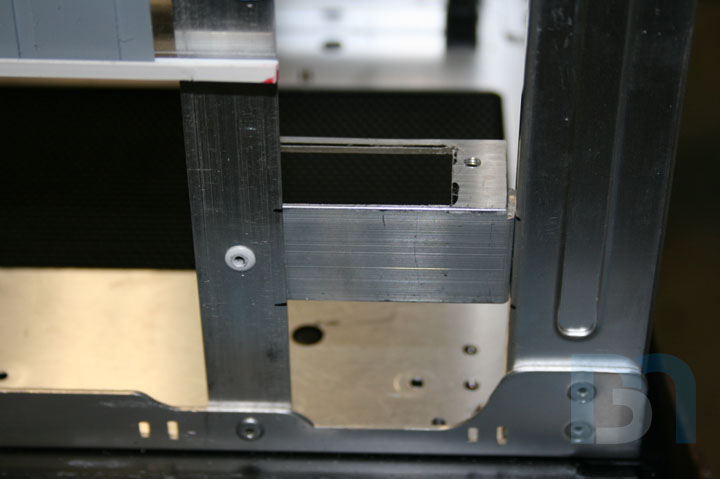
    Here's a tip: in order to make sure eveything fits the way they're supposed to, screw the pieces
    onto the drives first, then glue them down. This will ensure the mounting holes will line up to the drives
    after the glue has dried.

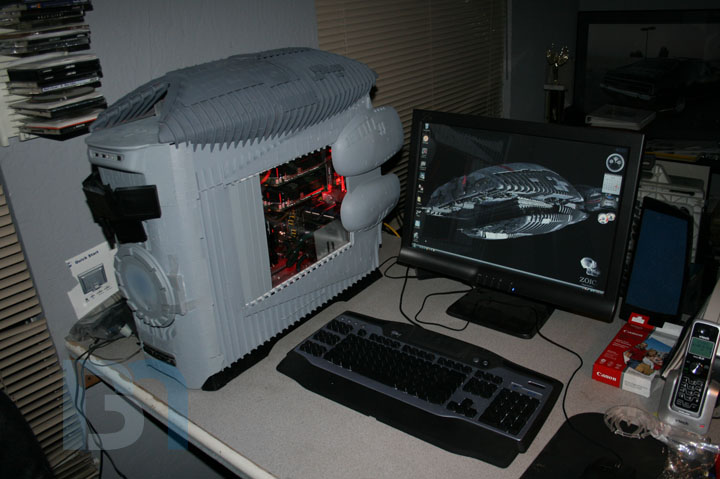
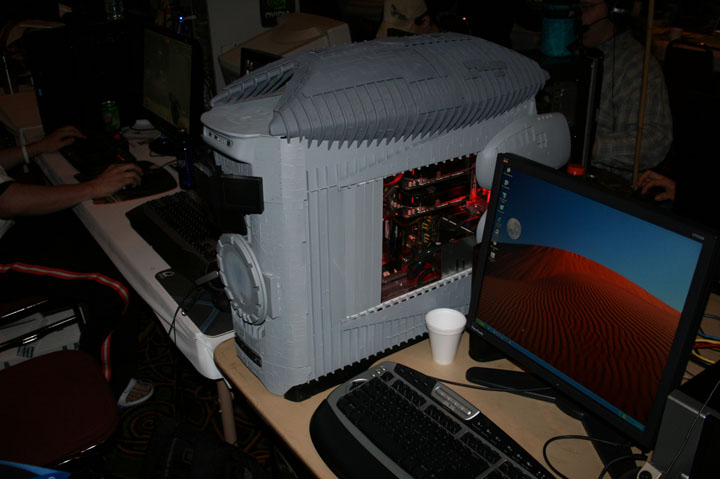
    I'm building the system tonight, so hopefully I will have another update for you tomorrow, with pics of a
    fully primed, semi-complete rig!
    Honey Roasted Peanuts Ingredients: Salt; Artificial honey roasting agents; Pressed peanut sweepings.

  2. #62
    Modding the World, One Case at a Time Boddaker's Avatar
    Join Date
    Jun 2005
    Location
    Northern CA
    Posts
    818

    Default Re: Battlestar Galactica Mod

    OK

    As much as I hate making non-pic posts, I wanted to give you guys a quick update. I got all the components installed into BSG, and have been installing the OS and games to get ready for this weekend. I ran into a couple snags with the dvd drive and front panel though. First, the drive that I so meticulously added a window to, doesn't work. It powers up and takes a disc, but can't get it mounted successfully so it spits it back out. As I feared, that small ring I glued back onto the plexi was off just enough to keep the disc from seating correctly. Fortunately, I purchased a backup drive for just such an emergency, so I was still able to load software.
    Then, when it came time to put the drive back into the front panel, I neglected to allow for cable clearance in the back. The IDE adapter took more room than I expected, so the cable hits part of the paneling. The solution was to cut away the interfering part, and make a box to cover it. So that is what I did last night.

    I should be able to put it all together tonight and take some pics. However, I am leaving early in the AM tomorrow, so I don't know if I can post before then (I still have to pack!).
    Honey Roasted Peanuts Ingredients: Salt; Artificial honey roasting agents; Pressed peanut sweepings.

  3. #63
    Modding the World, One Case at a Time Boddaker's Avatar
    Join Date
    Jun 2005
    Location
    Northern CA
    Posts
    818

    Default Re: Battlestar Galactica Mod

    Well, here are the primed pics as promised:


    And here it is all thrown together. It actually doesn't look to bad in primer!


    So like I said, I'm by no means done with this case. Still got tons of work yet before I can call this thing done.
    But building it up like this really helped to point out some problematic areas that will need to be addressed.
    It's good to find out about those now, than during the final assembly.

    Anyways, I've got a long drive ahead of me tomorrow, so I'm off to bed. Will post pics of the lan when I get a chance.

    Honey Roasted Peanuts Ingredients: Salt; Artificial honey roasting agents; Pressed peanut sweepings.

  4. #64
    Modding the World, One Case at a Time Boddaker's Avatar
    Join Date
    Jun 2005
    Location
    Northern CA
    Posts
    818

    Default Re: Battlestar Galactica Mod

    Well, the LAN was great. Had a great time, got a lot of good comments and feedback (and a few new contacts for hardware! )
    Here are a couple shots, but after looking at these pics, they really dont' offer up much more than the pics i took before I left for the lan lol. But here you go:


    I think my next task while it's up and running will be getting the lcd's hooked up and working.

    Honey Roasted Peanuts Ingredients: Salt; Artificial honey roasting agents; Pressed peanut sweepings.

  5. #65
    Modding the World, One Case at a Time Boddaker's Avatar
    Join Date
    Jun 2005
    Location
    Northern CA
    Posts
    818

    Default Re: Battlestar Galactica Mod

    HOLY CRAP AN UPDATE!!!!

    Ok, it's been way too long since I last updated, and I apologize for that. Life, as they say, got in the way
    and I was extremely hard-pressed to get myself into the garage to work on this project.
    So enough with the excuses, let's get on with the goods shall we?

    Last time I posted, I had just thrown the case together temporarily to get up to PDXLAN. None of the special
    features of the case were funtional (blast doors, mini lcd's, landing bay), it was just a case with a bunch of crap
    glued onto it lol.

    Well, these last few weeks I have been silently working on the blast doors. And they have proven to be a lot more
    difficult than I had originally anticipated. The basic idea was to have them roll up onto spools that are housed in a
    removable module mounted in the drive cage, with the spools being connected to servos. Well, rolling them
    up is not the problem. The servo motors are more than capable of reeling up the doors. Where I ran into a bit of
    a snag is when the motors are reversed, and they attempt to push the doors back closed. Being as flexible as
    the doors are, this was not to be an easy task, as they would just buckle at the first sign of friction, regardless of
    the fact that they were contained in a set of tracks.

    So I devised a plausible solution: add another spool and servo on the opposite end that will pull the door closed.
    This is the main focus of my come-back post.

    Now that I have given you more than enough back story, I can proceed with the pics!

    Here is a shot of the blast door in its tracks. You can see I added a 1/16" aluminum flat bar support on the right side,
    and some bracketry to hold the tracks in place along the drive cage.


    Here is the bracket i made to hold the servo for the closing spool.


    The bracket riveted to the vertical support bar, and case frame.


    The servo mounted in the bracket.


    And here is a shot of the closing spool mounted onto the servo.


    It doesn't look like much, but trust me, you're looking at a month's worth of work here! Granted my modding time
    has been severely cut down to nil, but I still think it was a lot of work! I will show more detailed shots of the
    spool later, and how I devised the upper pivot point, which happens to also be the means of removing the spool.

    Next update sometime this weekend! (I promise!)

    Glad to be back, and I hope to keep trucking on this until its finished!

    Honey Roasted Peanuts Ingredients: Salt; Artificial honey roasting agents; Pressed peanut sweepings.

  6. #66
    Modding the World, One Case at a Time Boddaker's Avatar
    Join Date
    Jun 2005
    Location
    Northern CA
    Posts
    818

    Default Re: Battlestar Galactica Mod

    Ok, finally another update! I know it's not as frequent as I promised before, but at least it hasn't been
    2 months like last time! Anyways, I'm slowly making progress on this blast door, creeping ever closer to
    a fully functional system.

    I wanted to show you how I made the pivot point for the smaller spool. Here is a shot of the piece I added
    above the spool that has a screw in the center. It's just a small piece of 1/8" aluminum riveted in place and tapped.


    Here's a shot from below looking up.


    A shot from below, with the spool disconnected from the pivot screw. I removed the threads off end of the
    screw so it wouldn't screw into the top of the spool. You can also see that huge factory-made hole to the left
    which was why I had to add that extra piece of aluminum over it.


    And here's the top view of the spool showing the center hole where the screw sits. To remove the spool,
    I simply unscrew the set screw and lift it out.


    Ok, so with the smaller spool in place I added the clear film. Got this sheet from my local drafting
    supply store. It's 5mils thick.


    Taped one end to the blast door, and the other I wrapped around the small spool. Sorry for the pics,
    but it is quite difficult to photograph things that are completely transparent!


    This shows the blast door open with the acetate stretching across the window opening.


    I opened the door a bit wider so you could see the extra pieces I added on the left for the door to glide on.


    Next, I got the limit switches mounted. They "limit" the movement of the door by cutting power to the servos
    once the door reaches a set position. This one will stop the door after it has closed fully.


    And this one will stop the door once it has opened fully. I extended the leading edge of the door with some
    styrene, which will serve to trip the limit switches.


    Now all that's left is mounting the controller board, and a bit of wiring and it will be ready to rock. Video is definitely
    forthcoming, hopefully by this weekend if all goes well.

    Honey Roasted Peanuts Ingredients: Salt; Artificial honey roasting agents; Pressed peanut sweepings.

  7. #67
    Modding the World, One Case at a Time Boddaker's Avatar
    Join Date
    Jun 2005
    Location
    Northern CA
    Posts
    818

    Default Re: Battlestar Galactica Mod

    Slight delay on getting the blast door working. Ran into some issues and couldn't get the two servos to play nice together no matter how I wired them. So I am looking into a USB controller that I can program via a windows interface. Hopefully then I will be able to program the sequence and adjust the speeds more accurately.

    So while I am waiting on that, I decided to focus my attention on another part of the case, more specifically, the other side panel behind the motherboard tray. This is a welcome change of pace, as I was getting totally bogged down and frustrated. Now I get to actually make some progress! I will upload some pics tonight so 'til then.
    Honey Roasted Peanuts Ingredients: Salt; Artificial honey roasting agents; Pressed peanut sweepings.

  8. #68
    Modding the World, One Case at a Time Boddaker's Avatar
    Join Date
    Jun 2005
    Location
    Northern CA
    Posts
    818

    Default Re: Battlestar Galactica Mod

    Well, I thought I had more pics than this, but I dont. So it will have to suffice for now. Call it a teaser shot lol!

    I made up a cardboard template for the other side panel's opening, so I could place the 10" LCD screen along with
    the larger BSG lettering I had cut way back when I did the small lettering for the front. (thanks again to Moddersmart.com)


    I got something special planned for the lettering, but you'll have to wait to see what that is.
    Honey Roasted Peanuts Ingredients: Salt; Artificial honey roasting agents; Pressed peanut sweepings.

  9. #69
    Modding the World, One Case at a Time Boddaker's Avatar
    Join Date
    Jun 2005
    Location
    Northern CA
    Posts
    818

    Default Re: Battlestar Galactica Mod

    So while I'm waiting for things, I thought I would delve back into my windowed slot loading dvd drive,
    and see if I could fix it. If you remember, the disc wouldn't fully load into the drive. It would go in and try to
    mount, but would just spit back out. I pretty much knew what I had done wrong, that I hadn't gotten the
    center ring positioned correctly. So after taking the drive cover off again, I carefully unstuck it off the acrylic window.
    Then I removed the cover off my spare drive and proceeded to take more precise measurements.

    Here is a shot of both covers side by side:


    Once I got the measurements, I transferred them to the window and re-glued the center ring back down.
    After ample drying time, I powered the drive up and loaded a disc in. This time it took the disc all the way, but
    didn't quite seat it onto the hub. As a consequence, it spit the disc back out. After a few more tries, I figured
    out that with just a slight bit of downward pressure on the window, it will seat. The center ring is merely there
    for the drive's actuating arm to press against momentarily in order to seat the disc onto the spinning hub.


    Here it is spinning away!


    And here's a shot with the disc ejected.


    So all I have to do is apply a little bit of pressure on the window for it to work. I will accomplish this by adding
    a small acrylic washer in between the medallion and the window, so when i secure the medallion down, it will apply
    that pressure and should solve the problem.

    Honey Roasted Peanuts Ingredients: Salt; Artificial honey roasting agents; Pressed peanut sweepings.

  10. #70
    Modding the World, One Case at a Time Boddaker's Avatar
    Join Date
    Jun 2005
    Location
    Northern CA
    Posts
    818

    Default Re: Battlestar Galactica Mod

    Holy crap, it's been another month since my last update?? Where does the time go? Granted, the whole move thing
    has sucked what little free time I have left outa me, but still! I remember not too long ago I was good for an update at
    least once a week. Well, it's time I get back to that, especially if I am to have any chance at making Nvision'08 in August!
    (yes, I know Battlestar Galactica actress Trisha Helfer (Number Six) will be a guest speaker there)

    So, here is an actual update, with pics: I got my LCD panel from Moddersmart,
    so I immediately set the lettering in place to see how it will look. First I tore the paper backing off
    around the cutouts, and got the lettering lined up and ready.


    Here's a closeup of just the cutouts. They look funky by themselves, but they'll line up with the centers of the lettering.


    I took a red ccfl and held it behind the panel.


    Then I placed the lettering over the cutouts and lined it all up. Here's a shot with the red ccfl.


    The lettering faces will be painted to match the logo, so it will be easier to read. Also, not shown is the
    smaller "BATTLESTAR" lettering that will eventually be placed above it.

    The other item I got in was the vinyl landing deck decal I had made up. I drew up a vector image in
    Illustrator and sent it to Liquid Sticker Designs to be printed on vinyl. Special thanks go to Lee Stringer for
    helping me out with the design! He was nice enough to send me a few reference pics of the actual CG model.


    Here it is in position. It will obviously be trimmed down, and the power/reset buttons will be cut out as well.
    Time permitting, I will be adding some chase led's for running lights down both sides.
    Honey Roasted Peanuts Ingredients: Salt; Artificial honey roasting agents; Pressed peanut sweepings.

Posting Permissions

  • You may not post new threads
  • You may not post replies
  • You may not post attachments
  • You may not edit your posts
  •