Wow! Thats amazing. +rep


Wow! Thats amazing. +rep


OMG! That's epic! Must...have...video!
+rep


Thanks for the rep and the encouragement, fellas!
@ Mach: it's not mobile yet, as I still have to mount the motor, and sadly I have no way of posting video. We're still doing video with tape here.Who knows, though? By the time I finish this, holographic video storage may be available at K-Mart.
Do not trust people like me. I will take you to museums, and parks, and monuments, and kiss you in every beautiful place, so that you can never go back to them without tasting me like blood in your mouth. I will destroy you in the most beautiful way possible, and when I leave you will finally understand why storms are named after people.
cool That amazing project
Rep +

interesting project, can't wait to see the final results...

thats great man... very nice
Originally Posted by Drum Thumper

Edit: I just read this whole thread again and realized that I forgot to mention that I had to remake every one of the panels I made previously, which is why this post looks just like the earlier pre-assembly post. The only thing I was able to salvage was the bottom piece.I also wound up using a different motherboard tray, out of an Apevia X-Discovery case that I dissected.
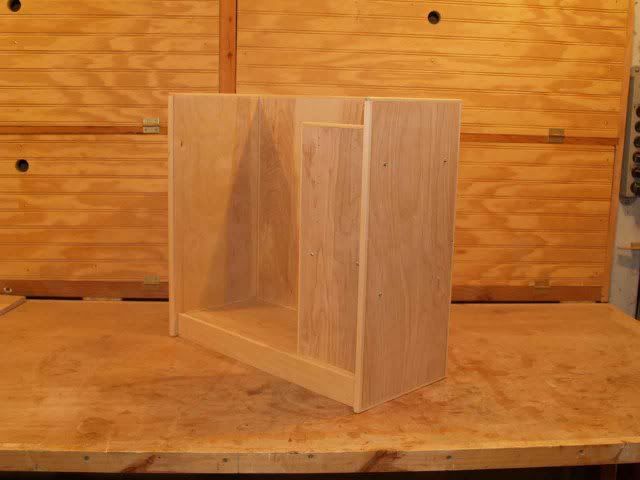
Just a small update on assembly today. I've decided to assemble this whole project with the brass inserts I used on the drive tower, so that I can completely disassemble it in the future if needed. I got all the panels cut to size, edge banding in place and inserts installed. Check it out:
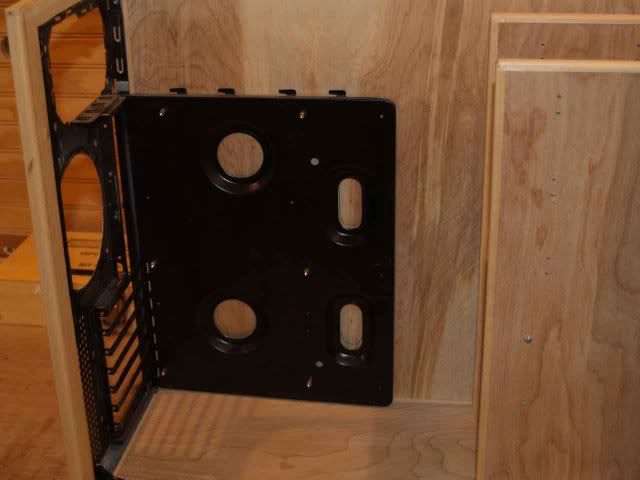
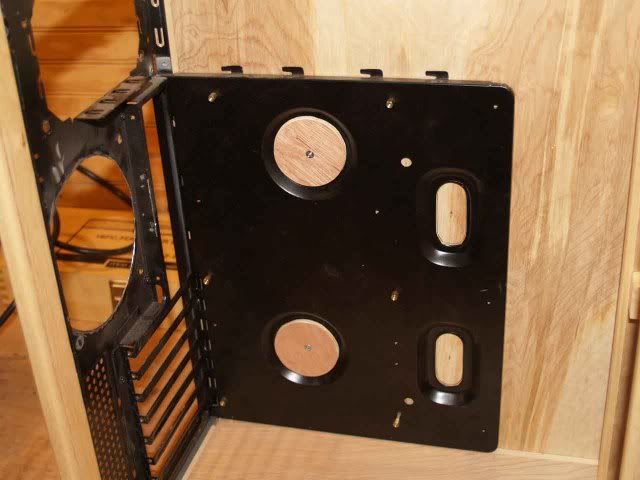
Got the hole cut in the real panel for the motherboard tray, turned out perfectly.This particular tray is designed to be removable, and after I installed it the only thing holding it in place are three screws that go through the rear panel, which will have to be removed before this thing is done. The rear panel itself is not a problem but I had to figure out a way to secure the motherboard tray.
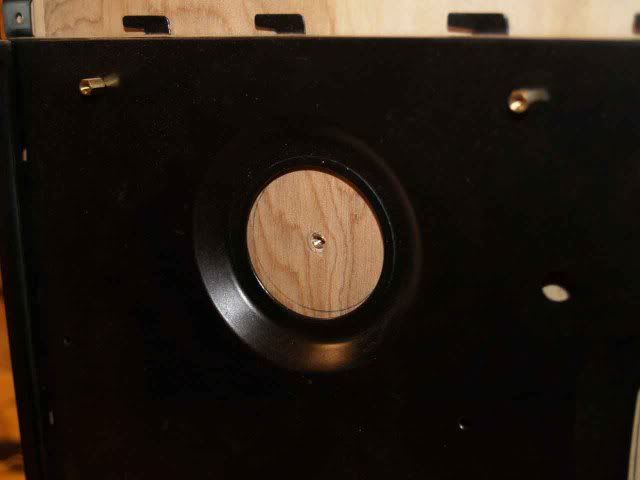
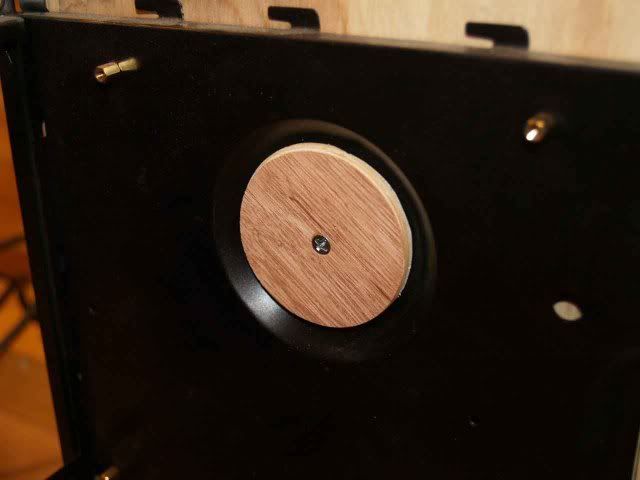
I had to have a way to secure it that wouldn't leave anything sticking out higher than the surface of the tray (like screw heads), as with my luck I would put it in just the right place to short across two pins on the back of my board and fry every component I have. I decided to use the depressions in the middle. I put a brass insert in the center of the two circular ones.
Then cut two circles of Luan slightly larger than the bottom of the depression, countersunk the screwhead and screwed them in.
When it's done, of course, these will be hidden under the board, but they will still get the same paint treatment the tray is going to get.
That's it for now, I'm about to go back out the shop and start laying out the front panel, have to cut for both DVD drives, the front temp gauge, the on/off switch and the intake fan. I've got other holes to cut in it but they will have to wait until components arrive for layout reasons. That's one reason I love being able to take it apart and put it back together as often as I need to.
Wish me luck, it's cold out and my shop heater went out last night!
Last edited by blueonblack; 12-05-2008 at 02:37 AM.
Do not trust people like me. I will take you to museums, and parks, and monuments, and kiss you in every beautiful place, so that you can never go back to them without tasting me like blood in your mouth. I will destroy you in the most beautiful way possible, and when I leave you will finally understand why storms are named after people.
Looking good man. Bad luck about your heater.

really cool idea

Frame looks rock solid, can't wait for more progress shots.
Project: Elegant-Li *NEW*
Project: Alpha FINISHED
Project: LEXA Revival FINISHED
Project: LEXA FINISHED Bit-Tech MOTM Nominee October 08
 Posting Permissions