Page 1 of 4 1234 LastLast
Results 1 to 10 of 40

Thread: Monster Truck Case

  1. #1
    Modding the World, One Case at a Time Boddaker's Avatar
    Join Date
    Jun 2005
    Location
    Northern CA
    Posts
    818

    Default Monster Truck Case

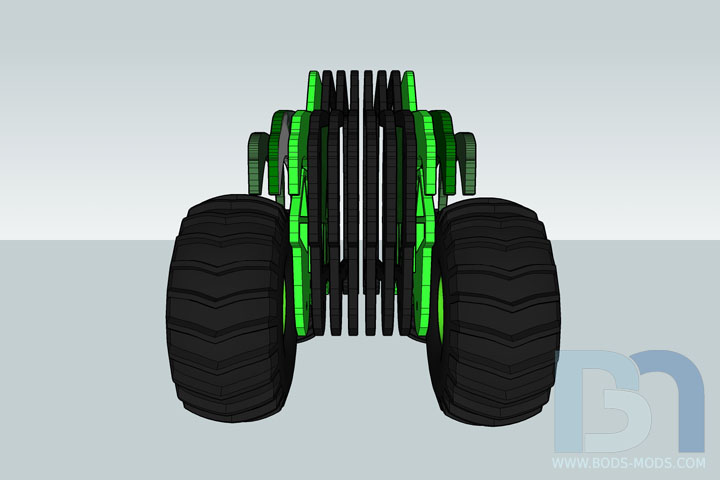
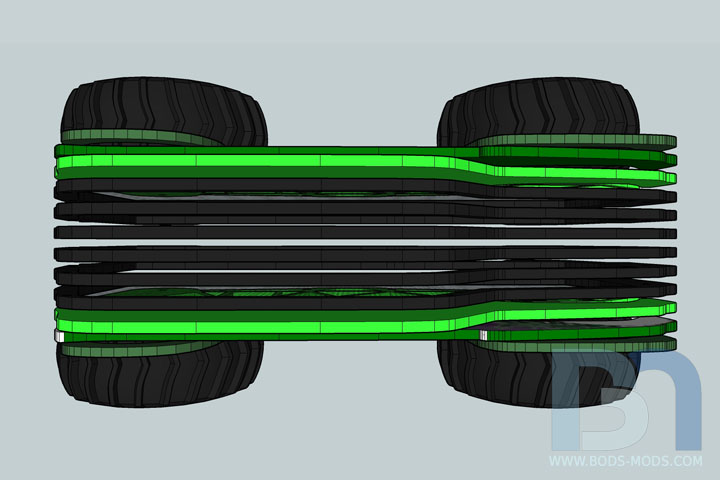
    Hey Everyone! I'm back with another mini ITX scratch build. If you recall, I did one for my daughter: a Kai Lan themed case. Well this one is for my son, and will be a monster truck themed case, built much in the same way, with stacked laser-cut acrylic pieces. Here are some mockups out of Sketchup:


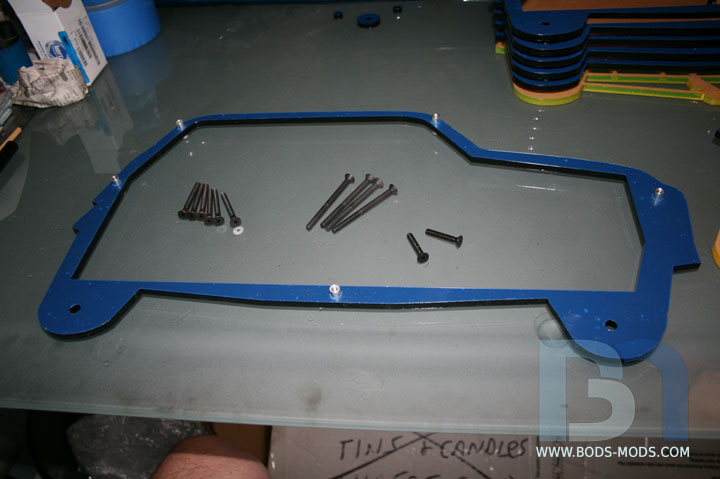
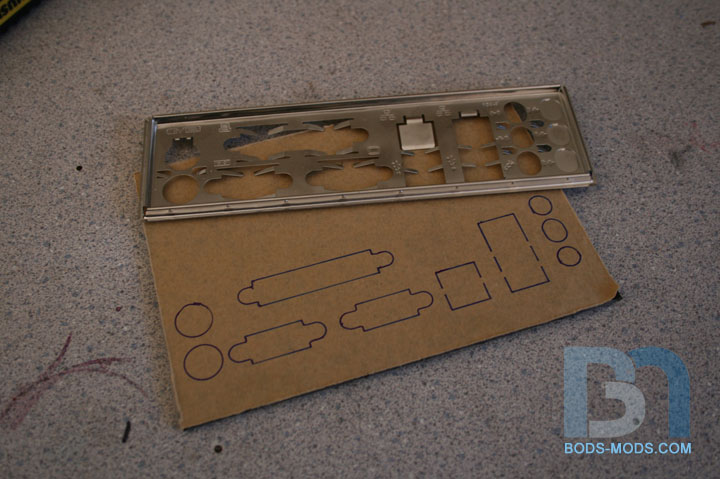
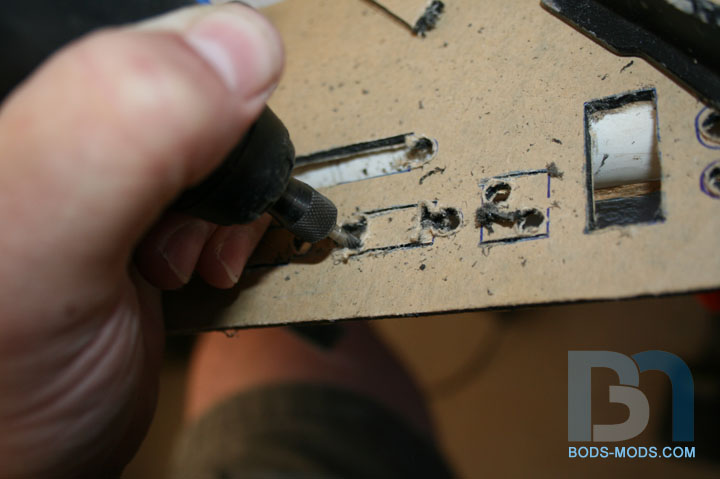
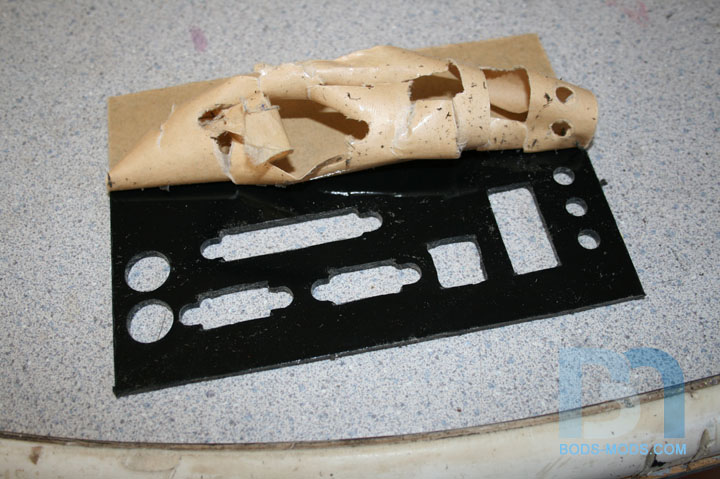
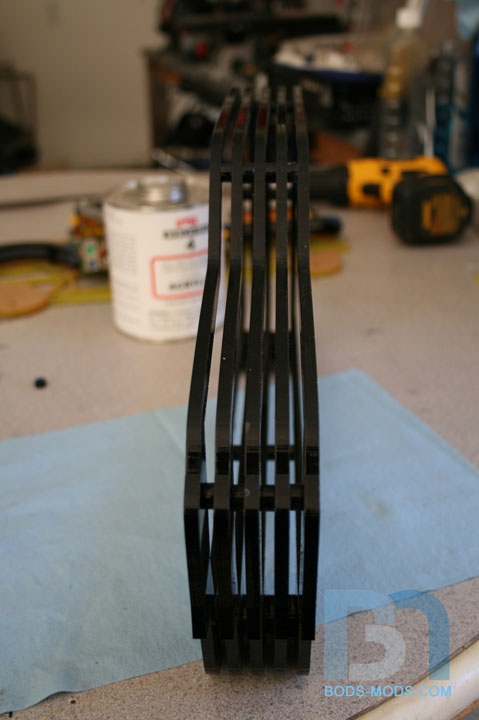
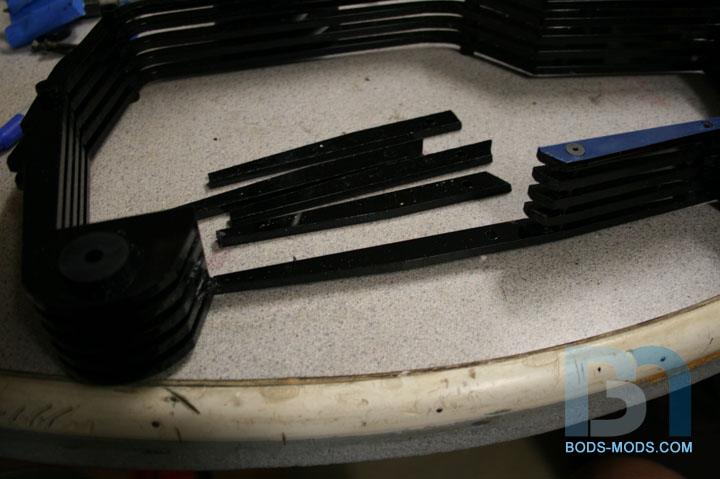
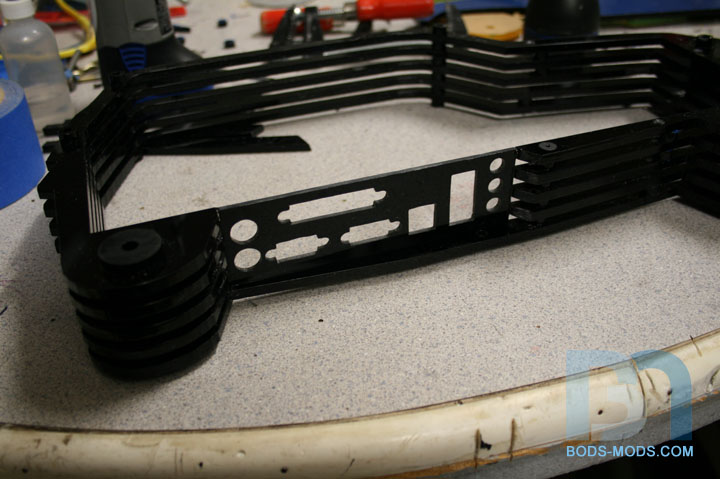
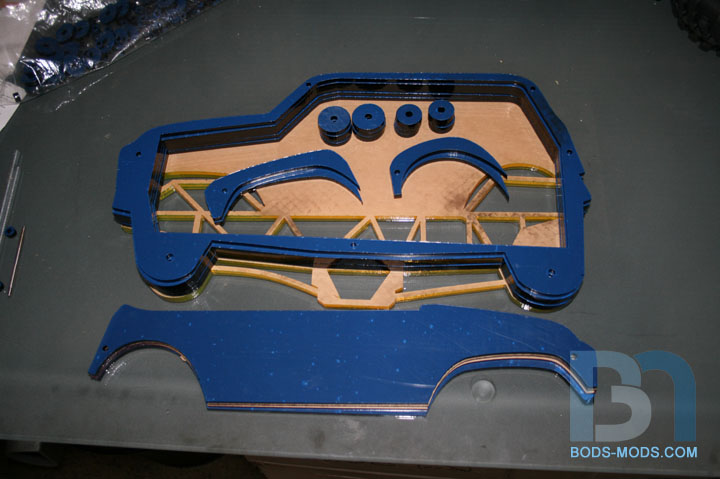
    Moddersmart cut me some acrylic according to my vector files I sent:


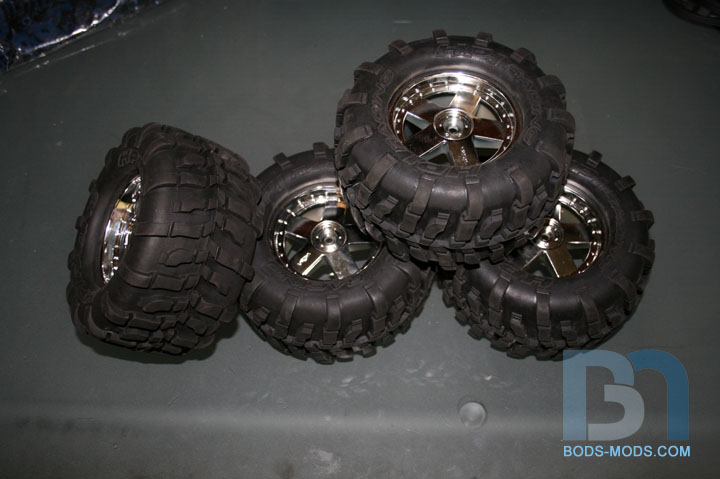
    I got some real rubber R/C monster truck tires from RC Planet online. These things are 3 1/4" wide x 6" diameter.


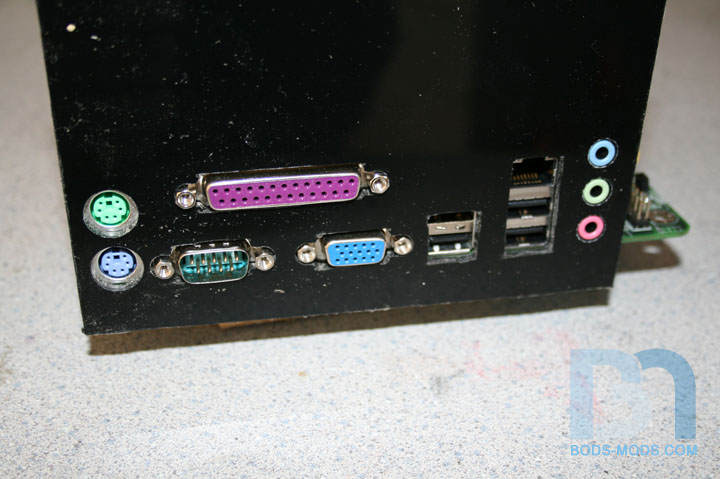
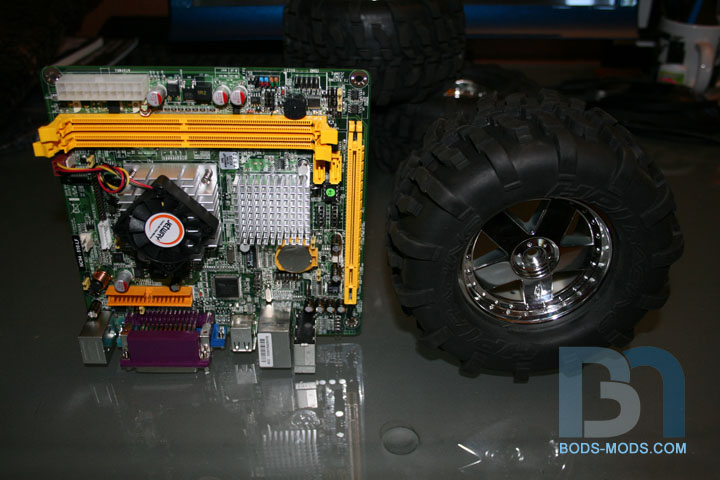
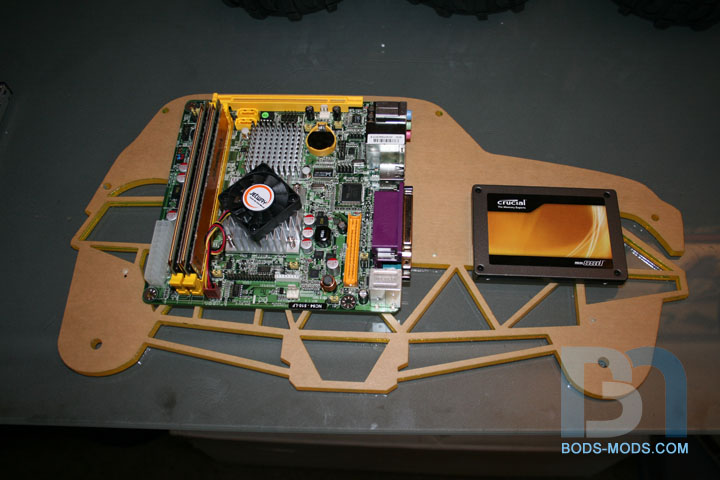
    For hardware, I'll be using this Jetway mobo sent to me from Bit-Tech (as a prize replacement for a 220v psu)


    To show you how big these tires are, I set one next to the mini ITX motherboard lol:


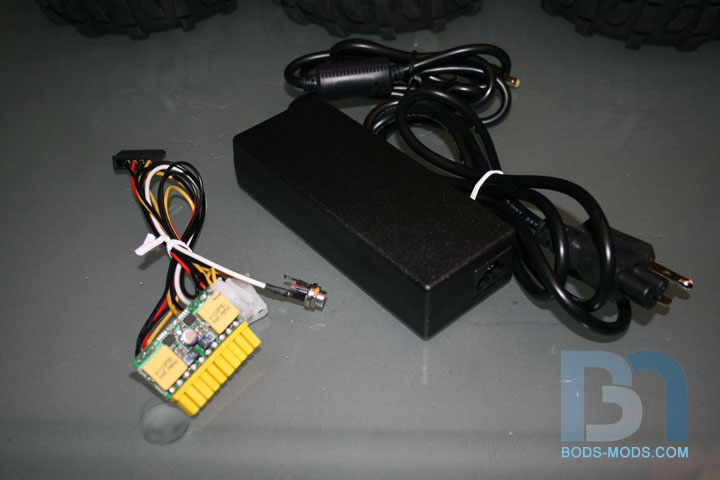
    For power I turned to short-circuit.com once again for a picoPSU/power brick combo:


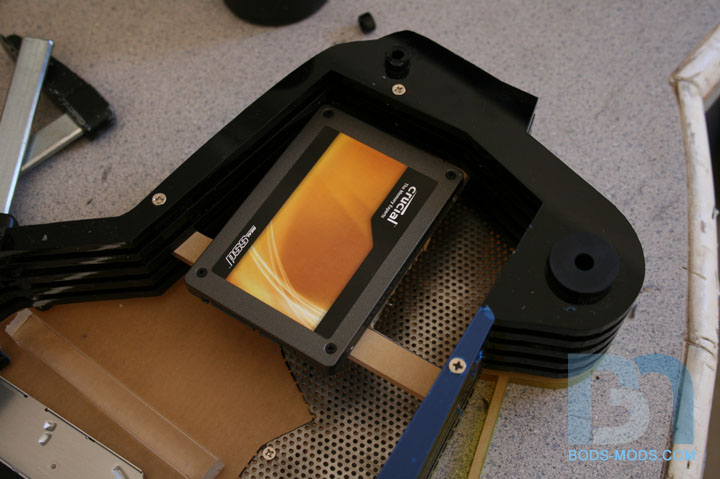
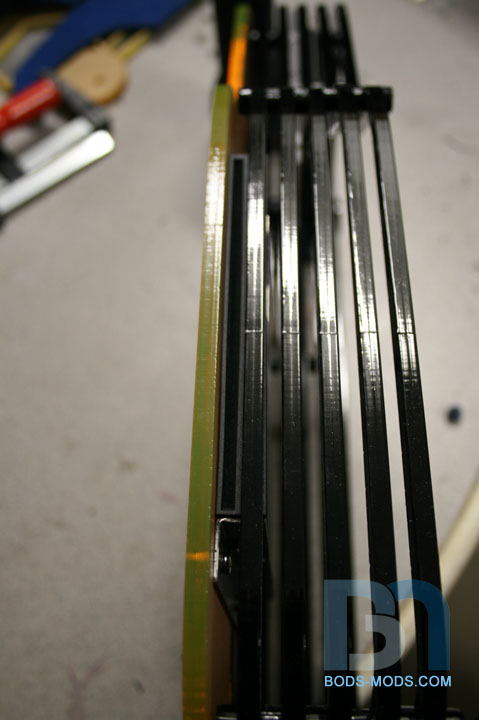
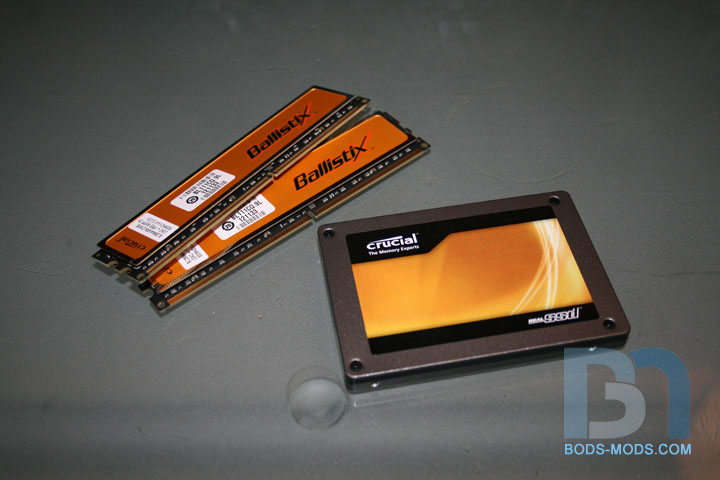
    The Crucial DDR2 800 4Gb memory kit and 64Gb SSD combo worked so awesomely in my daughter's case, I saw no reason to choose otherwise for this build.


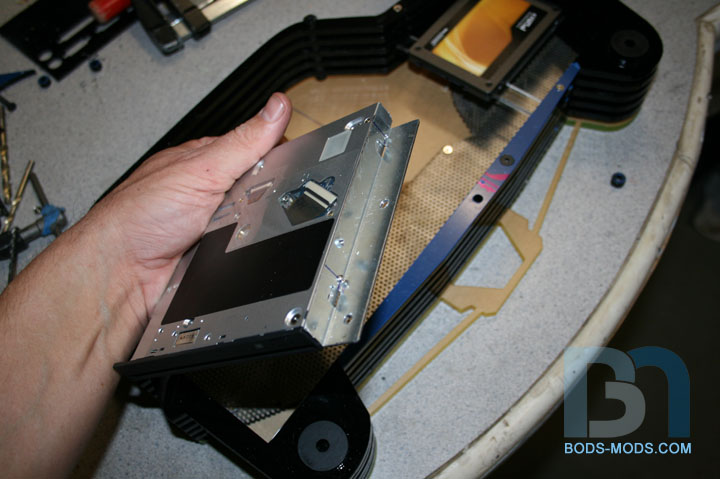
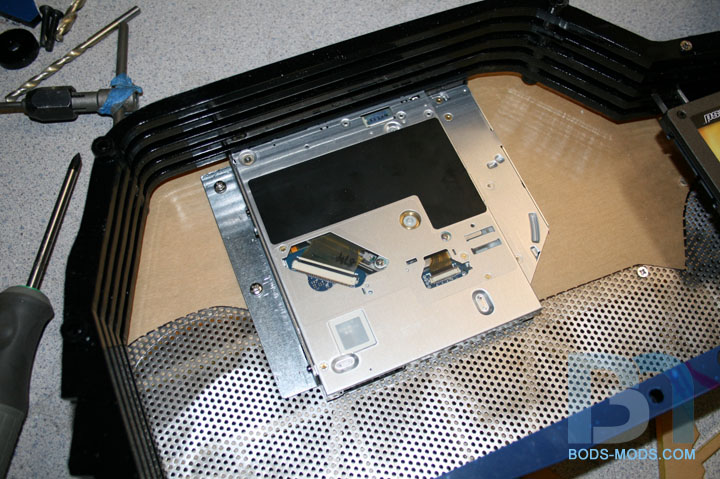
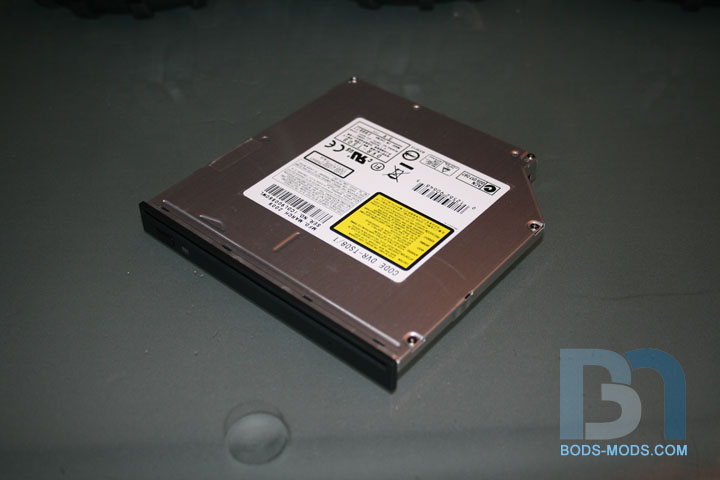
    And of course, one cannot have a true miniITX build without one of these slot-load, slim-line DVD-ROM drives.


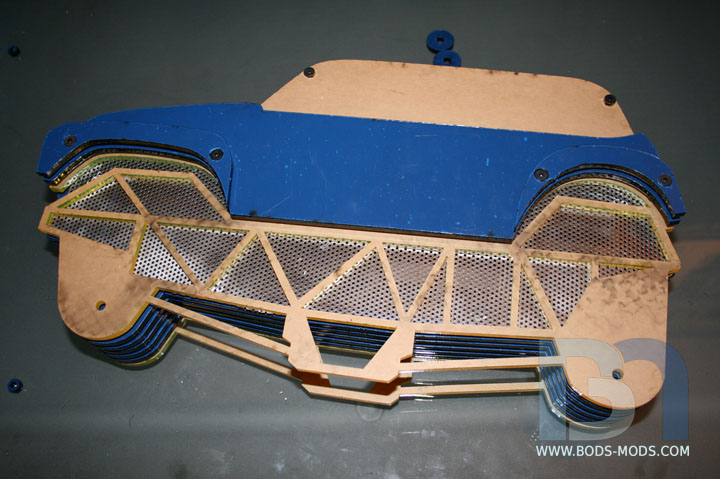
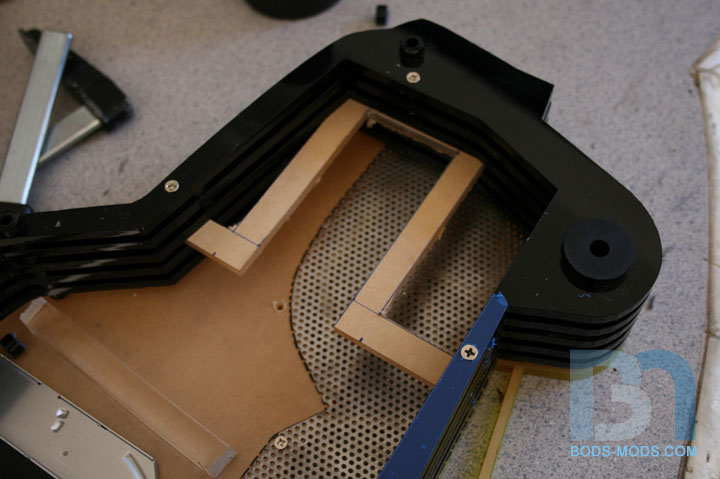
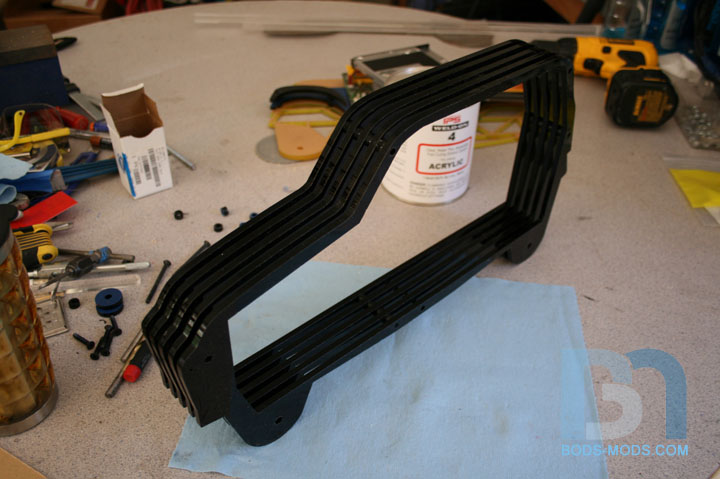
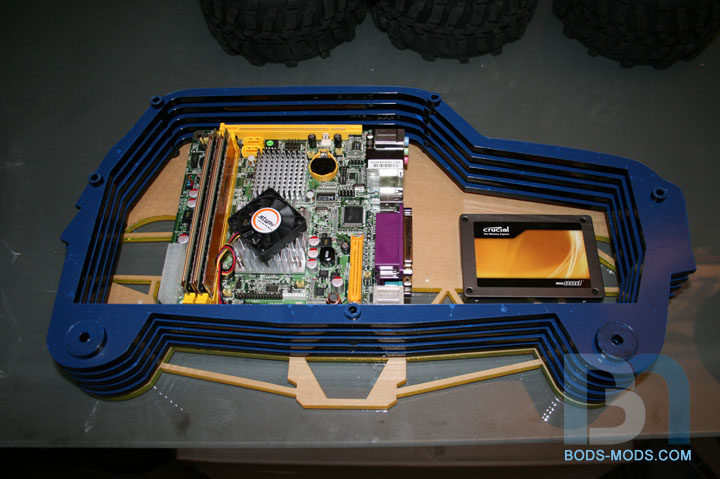
    Here I'm placing the parts onto the base to see where things will fit:


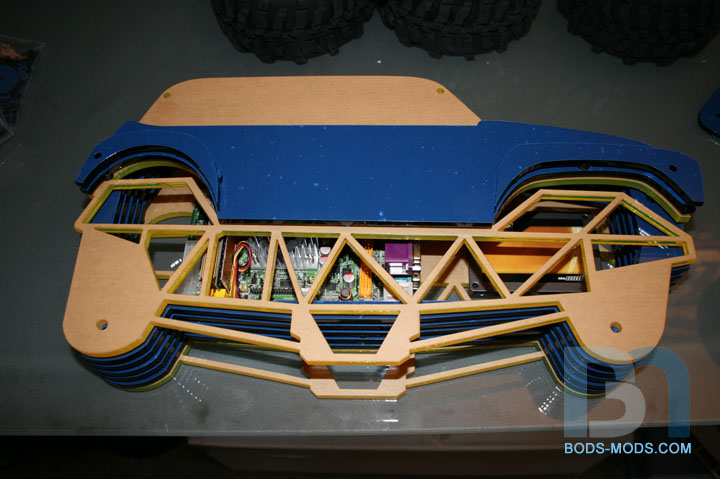
    ...with one edge piece layed on:


    ...more...


    ...with the top layers on...


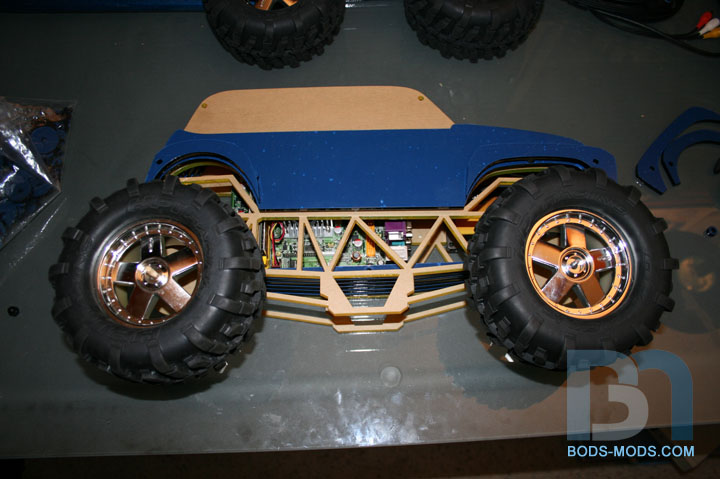
    ...and the tires in place:


    Of course, I will have the body and fender pieces on both sides of the case, since it will be sitting on all 4 tires.
    I'm going with a Grave Digger theme because a: my son likes that one the best, and b: it's one truck in which I can fit the components rather easily, thanks to its shape.

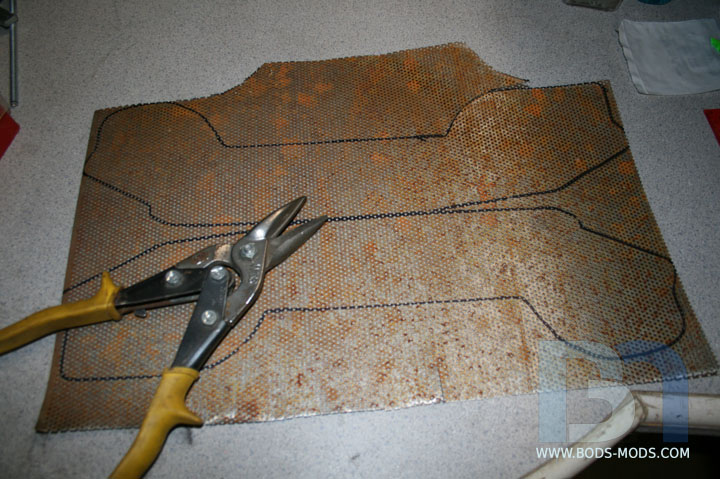
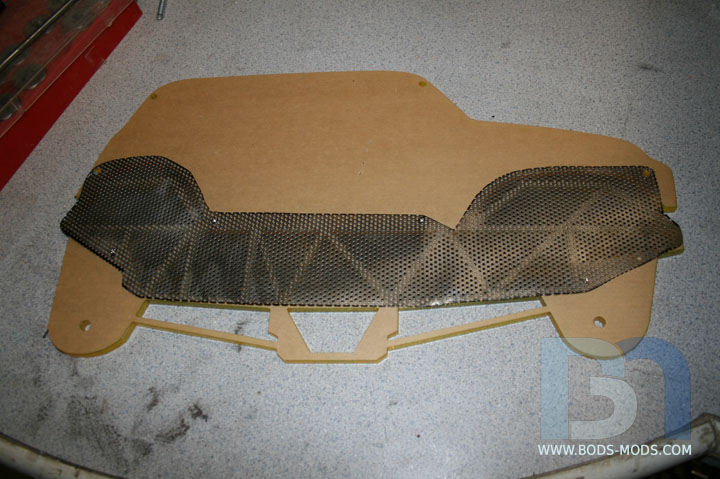
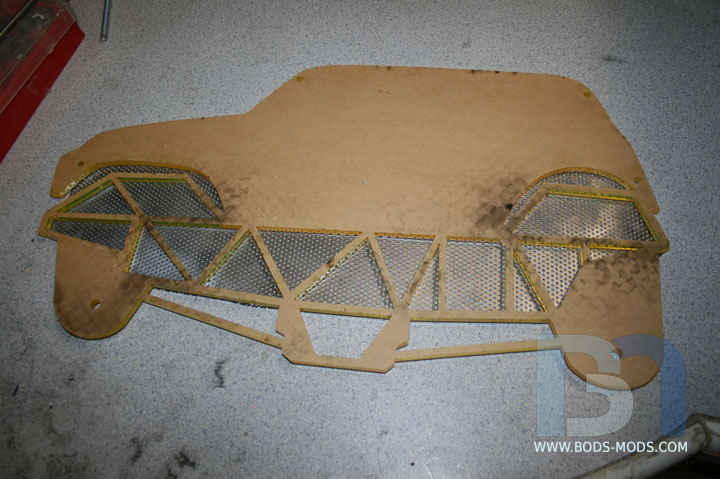
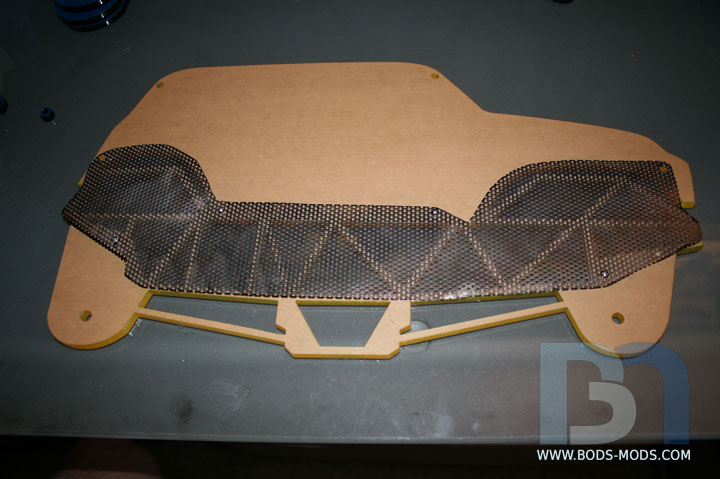
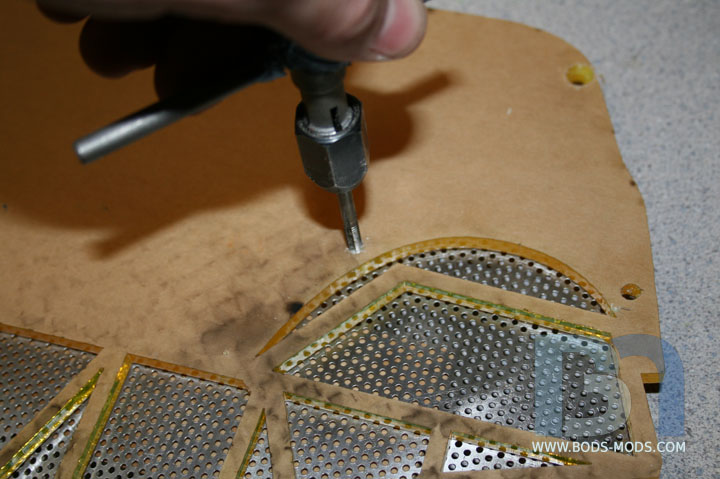
    More to come this week as I work on adding some mesh to the outer pieces.
    Honey Roasted Peanuts Ingredients: Salt; Artificial honey roasting agents; Pressed peanut sweepings.

  2. #2
    Resident 100HP water-cannon operator SXRguyinMA's Avatar
    Join Date
    Jun 2008
    Location
    MA
    Posts
    5,865

    Default Re: Monster Truck Case

    damn both your kids get SSDs! want to adopt me lol

  3. #3
    Overclocked StormRider's Avatar
    Join Date
    Apr 2010
    Location
    Carlsbad, CA
    Posts
    315

    Default Re: Monster Truck Case

    ^

  4. #4
    Will YOU be ready when the zombies rise? x88x's Avatar
    Join Date
    Oct 2008
    Location
    MD, USA
    Posts
    6,334

    Default Re: Monster Truck Case

    Looks good. How are you going to split it for access?
    That we enjoy great advantages from the inventions of others, we should be glad of an opportunity to serve others by any invention of ours, and this we should do freely and generously.
    --Benjamin Franklin
    TBCS 5TB Club :: coilgun :: bench PSU :: mightyMite :: Zeus :: E15 Magna EV

  5. #5
    ATX Mental Case RogueOpportunist's Avatar
    Join Date
    Sep 2010
    Location
    Canada
    Posts
    173

    Default Re: Monster Truck Case

    That's awesome, for an extra added touch you should make a case for an external hard drive that looks like some rusted out junker for it to drive over.

  6. #6
    Resident 100HP water-cannon operator SXRguyinMA's Avatar
    Join Date
    Jun 2008
    Location
    MA
    Posts
    5,865

    Default Re: Monster Truck Case

    that would be neat!

  7. #7
    Modding the World, One Case at a Time Boddaker's Avatar
    Join Date
    Jun 2005
    Location
    Northern CA
    Posts
    818

    Default Re: Monster Truck Case

    Quote Originally Posted by x88x View Post
    Looks good. How are you going to split it for access?
    For fasteners, I will be using countersunk hex head screws on each side, with threaded spacers in the middle. If I need to open it up, I can remove the screws on one side along with the tires, and just lift the top pieces off altogether. I don't foresee having to get in there very often once it's up and running, so I'm not too worried about ease of access (not that it will be very difficult this way).

    @ RogueOpportunist: I like that idea! Will go along with the theme nicely. ;-)
    Honey Roasted Peanuts Ingredients: Salt; Artificial honey roasting agents; Pressed peanut sweepings.

  8. #8
    Administrator OvRiDe's Avatar
    Join Date
    Dec 2005
    Location
    Tulsa, OK
    Posts
    4,586

    Default Re: Monster Truck Case

    That is one lucky boy! Looking fantastic!

  9. #9
    Modding the World, One Case at a Time Boddaker's Avatar
    Join Date
    Jun 2005
    Location
    Northern CA
    Posts
    818

    Default Re: Monster Truck Case

    Thanks OvRide!

    Working on the mesh for the inside, got one side done.

    Had some old mesh sheet lying around so I decided to use it (kinda rusty lol)


    After cutting the pieces out, I used a wire wheel to get the surface rust off them, and I ground the edges down. They will eventually get a coat of black paint.


    Here it is from the outside.


    I attached it to the acrylic with small screws. It also utilizes two of the main bolt holes.


    I got my fasteners in yesterday, so I thought I'd show you how this thing will screw together. This is the middle frame piece. I got some 5/8" long threaded spacers and pressed them into the holes. Also shown are the 8-32 hex head countersunk screws of varying lengths.


    Here I'm tapping some holes in the covers for the fender screws that don't go all the way through.


    Here's a shot of it screwed together. I had other angles, but not sure what happened to those pics lol. I'll take some more tonight.


    Once I get the other mesh piece mounted, I'll move onto mounting the components.
    Cheers!
    Honey Roasted Peanuts Ingredients: Salt; Artificial honey roasting agents; Pressed peanut sweepings.

  10. #10
    Modding the World, One Case at a Time Boddaker's Avatar
    Join Date
    Jun 2005
    Location
    Northern CA
    Posts
    818

    Default Re: Monster Truck Case

    Ok, got an update for ya. Found some time this weekend to get some things mounted. After putting the other mesh on, I was able to work on mounting the SSD and DVD drives.

    After some thought, I decided to position the drive along the same plane as the center frame layers. So I cut out an acrylic piece that would slide in between those layers to support the drive.


    Here it is slid into place...


    And with the drive mounted on.


    Moving on to the DVD drive, it will be mounted on to the base, facing up. So an L-bracket was made up to attach to the drive...


    ...and mount to the base. I'll be adding an acrylic piece to the other side for the drive to slide into, for added support.


    You can see the slot lines up nicely with the first spacing.


    The motherboard will be situated above the DVD drive, with the IO panel facing downward. First thing was to make a new IO plate out of black acrylic. Using the original as a template, I marked the holes.


    Drilled pilot holes...


    Then used the rotary tool for the straight cuts...


    ..and finally the dremel to finish them off.


    Peeling the paper back to see my progress. A little more and I can advance to the filing stage.


    But first a test fit. Looking good!


    Before I could add the IO plate to the center pieces, I needed to glue them all together. So starting from the middle piece and using Weld-on #4, I worked my way out on both sides until I got one solid piece.


    Now I can cut away the parts I don't need.


    Here's the IO plate filed, cut-down, and glued in place. I just hope the motherboard fits the way it's supposed to now


    Honey Roasted Peanuts Ingredients: Salt; Artificial honey roasting agents; Pressed peanut sweepings.

Posting Permissions

  • You may not post new threads
  • You may not post replies
  • You may not post attachments
  • You may not edit your posts
  •