So is there a way to actually hook it to something to read RPM's like on a fan or something?


So is there a way to actually hook it to something to read RPM's like on a fan or something?
Life is tough, it's even tougher when you're stupid. - John Wayne


I'm not sure TBH. It was too big and didn't fit well with the AC mod so I didn't use it but my intention was to try to hook it to an Arduino and have it read HDD activity or something or even just have the Arduino move the needle randomly or in a set pattern. I haven't messed with it much. I'll play with it this weekend and see what I can come up with.
Arctic Cat * Maximum Security * Cribbage Board * Rockin Case * Armor Redux
Tempest SXR * Power House * Red Comet * ICHIWZ * Acrylic Headphone Hook
Continuing sponsorship support from PCBoard.ca


I'm sure arduino can be used to make that gauge functional, I don't know much about them but I have seen them do similar things. One guy that comes to mind in the "pre-arduino" era is James T. Anderson who built that Heavy Metal mod back in the early days of modding. He wrote his own software to make it work but he may be willing to point you in the right direction, I've spoken with him and he is a really nice guy. The bad news however is that his website which showcased the worklog seems to be gone, thus finding him might be a challenge.
LOL totally sweet!
I'll be in Vegas for a week so I'll have more progress when I get back.
Life is tough, it's even tougher when you're stupid. - John Wayne

What's the connector for the fans look like?
3 pin Molex KK:
4 pin Molex KK:
http://www.jab-tech.com/images/D/d_3686.jpg
or is it an old school HDD Power connector?
The three and four wire Molex KK connectors have a tach sensor wire that can be read by a microcontroller.
Back in the modding saddle again. I have way too much going on right now!
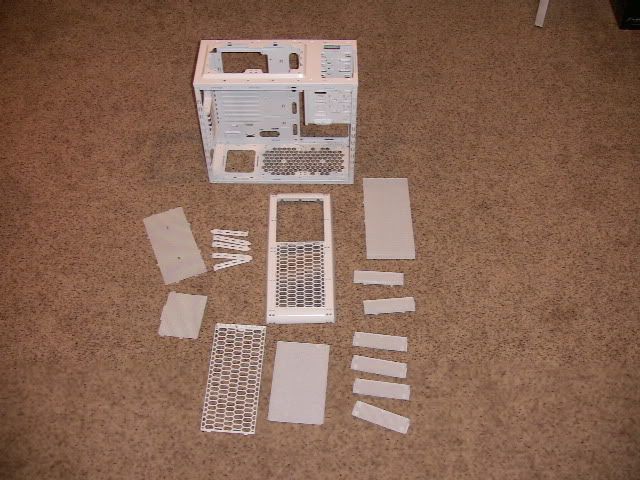
I am about done with sanding and have moved on to the primer stage. I even got some painting finished!!
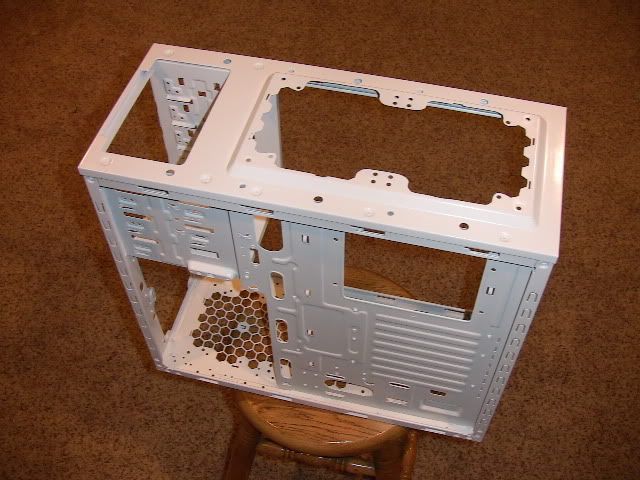
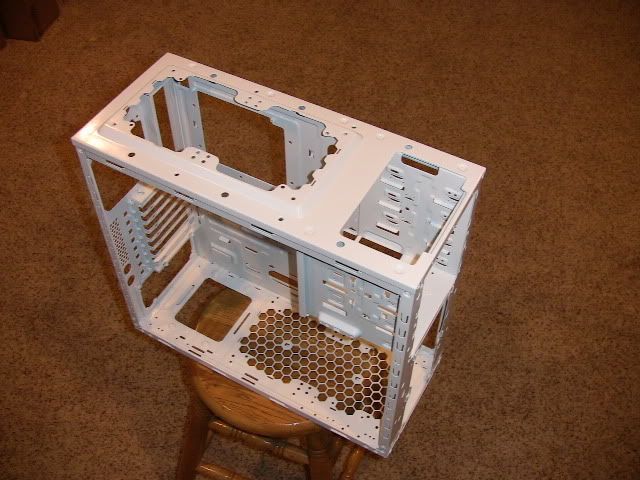
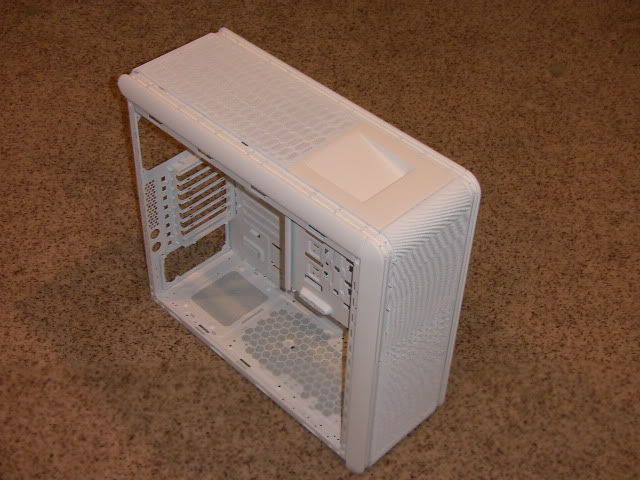
Here is the skeleton in beautiful super bright white...
So now I can start getting parts mounted.
I have some sponsors kicking in product but I ran into a snag with the mobo. I need one that the 980x will fit into so I'm a bit limited considering it needs to have the red,white,black color combo.
I'll have more soon. There are so damn many cables! I bought some paracord in red. It's ssssoooooooo nice.
Life is tough, it's even tougher when you're stupid. - John Wayne
Today was a good news day. I have another sponsor...
Patriot!
They are sending me a Wildfire 120 SSD and a pack of Viper Extreme ram - 24 Gb to be exact
http://patriotmemory.com/products/de...id=1041&type=1
http://patriotmemory.com/products/de...d=1077&type=17
Not only is this stuff completely badass but it also just happens to match the colors of the build!! And will perform to the level I need with all the high end parts I'm using.
On a sadder note, I am surprised at one major manufacturer who I contacted about using their motherboard. I called and spoke to the rep, and was told to send him an email with details. I have not heard back at all. I sent another email asking for an answer either way so I can place an order if I need to and never heard back at all. It just rubs me the wrong way. Not because I didn't get the parts sponsored, but because they basically chose to leave me hanging. Just seems rude. Maybe I'm just cranky. But now I'm buying an ASUS Rampage 3 Formula board instead. I didn't approach ASUS about sponsoring but I don't have time at this point. [end cry]
So on to the show...
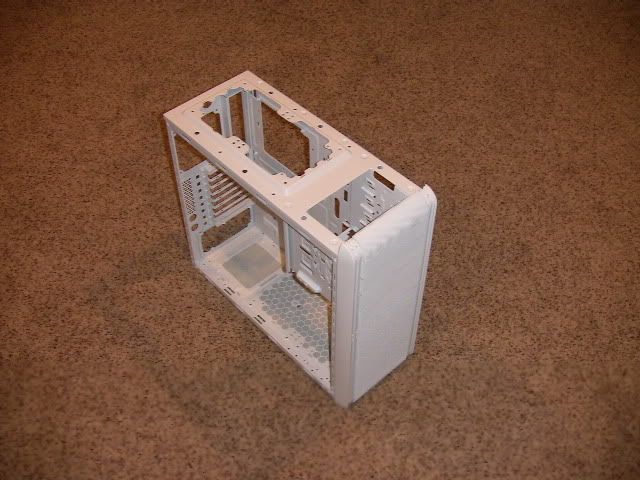
I am happy to be finishing the paint up. I really love this white a lot. It just seems so clean.
I brought some more parts into my office to drool on.
and I put a few on the frame. Now it's starting to take shape.
I had a minor paint boo-boo on the top bezel and I will just re-spray the whole thing since it's easy to work with.
I picked up some material for a really really cool window that I'll be installing soon.
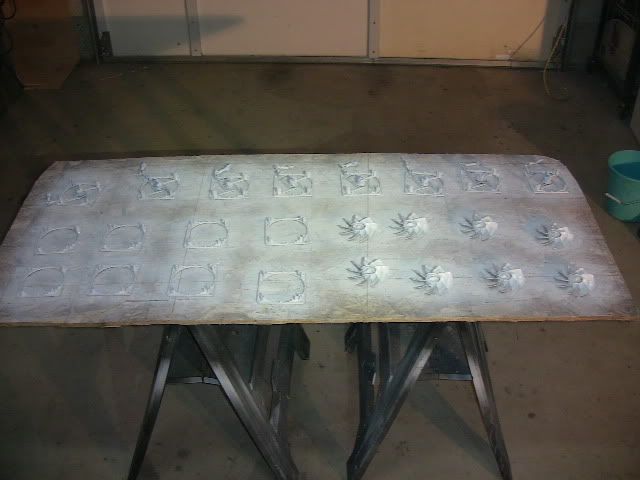
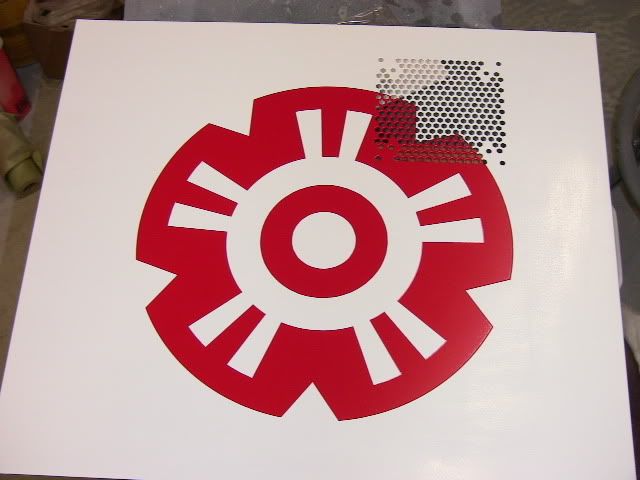
And I got all my stencils ready for the logo's and lettering I'll be doing in red paint.
Sooo, it's coming together.
Life is tough, it's even tougher when you're stupid. - John Wayne
I have a little more painting done, and I ordered the last of my hardware today.
I had planned to head down to my buddy Greg's machine shop to beg him to let me use the mill to cut the window out of the side panel. But, I already had enough stuff laying around to just slam it out in my shop.
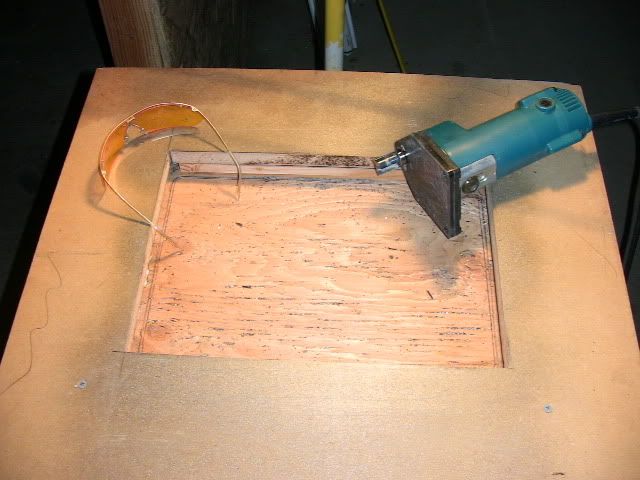
I made a template out of wood and routed it out. It only took about 20 minutes for the whole process and it came out perfect.
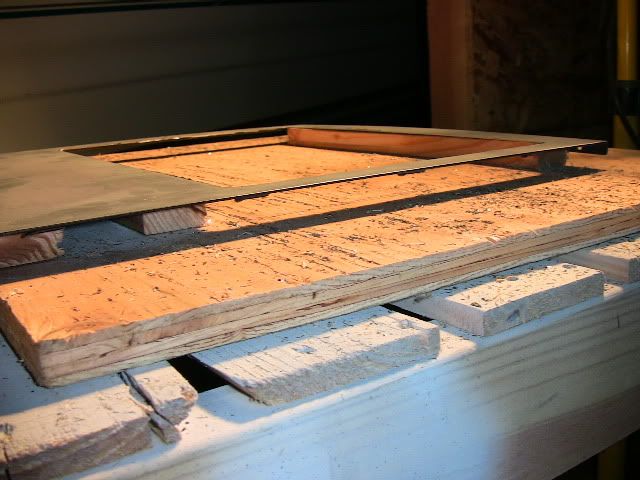
If you've never made a template it's a lot easier than you might think. You put a piece of plywood down that's a bit bigger than the side panel. I use 24" x 24" pieces.
Then you get some 1" X 2" wood strips and cut them so the fit under the side panel and prop it up off the plywood like so -
Keep them as close to the area of the hole as possible. These support the edge of where you are cutting and will help keep it clamped tight.
So then you cut a square hole in another sheet of plywood ( or 3/4" particleboard ) and lay it exactly where you want your window. Then take some long screws and screw them in through the top piece and into the bottom piece as close as you can to the edge of your case panel. This will clamp the the panel down and now you have a template.
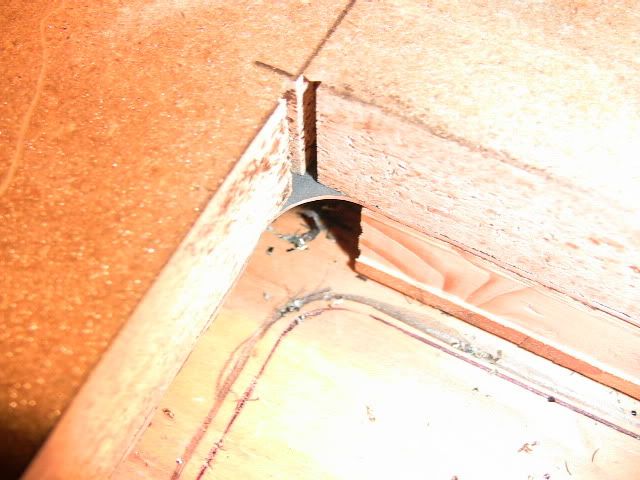
Then you take a router with a straight bit that has a flush bearing and you go around the edge. It trims the metal off, leaving a nice smooth cut edge.
You might think you would need to round the corners of your template to get the rounded corners for your window. But no! The router bit and bearing are round so they hit the inside corner but can only leave the shape that the bit is. So if it's a 1" diameter bit, you will get that radius, if it's a 1/2" diameter bit, you will get a smaller radius. Easy!!
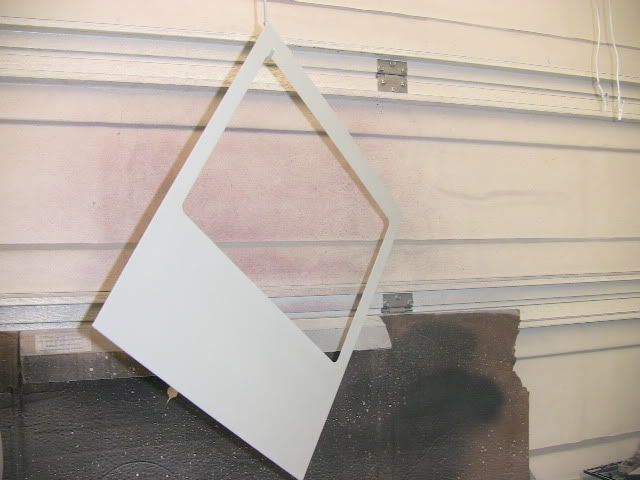
So then sand the sharp edges scuff it all up and clean it. Then Primer that new panel!
Remember, it does not have to be a square window. You can get creative and do a round one ( Like a ship portal window. ... Ohhh mod idea? ) or even a totally odd shape.
I have a bunch of stencil work to do on this soon. As soon as I find the perfect red paint. I will be adding the Enermax name and logo to several places on the case. I also will now be adding Patriot to the case as a great sponsor.
So much to do. But I will admit... I love it.
Life is tough, it's even tougher when you're stupid. - John Wayne
I received a package from Patriot today....
Some Viper Extreme ram and a Wildfire 120 SSD :shock:
Thank you so much to them and Scot specifically. They really do support the modding and gaming community. I know that when I make purchases I always think about who supports us and I buy from them. When they give, we must give back.
I fixed my paint boo-boo on the top panel and assembled it. It's starting to take shape!!
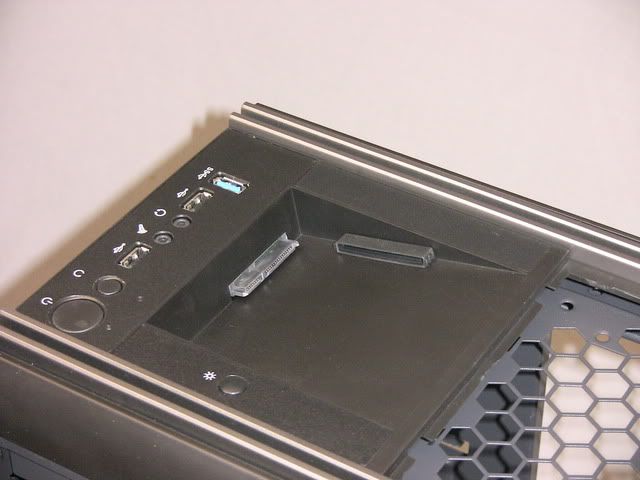
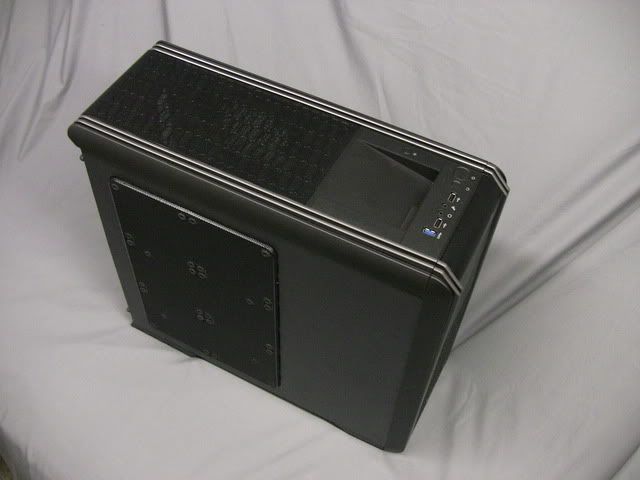
Notice all the controls are gone? No power button, reset, usb, etc? They are being "relocated". Here is a shot of where they were -
I filled the holes and smoothed out that section.
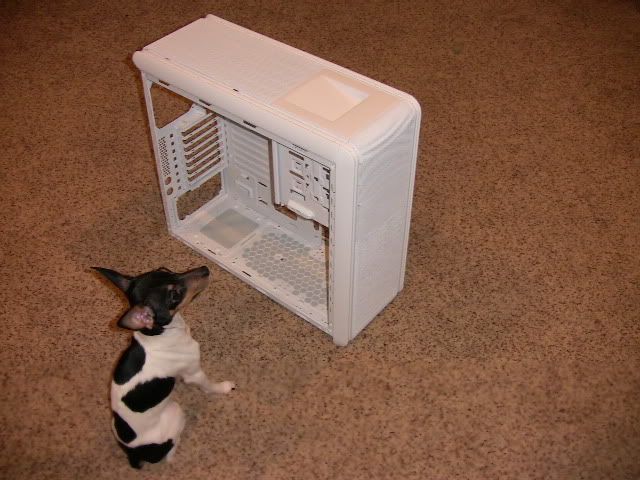
and most important - my boy Truman approves ...
Either that or he's wishing I would mod a fire hydrant one of these days.
Now it's time to tear apart the psu for the same white paint, and a ton of fans that will also get painted white. They had fans that were white already but wouldn't you know it they discontinued them right before I needed them!
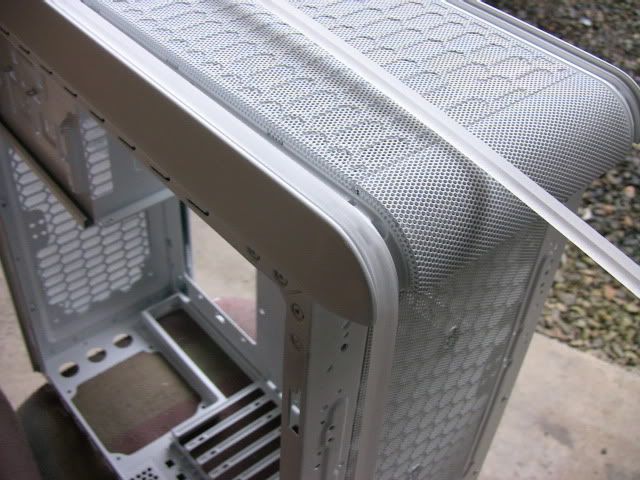
I've got some paint on the door with the window cut-out and will be making a window for it tomorrow. It will have a cool window treatment that should really set it off.
I've got all my stencils ready to go and my red paint is standing by for logo's and lettering.
And I'll be attempting a tricky little job making some cool racing stripes out of acrylic square bar.
Why do all my mods seem to consist of things that are experimental..
Hopefully you guys learn from it and are like...screw that!! Leave the headaches to me.
.
Life is tough, it's even tougher when you're stupid. - John Wayne
Lots done this weekend.
I am working on all the extas that needed painted white.
DVD drive, fan controller, 9 fans, etc.
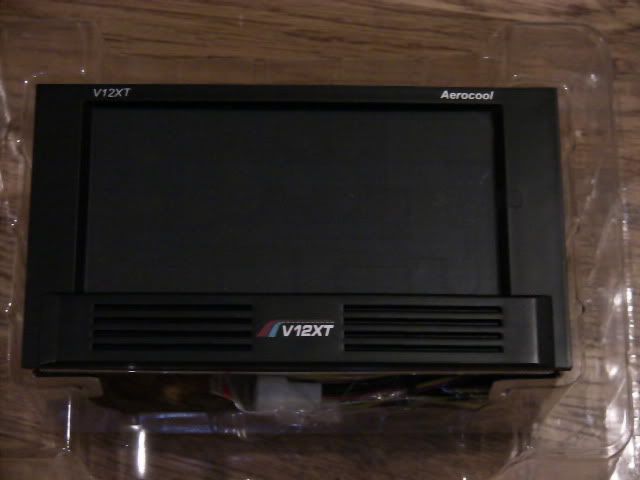
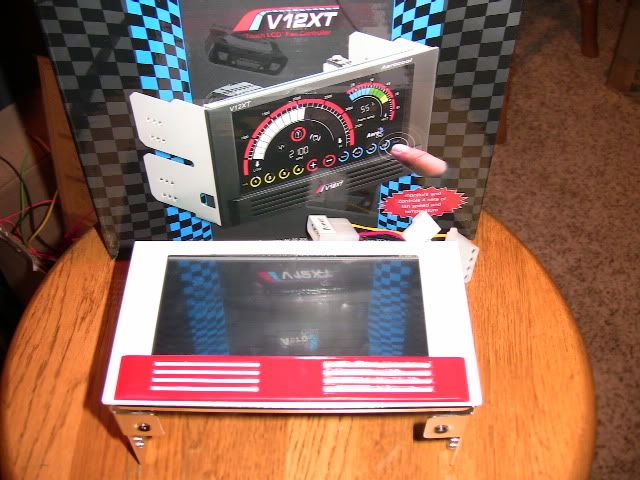
I pulled the new fan controller out of the box and tore it apart. I sprayed it with the matching white/red combo.
and the DVD player but I think I'll spare you the pic. I think you can visualize a white DVD burner.
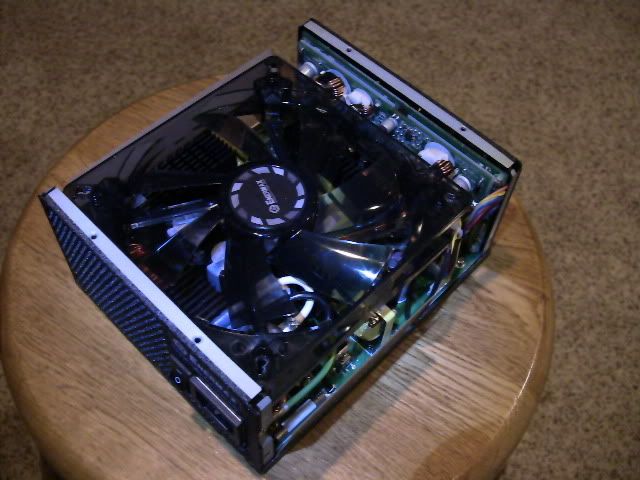
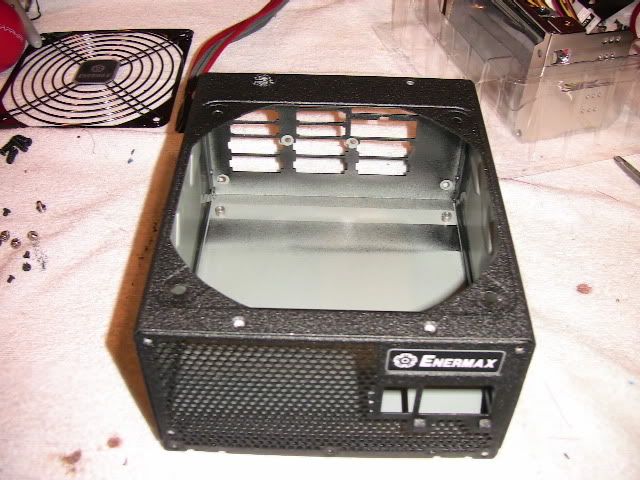
I took apart the Platimax PSU and was very impressed instantly at how well built it is. It's a modders dream because it pulls completely apart without have to snip wires or remove solder! And it's a 100% modular unit so the wires for the 24 pin are not there either. I love it! I may only buy these from now on. It's so easy to paint it now. Thank you Enermax!
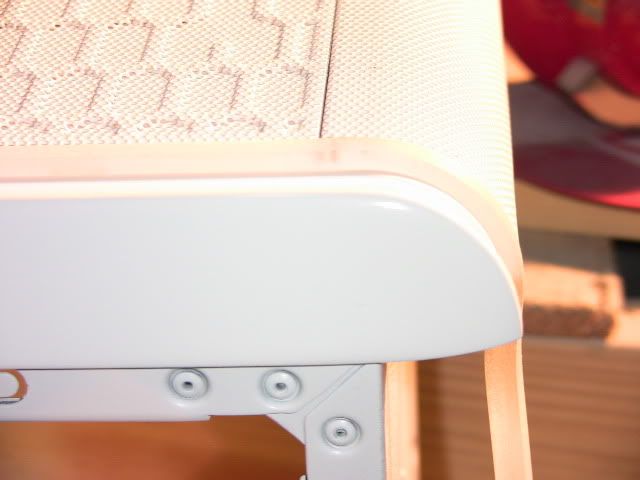
When you look at the case you can see the gray strips that run down the top and front on both sides. THey look cool, but I didn't care for how the had a flat spot. I took them out and I am replacing them with 1/4" acrylic square bar. They will now sit down flush and I will match the contour of the case.
Here's the bar before I took my heat gun to it.
This pic is kinda bright but I think you can see it now inside the grooves. I will be painting these red so it will look like a set of double racing stripes.
I started on the fans too but I ran short of white paint and primer. I have these things all taken apart to make it easy and lucky for me you can snap the fan right off the housing! Thank you AGAIN Enermax. Much love

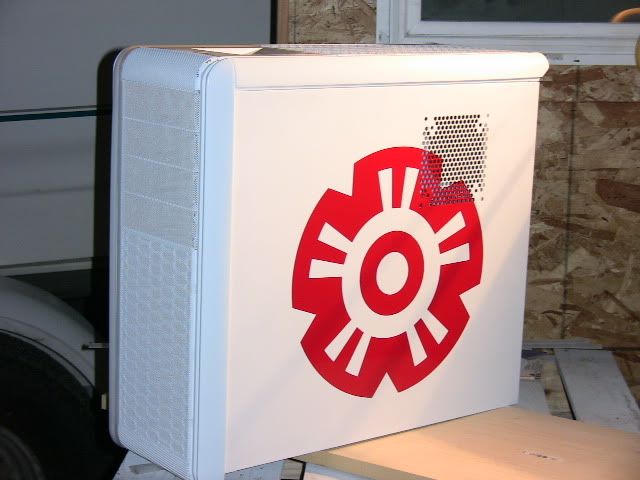
And then I also have the logo and name painted on the side panels. Still curing for a sand and buff but it looks great. The red is perfect and it just pops.
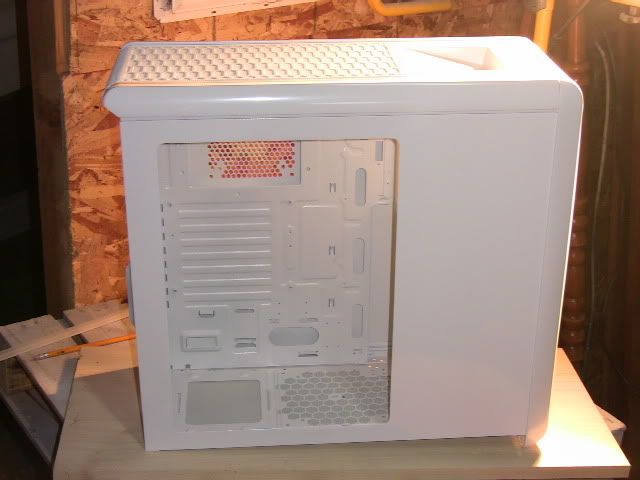
I also did the Enermax name on this side panel but I guess I forgot to take a pic so I will later. But here is a shot of it with the window cut out..
More soon. I'm exhausted . Bye.
Life is tough, it's even tougher when you're stupid. - John Wayne
 Posting Permissions

 Reply With Quote