You should run over the toy cars with your real car to make it look authentic..lolOriginally Posted by Boddaker


You should run over the toy cars with your real car to make it look authentic..lol
Life is tough, it's even tougher when you're stupid. - John Wayne


/\ YES! I agree totally
Arctic Cat * Maximum Security * Cribbage Board * Rockin Case * Armor Redux
Tempest SXR * Power House * Red Comet * ICHIWZ * Acrylic Headphone Hook
Continuing sponsorship support from PCBoard.ca

^ !!!
Not dead yet

Ok, I think it's time I got back on this project and finished it up, don't you? One of my new year's resolutions was to finish what I started! So I'm trying to make good on that promise this year. ;-)
So let's see... last update I had just gotten the tires mounted, and was waiting on some cables before starting on the wiring. I did get them in, but I also ordered a set of Grave Digger vinyl decals by Parma (thanks to Bob for telling me about these). Normally they would go onto a 1:8 scale RC monster truck body. They are a tad larger than the scale of this case, but the 1:10 scale was too small. So I will make this work.
Putting the main decal on the side piece, and trimming it down. You can see the size difference.
The side and fender piece finished. I was able to mix and match the flame curves on the fender and body so it looks uniform when stacked.
Having larger-than-needed decals actually worked to my advantage. I was able to use the extra to overlap the image a bit between the main body and the side piece. This way the image can still be seen farther down in between the two.
All the pieces stacked up.
Doing a little prep work for the impending wiring, I got the power button mounted. I marked the area to be cut out,
and removed the material with the rotary tool and some curved files.
Button installed.
Next up, the wiring commences!
Honey Roasted Peanuts Ingredients: Salt; Artificial honey roasting agents; Pressed peanut sweepings.
this thing's looking sick!
Arctic Cat * Maximum Security * Cribbage Board * Rockin Case * Armor Redux
Tempest SXR * Power House * Red Comet * ICHIWZ * Acrylic Headphone Hook
Continuing sponsorship support from PCBoard.ca

Looks amazing....check!
Many instances where I think "Man why don't I ever think of stuff like that?" ... check!
Excellent construction quality...check!
Thinking often "I want one too!" .... check!
Yep, it's a Boddaker mod
lol thanks David!
Honey Roasted Peanuts Ingredients: Salt; Artificial honey roasting agents; Pressed peanut sweepings.

C'mon, Mr. Bod! SigQuote that!

your a good egg boddaker
Finishing up the last bit of details now. If you remember how I was mounting the SSD, I had a piece of 1/4" acrylic fitting in between the frame layers, with the SSD screwed into it.
Here it is again, but painted (since it would be visible, it had to blend in with the rest of the framework)
Top view:
...and mounted. I added extra spacers in between the ribs so they wouldn't get squeezed together when I tightened the screws.
Moving on to the lighting, I got a bunch of green led pigtails from Moddersmart along with a 20-station LED board and started running them along the inside of the frame ribs. I cut these little C-clips from some scrap acrylic tubing I had in my stash, once again legitimizing my inability to throw anything away lol.
I first taped the pigtails together, spacing them accordingly, then I used the clips to keep them tightly to the center rib.
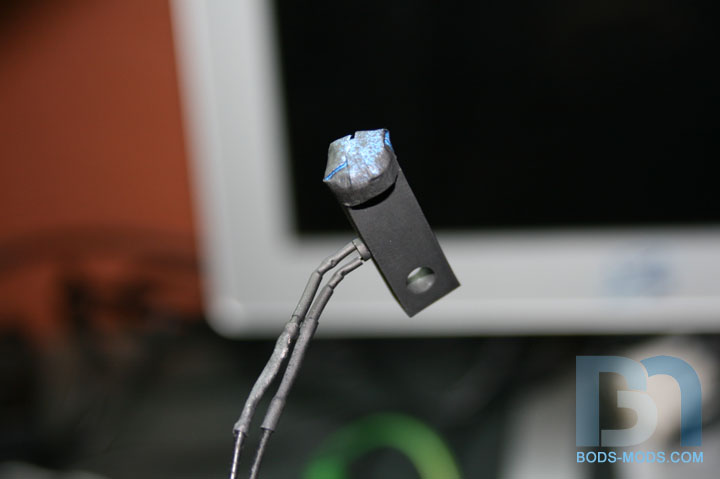
For the headlights, I had to throw a little more thought into it. I took two red led pigtails and shortened them down. Then I made these headlight lenses to fit in between the fender pieces and the main body, acting as one of the spacers.
I drilled a hole in the main body for the cable to pass through.
Taped off the lens part and painted the rest, so the red light won't show anywhere but the lens.
Here's the headlight in place. I scuffed up the lens to diffuse the light.
Both headlights in.
And lit up. If you look closely, you'll notice the sides of the lenses are darker than the center. This is due to the actual led being placed farther back rather than right into the round portion. I wanted it to be diffused more, but didn't count on it not lighting up the entire headlight lens. It doesn't look too bad though.
Here's a wider shot showing the green lighting as well. I was considering painting the backside of the main body piece, but I kinda like being able to see some of the componentry through the green acrylic. And the lighting makes that skull part of the decal all the more eerie! What do you think?
Tomorrow after work, I'll take some studio shots of the case with the tires on. 'Til then!
Honey Roasted Peanuts Ingredients: Salt; Artificial honey roasting agents; Pressed peanut sweepings.
 Posting Permissions

 Reply With Quote