Page 1 of 2 12 LastLast
Results 1 to 10 of 11

Thread: CyberPunked Two 077

  1. #1
    Overclocked
    Join Date
    Mar 2011
    Posts
    280

    Default CyberPunked Two 077

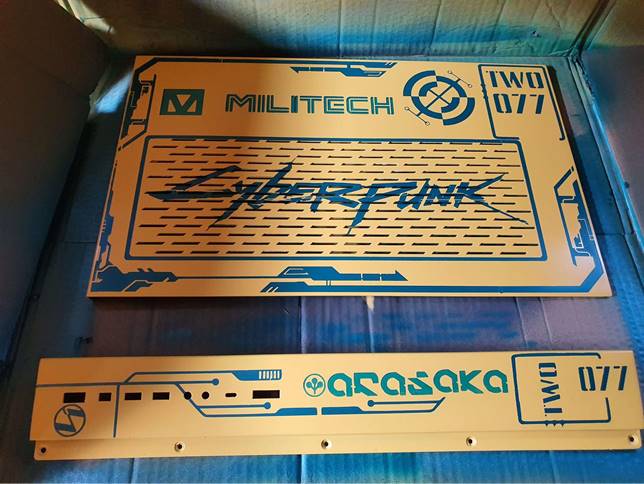
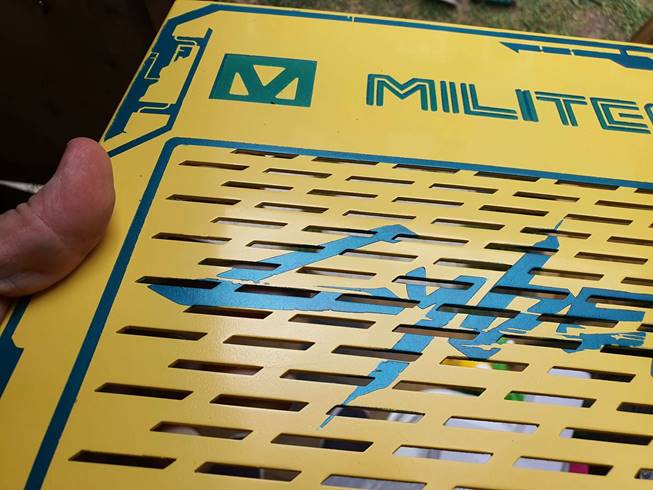
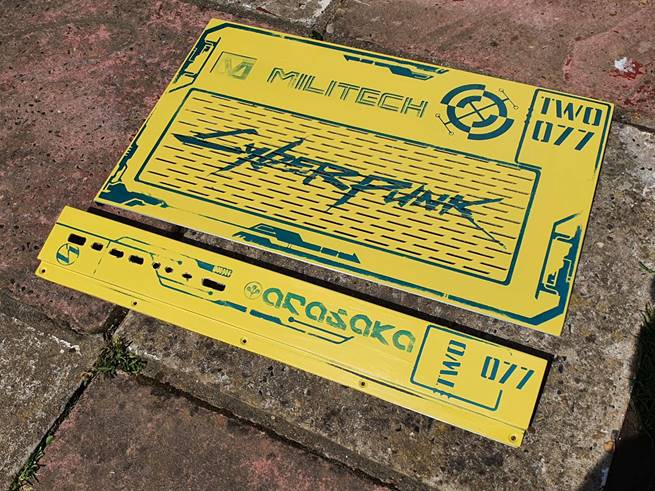
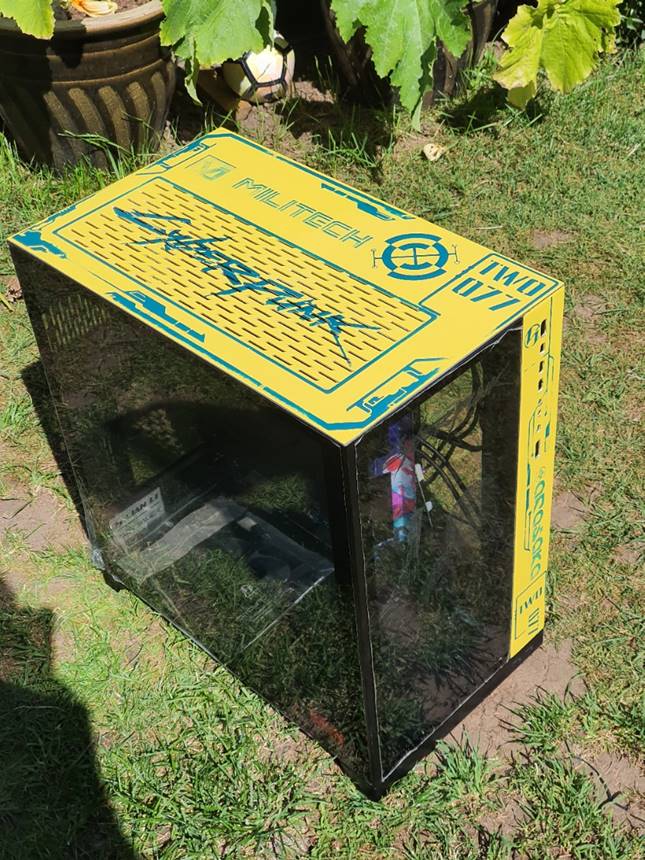
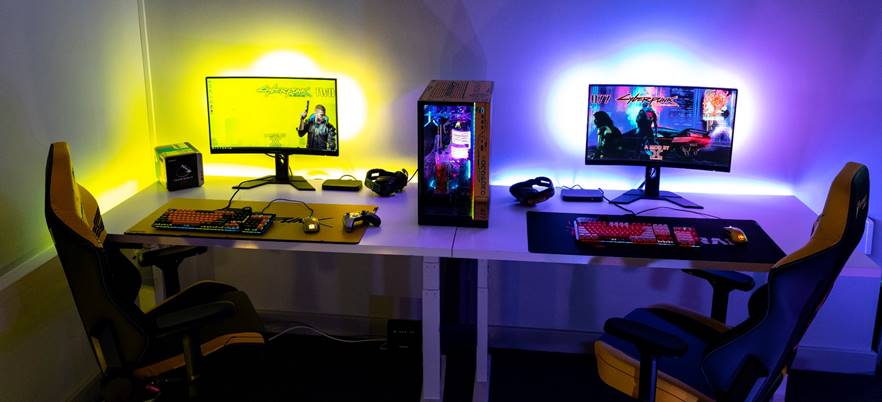
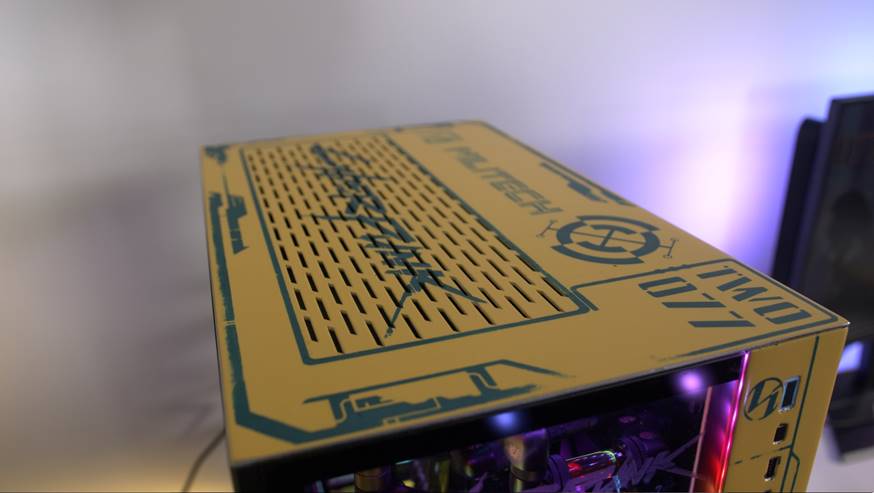
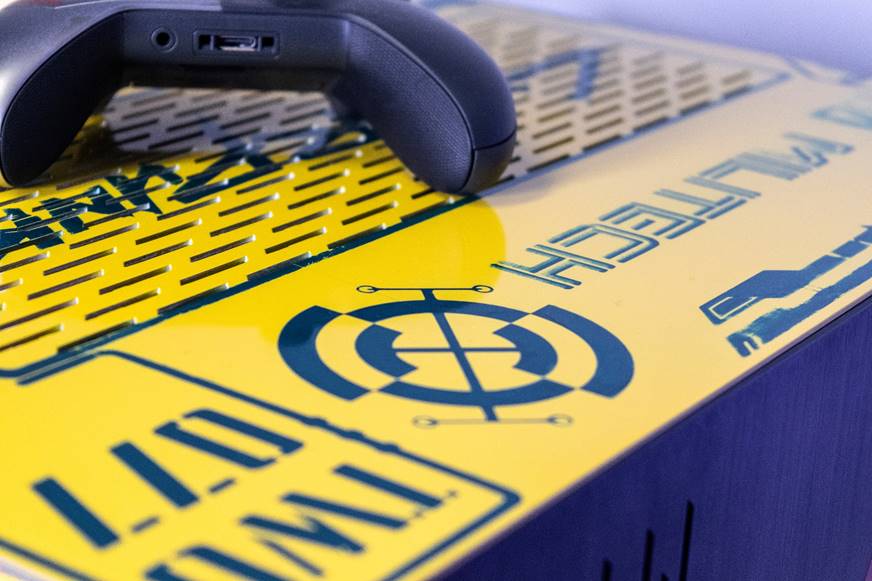
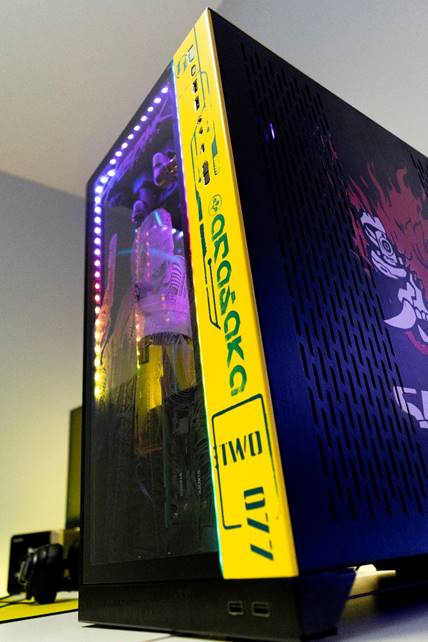
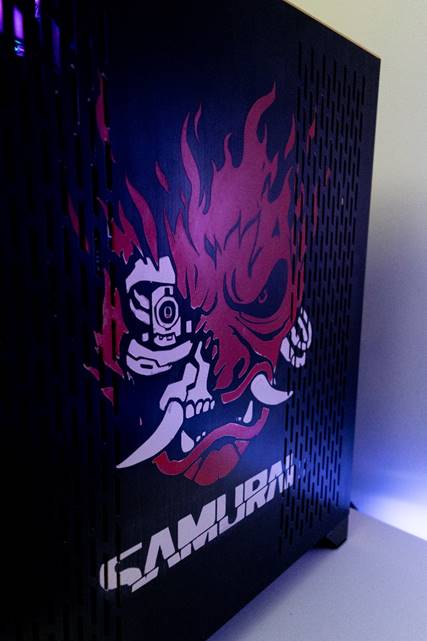
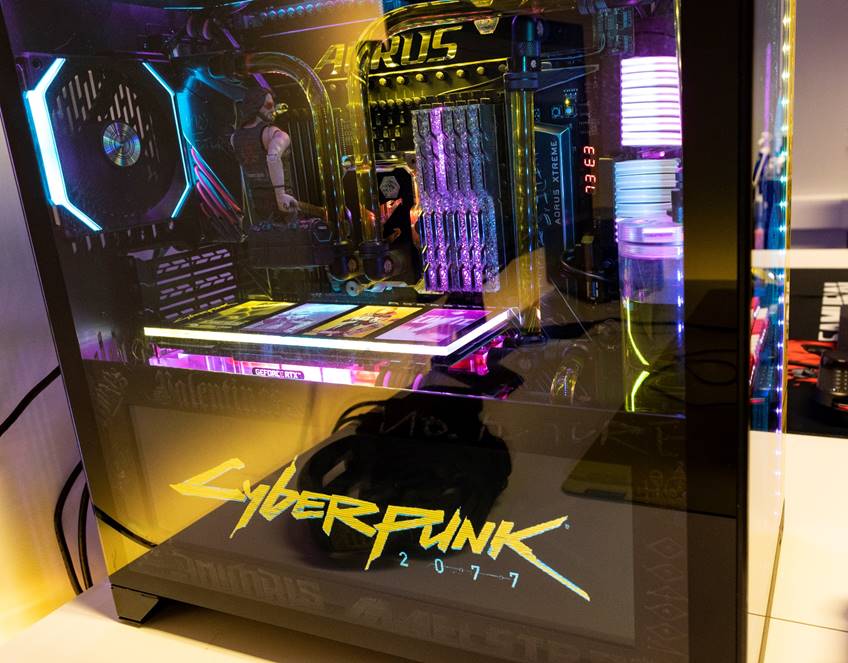
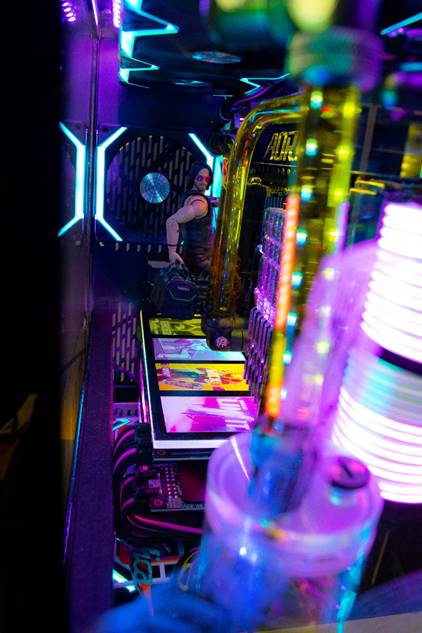
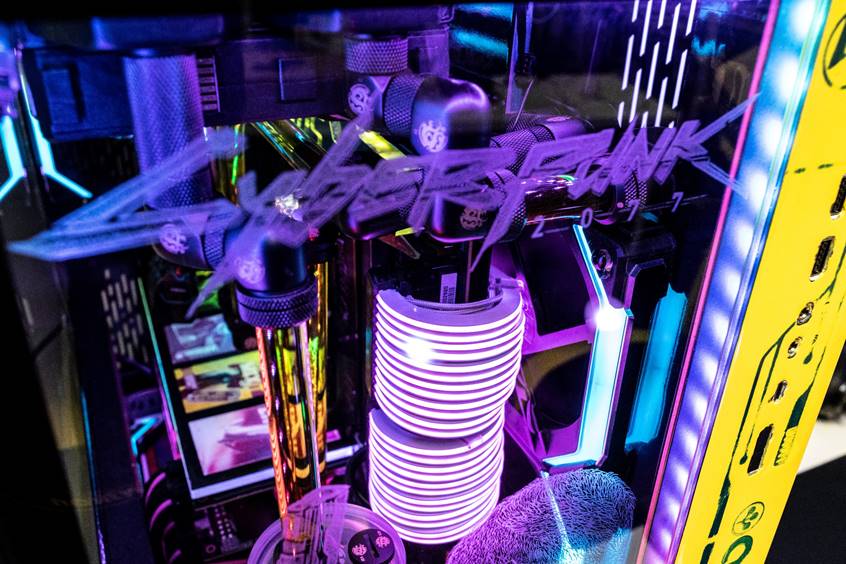
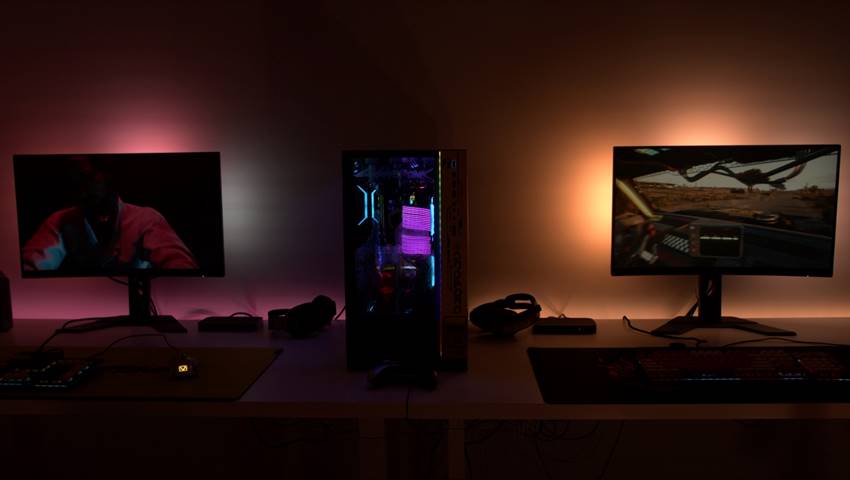
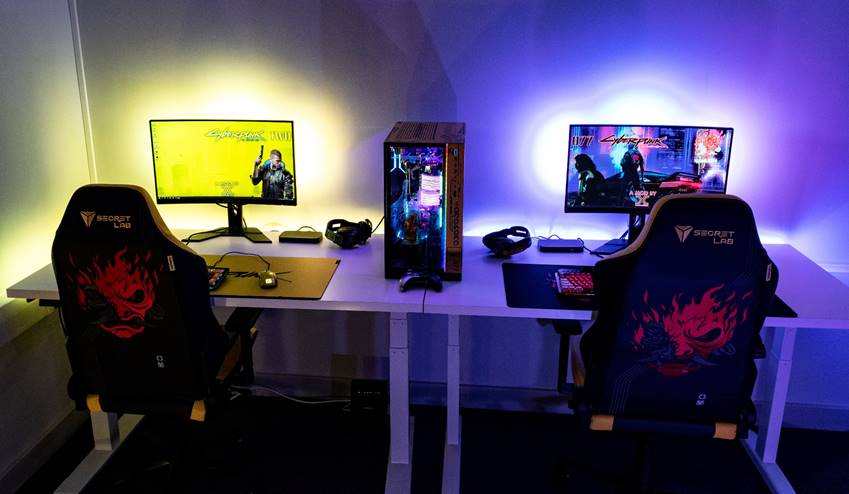
    Hi all and welcome to my next mod project, CyberPunked Two 077, the name is reference to something, but I will leave that until the later stages for you guys to figure out, although I know you have figured out that of course this rig is going to be themed on cyberpunk 2077. Let begin this crazy journey with thanks to the sponsors involved in this.


    Website, Facebook, Youtube


    Website, Facebook, Youtube


    Website, Facebook, Youtube


    Website, Facebook, Youtube


    Website, Facebook, Youtube


    Website, Facebook, Youtube


    Website, Facebook, Youtube


    Website, Facebook, Youtube


    Website, Facebook, Youtube

    I would like to thank all the sponsors involve who without none of this would be possible.

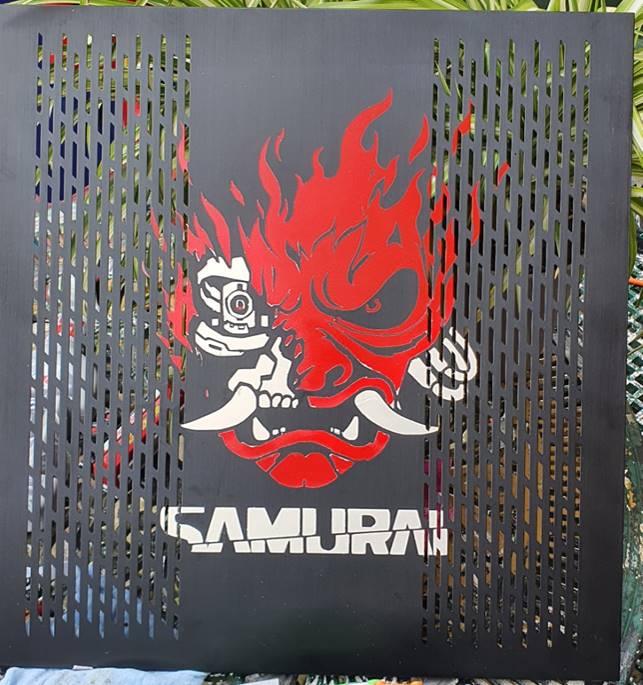
    Also I would like to make a big shout out to CD Projekt Red for supplying me with assets to get reference from, thank you so much.

    So First up shall we take a look at what the guts of the system is going to be?
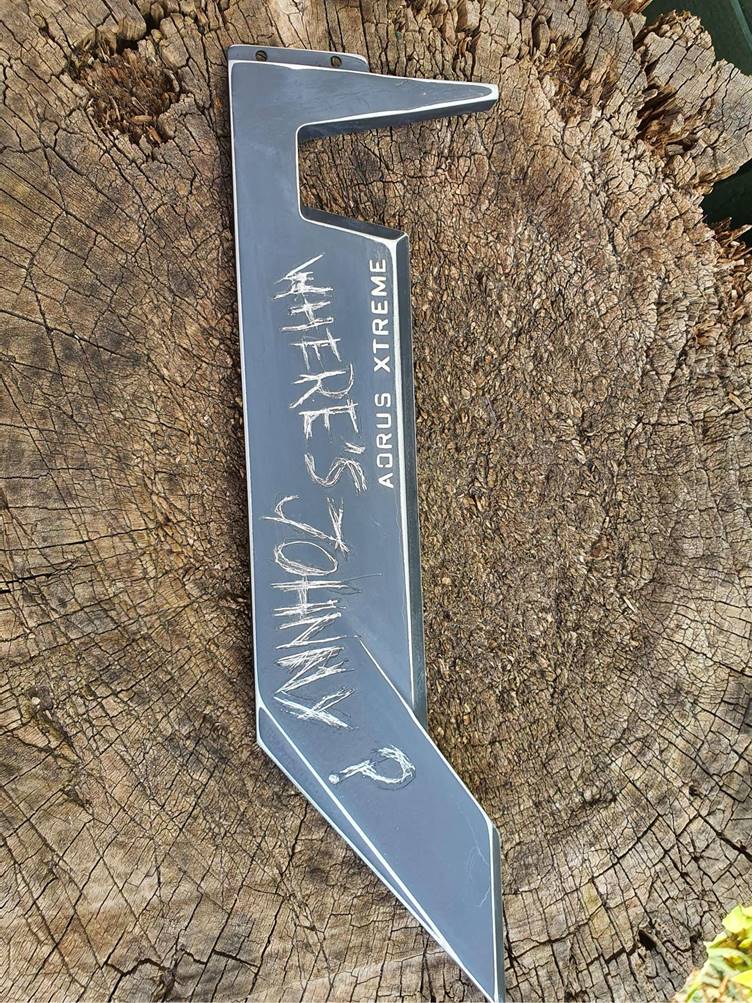
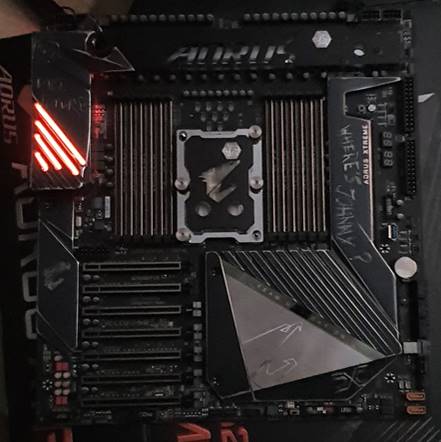
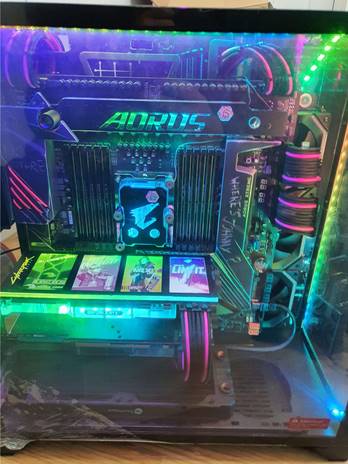
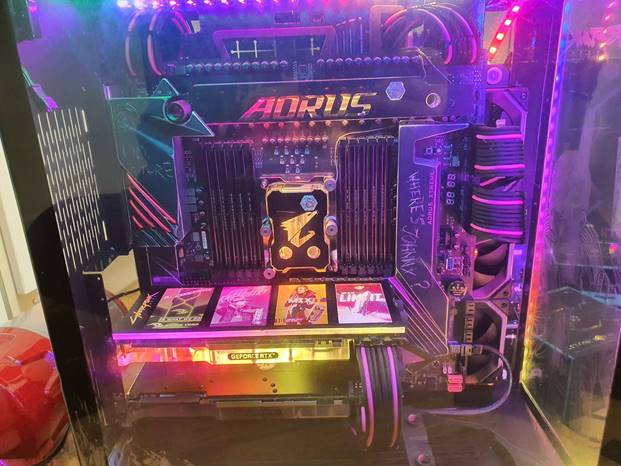
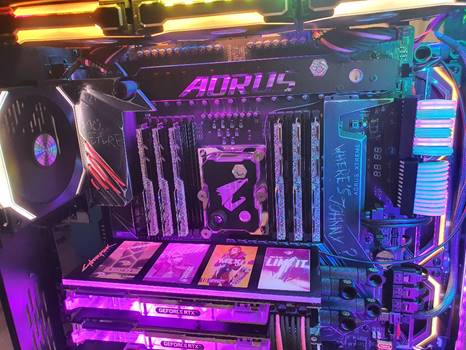
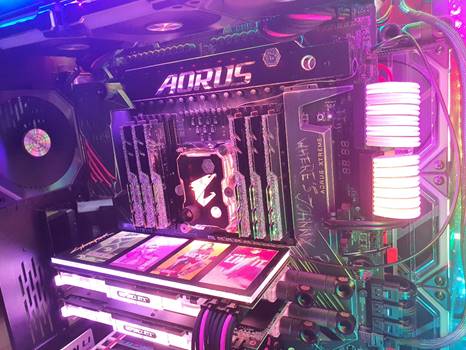
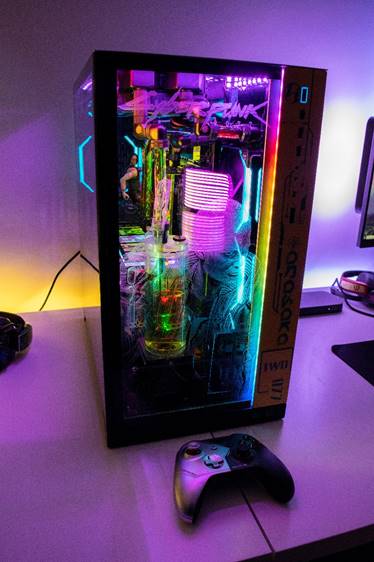
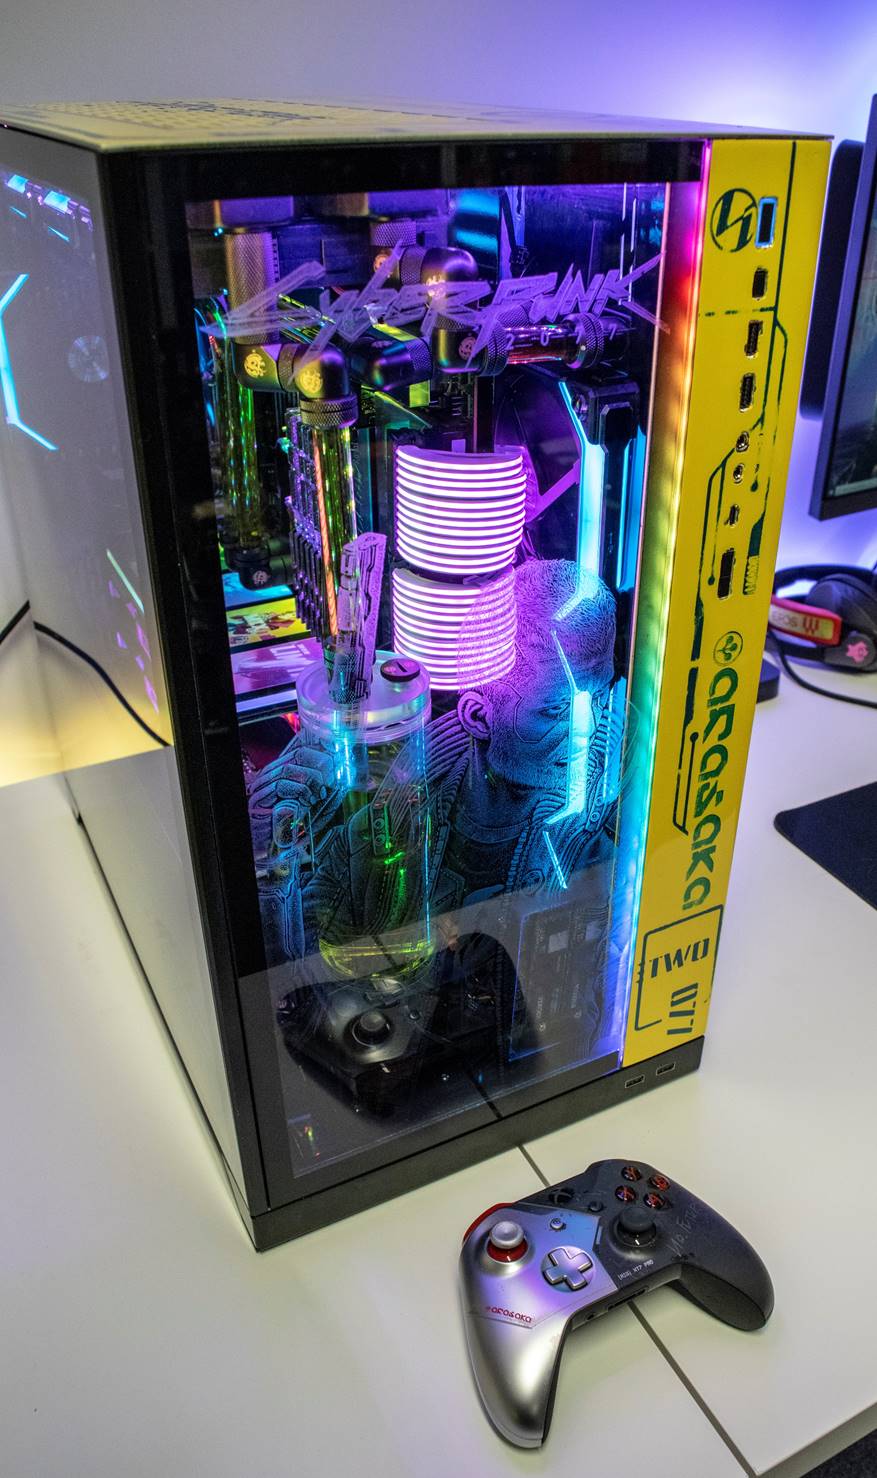
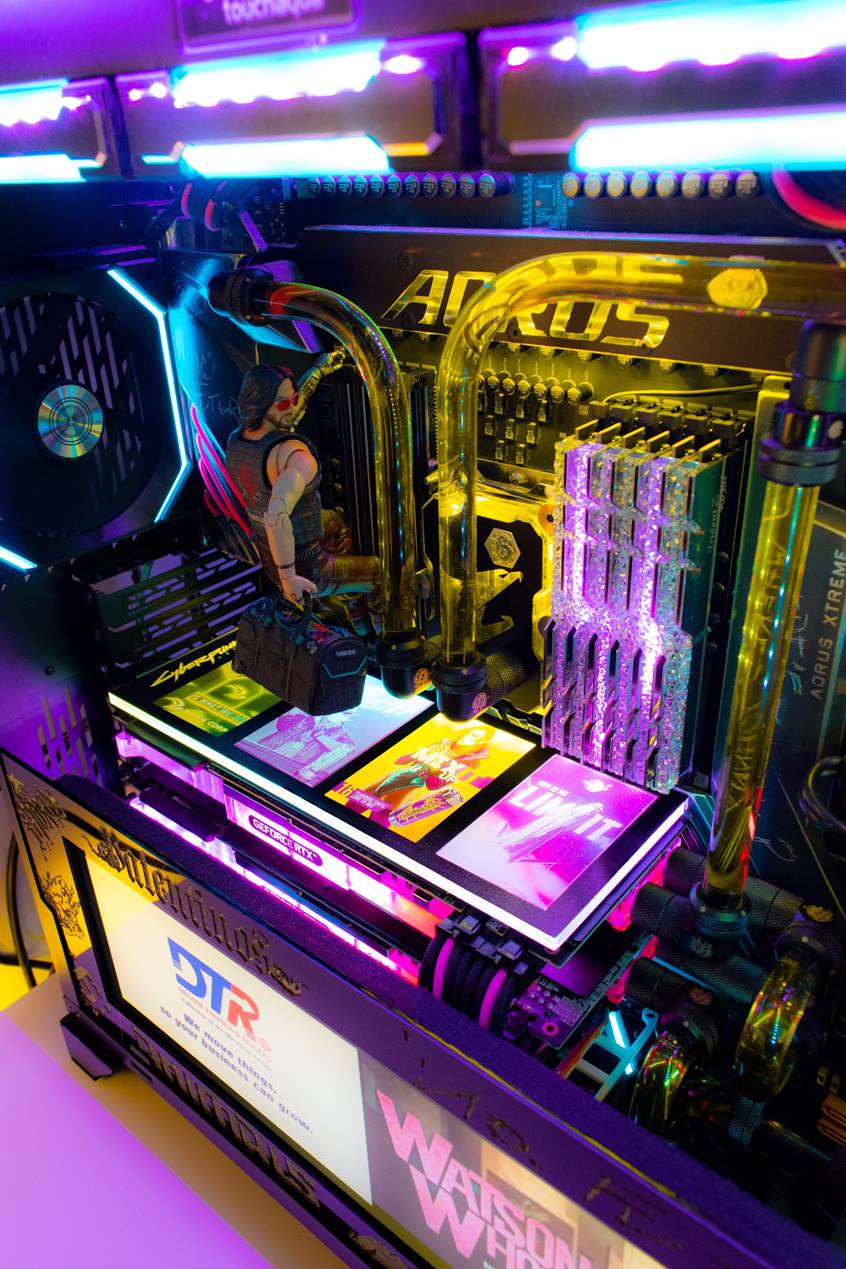
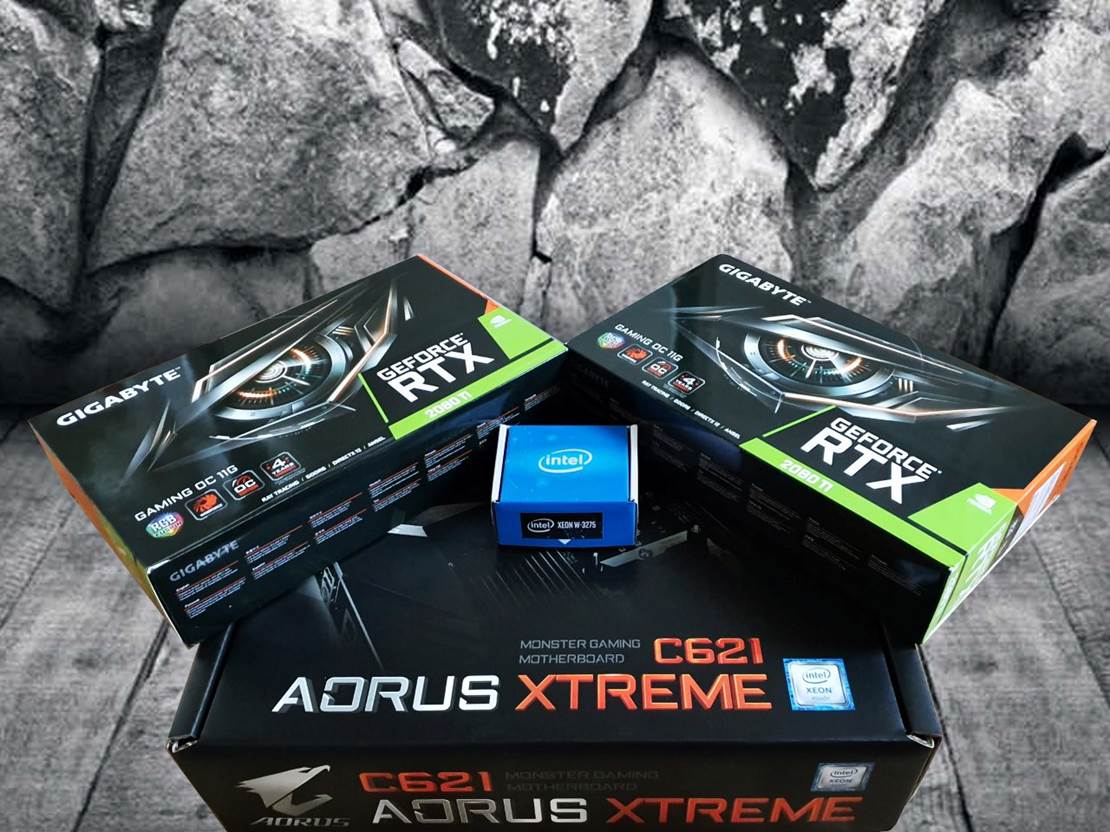
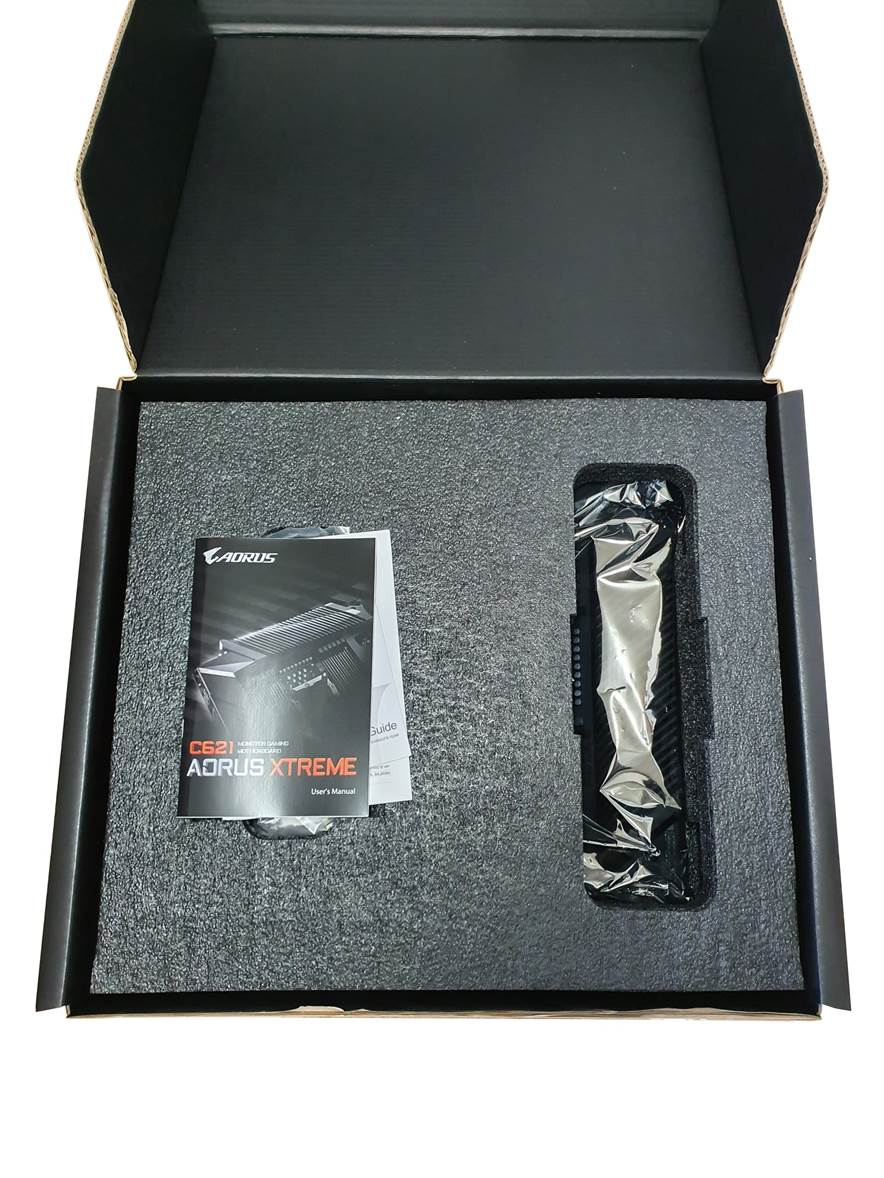
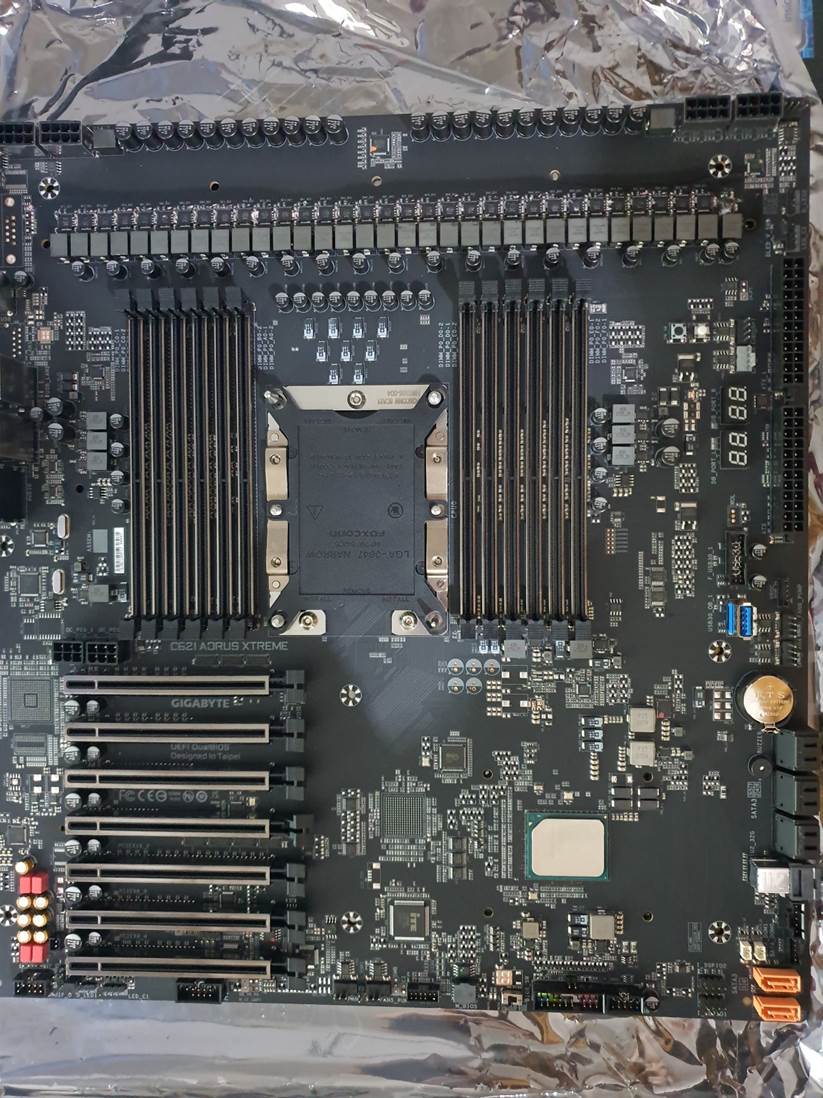


    :O yes I am amazed to, it’s going to be a beast, not only will we be using the Aorus C621 Xtreme motherboard, we have a 28 Core Intel Xeon W-3275 for the motherboard, also to top it off there are 2x 2080ti Gigabyte Gaming OC 11G cards.


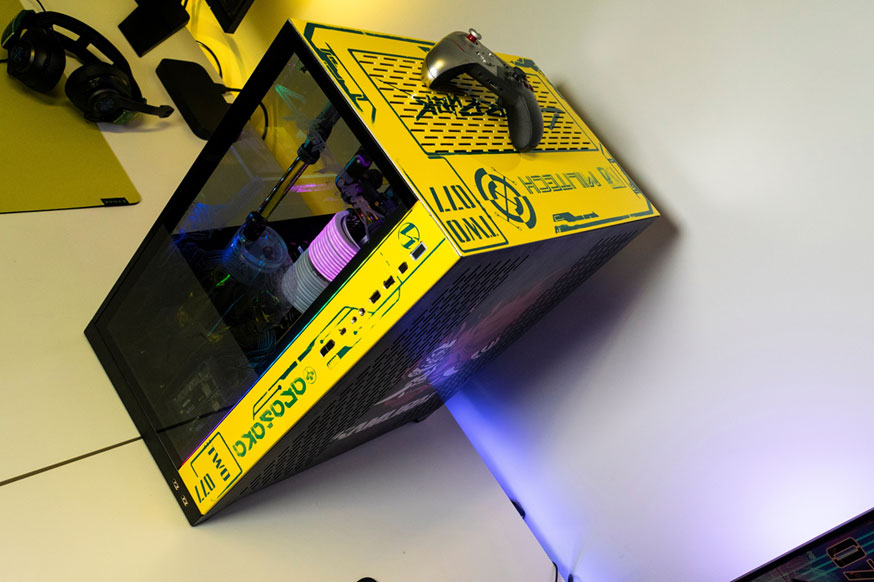
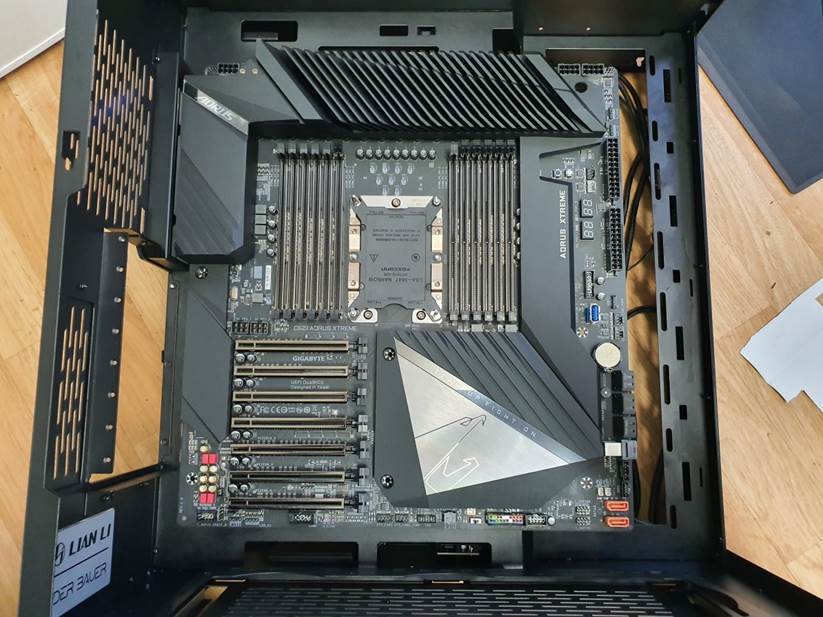
    Need more idea of the size of this mobo, let me throw it into the lian li PC-011 dynamic XL version (which I will be using in the build).


    As you can clearly see this is a monster of a motherboard, but I have plans for it, first though I need to fab a mount to make sure the board mounts correctly, Lian li do sell a E-ATX mount for this case as seen above, but its designed for another brands motherboard and would not work with this board, so here is what I came up with.


    So now I need to sand the raw alu down and paint it black then do some sanding on the edges to get the worn look. Moving back to the motherboard, let us take a look at it naked.


    Ermm yes that’s going to need some serious cooling, let’s see what we can do about that.


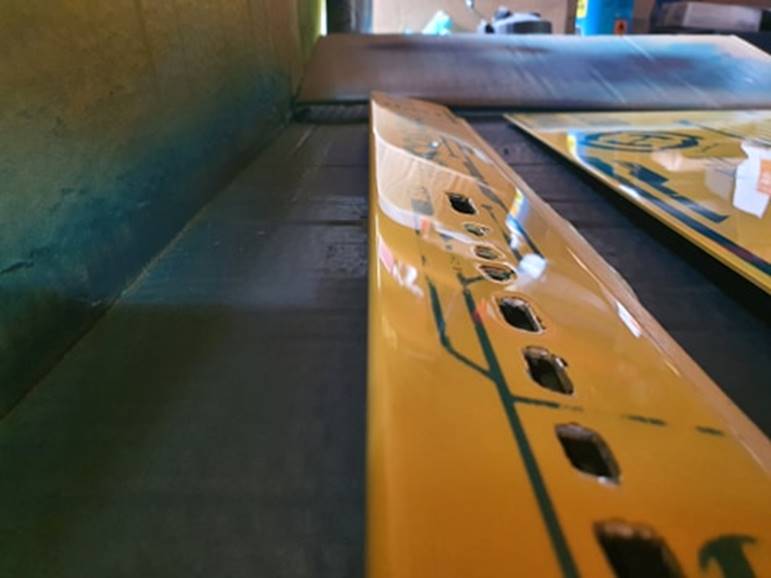
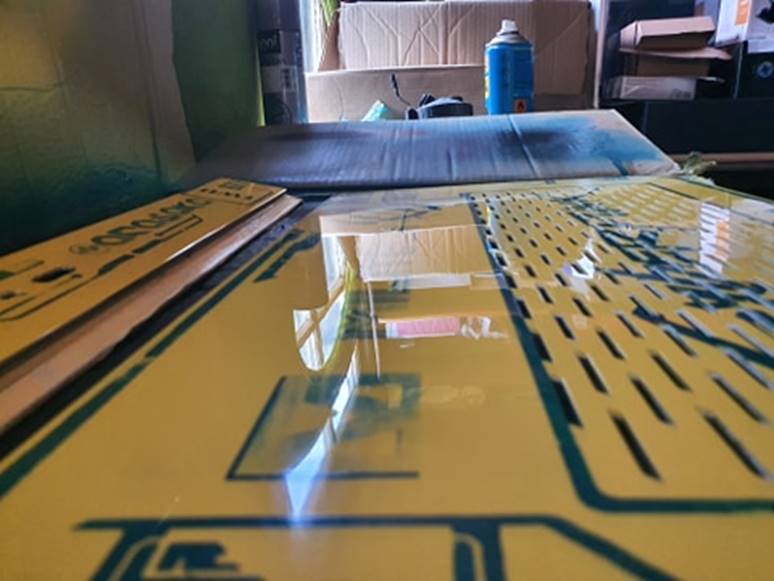
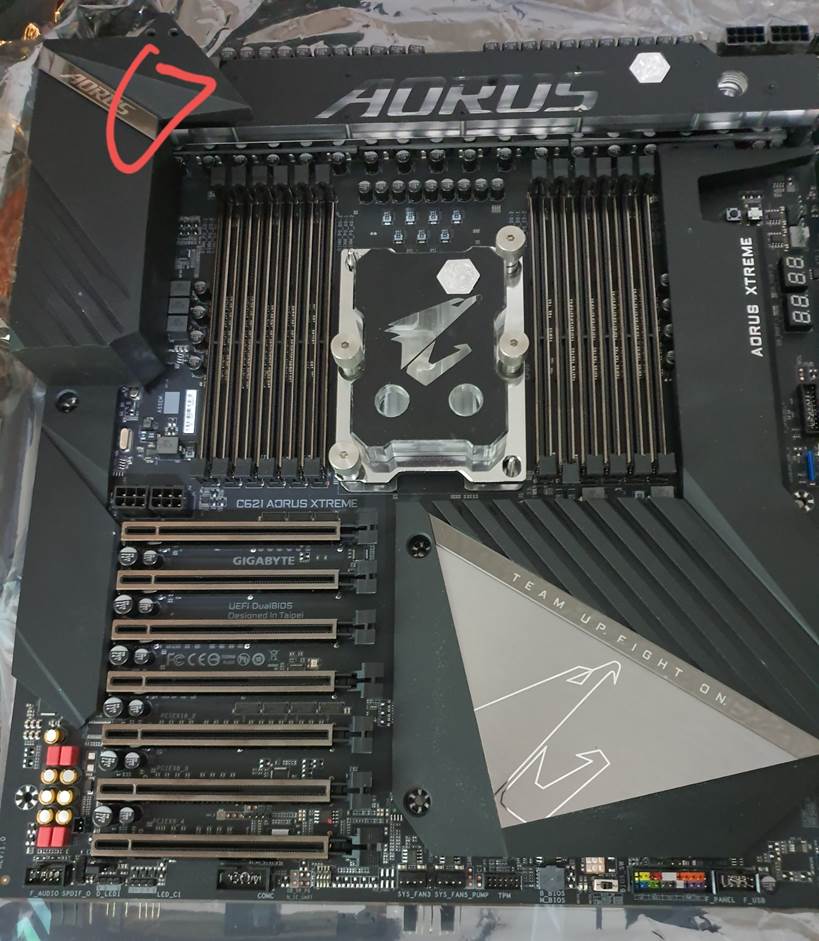
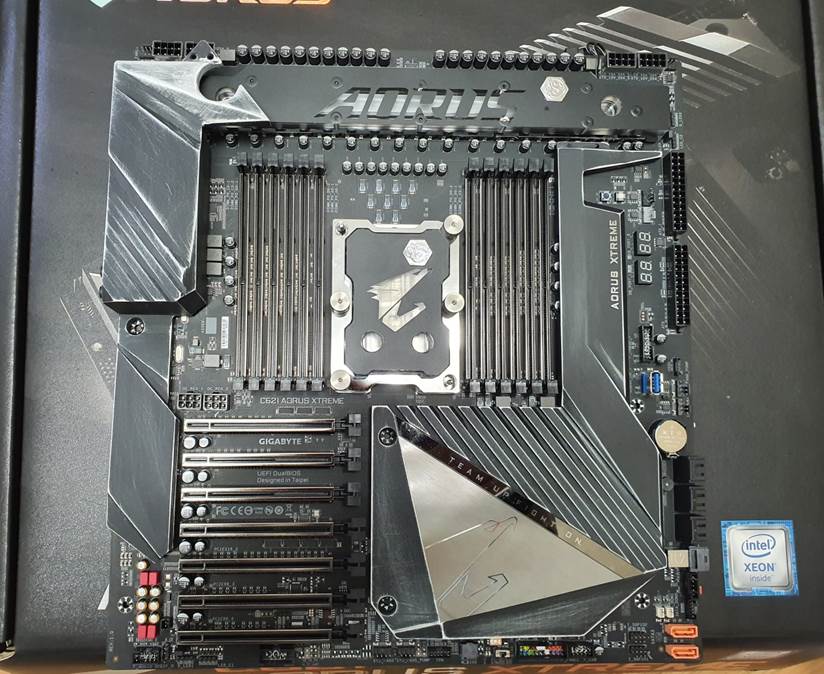
    The Bitspower block, is rather large and one of the ports sits under the IO, The main question here is do I keep the io shield and drill a hole through on the drill press, or do I leave it off, having looked at the reference images from the game, a lot of metal stuff seems to be worn down a bit. So I decided after cutting and sanding and prepping for paint I actually like the worn look a lot, so I removed the right chipset cooler as well and gave it the same treatment.


    Yes I did just take a very expensive motherboard and use 600 grit on the alu parts (of course removing them first ), I made the rub down near the hole in the io panel more intense due to that I will poking a carbon black bitspower extension in there. Anyway stay peeled as I add more stuff over the next couple of months and see what we can come up with in the end.

  2. #2
    Administrator OvRiDe's Avatar
    Join Date
    Dec 2005
    Location
    Tulsa, OK
    Posts
    4,586

    Default Re: CyberPunked Two 077

    New project!! Looking forward to it!

  3. #3
    Overclocked
    Join Date
    Mar 2011
    Posts
    280

    Default Re: CyberPunked Two 077

    So for some reason all posts were not put up for this build so bloody strange and I think it was my end as forum was not in mod post book mark for some reason so I am posting each post below.

  4. #4
    Overclocked
    Join Date
    Mar 2011
    Posts
    280

    Default Re: CyberPunked Two 077

    Small little update, some of you may know or not, my wife is very talented with a dremel at creating images from 1000s of dots, here is the start of the front panel engraving.


    Yes I know it's back to front, but it's being done on the inside, so once complete it will be flipped.

  5. #5
    Overclocked
    Join Date
    Mar 2011
    Posts
    280

    Default Re: CyberPunked Two 077

    So it has been a while since the last update for obvious reasons, but lets crack on shall we, I wanted to paint the top panel and front side panel with a yellow and a bluey green pearl airbrush for the art I was putting down.

    First the yellow basecoat and then flattening it was done


    Next it was time to airbrush the design onto the panels, then paint with a fine tip brush some smears onto it (extra paint blobbed down in some areas).


    After doing this normally we would be moving onto flattening it smooth with a very fine compound, but as I wanted a worn look a coarse compound was used.


    I am happy with the result, but as with previous mods, I always get ummm and ahhh and more, or should I have done less in my thoughts when doing wear on a buld. On the front panel IO ports I also took the file too them to add some wear and chipping as if the pc was worn a bit these ports should be the most worn.


    On the top it’s a different story, I wanted to add wear but keep the cyberpunk logo more intact than the rest.


    Then after this it was onto clearcoating, this will be done in stages to get a deep gloss finish, this is after stage one


    So slowly coming along bit by bit, why I let the second coat of lacquer dry I moved onto the motherboard heatsinks and io shield, I decided despite what I had done earlier I wanted to do it different so painted them all matt black. Here was what inspired me from in game footage.


    So I wanted to recreate this style onto the io shields and make it look like someone has used a key or something to scratch the designs in.


    The worst thing about doing this was due to the size I had to do it with a sewing needle which my fingers did not like one bit, but we are moving along now with the build and more will follow.

    Until next time.

  6. #6
    Overclocked
    Join Date
    Mar 2011
    Posts
    280

    Default Re: CyberPunked Two 077

    So final coat of lacquer dried yesterday and I polished it up, so happy with the finish.


    Happy with how it came out tbh, onto the next job now.

  7. #7
    Overclocked
    Join Date
    Mar 2011
    Posts
    280

    Default Re: CyberPunked Two 077

    So another small little update for you guys, this time just painted a few things and added a tester neon string light that I will be replacing with a pink one.


    I like the way its come out and when the pink one arrives I will glue it down so its straight, also on the subject of the case I don’t a quick assemble to see how the yellow panels looked.


    So happy with how its come out, but obviously its now time to do the samurai logo on the back panel, this was probably the hardest to do due to the layering up of the paint to get desired effect, ill go into detail after the picture.


    Might not look like much but this is 4 layers of paint for a worn look to match the build, I done etching primer (not a classed as one of the 4), then pearl black as base of artwork, when that dried i sprayed pearl silver, then using a cotton wool bud dabbed hairspray in cerian areas i wanted to stay silver sprayed over with platinum pearl then dabbed areas i wanted to go back to the platinum and used some red over that lol,... then used hairdryer in some areas to make the red paint not have chance to fume out in some areas to get a rough surface to get the desired look, I am happy with how it came out.

    Moving on I have laid the basic graphics down on the mouse with a metallic basecoat and just need to do the top layer now


    Top layer will be a translucent colour, added some extra thick paint as with the case via a brush then will sand back the graphics to add some wear to it too to match.

    Moving on I have the headsets to paint as well, but as a lot of people that paint will tell you it does not always go to plan as I must of picked up a old can of primer for the headset (same one used on mice but different can) as despite looking hard, the moment the metallic base was drying on it, the twat started bubbling up so I have to re sand those back. Other than that no issues so far.

    I will 100% need in final photos and video need to get plenty of lighting on this due to the pearl being really fine, to get it to sparkle.

    More coming a lot sooner once I have completed the mice, I also have a special thing lined up for inside the case that involves a small info screen, not transparent, but not what you would normally expect either.

  8. #8
    Overclocked
    Join Date
    Mar 2011
    Posts
    280

    Default Re: CyberPunked Two 077

    So after quite a few delay here I am again back with another update, so lets start off with the first thing to update with, so new items going into the build.

    First up I would like to thank Secret labs who provided Well I suppose you can guess what…


    I think that was a bit obvious don’t you but of course it 100% matches the build well.

    Next on the list is Seagate who not only joined in the fun but wanted to ensure I had a future proof cyberpunk themed nas, this was a shocking delivery.


    4x 16tb drives in Raid equalling 32gb in total with 2x 480gb cache drives is probably all the nas I would ever need tbh, more than enough and very future proof.

    Time to get back to the moding I suppose and the mice, you remember from my previous post that I had put down the metallic silver base coat and the graphics and created some wear, well now it was time to lay over the candy yellow before rubbing that down in some places for wear and hear is how mouse one came out.


    Coated in lacquer as well and onto the other mouse, I am actually starting to enjoy the worn look I have created a fair bit now… also the game is getting close I know, so here are some sneaky pics to wet your appetites, This is just a lighting test and I have not decide on final loop yet, I was just organising some things and testing some things out so lets take a gander.


    Please ignore th image clarity hear there is still film to pull of the glass, So now I have tested the front panel lighting out, I think I should just hook up the motherboard, gpu ect and do some lighting tests inside the case, let me know what you think.


    But I think the inside is 100% matching up to my inspiration lighting wise, which was worn, neon and dystopian, getting the final lighting right is going to be a challenge and a few other things as I do want to have neon pink and blue to be the colours but its going to take some work to arrange so they don’t drown each other out colour wise..

    As I said this was just a rough wiring test to see how the lighting loops are going to work before I route the cables to the separate controllers, I also need to sort pump placement as well as there is quite a bit going on wire wise. As you can see this is not a powered up test yet for obvious reasons (no pump and no loop). But I kind of love how the backplate cover came out and reacts to different colours.

  9. #9
    Overclocked
    Join Date
    Mar 2011
    Posts
    280

    Default Re: CyberPunked Two 077

    Please delete

  10. #10
    Overclocked
    Join Date
    Mar 2011
    Posts
    280

    Default Re: CyberPunked Two 077

    So guys got there in the end, here are the pictures here, more can be seen here in larger format, this last year has been a bit strange for us all. Lets hope 2021 keeps us all safe and getting back to some normality, I wish all of you to stay safe, anyway enough of the rumbling on here are the completed pictures.


    That’s it for the layout, now lets look at the items on the desk to go with the build.


    I love how these turned out, this is on the left side of the build and tie in nicely I think


    Then on the right side due to that side of the case being black with the red and white samurai case I done this to the external devices.

    All the Painted items (headsets and mice) were done with a metallic silver, then green and blue and white mix of pearlescent on left side and the same but with red pearl on other, then the red was scuffed down to give some wear and tear, on the mice I coated them with candy yellow, then lacquered them with more than enough coats so I could when not fully cured but ok to touch could then rough up the finish, but only in areas fingers would touch.

    On the headsets, I just used matt lacquer and then went to town scuffing that up as well to match the whole wear/worn effect on the pc. The full gallery of build can be viewed here all 122 pics :p

    If you want to see the video of the build click here or view below.


Posting Permissions

  • You may not post new threads
  • You may not post replies
  • You may not post attachments
  • You may not edit your posts
  •