Page 4 of 4 FirstFirst 1234
Results 31 to 39 of 39

Thread: "MybadOmen's" New NZXT Build ?

  1. #31
    ATX Mental Case
    Join Date
    Feb 2012
    Location
    USA
    Posts
    184

    Default Re: "MybadOmen's" New NZXT Build ?

    UPDATE !

    Hiya guys,

    In this Update i am going to be Hard Tubing "LEGION" using Primochill's New Rigid Tubing and i was also lucky enough to get my hands on some of their New Nickel Revolver Series Rigid Fittings before they are released.

    I will also be showing you how to bend the tubing easily using the method that Primochill provides by using a Heat Gun and Primochill's Bending Silicone, A cool little hobby saw i have and a Homemade Jig and don't forget the Olive oil (Seriously).


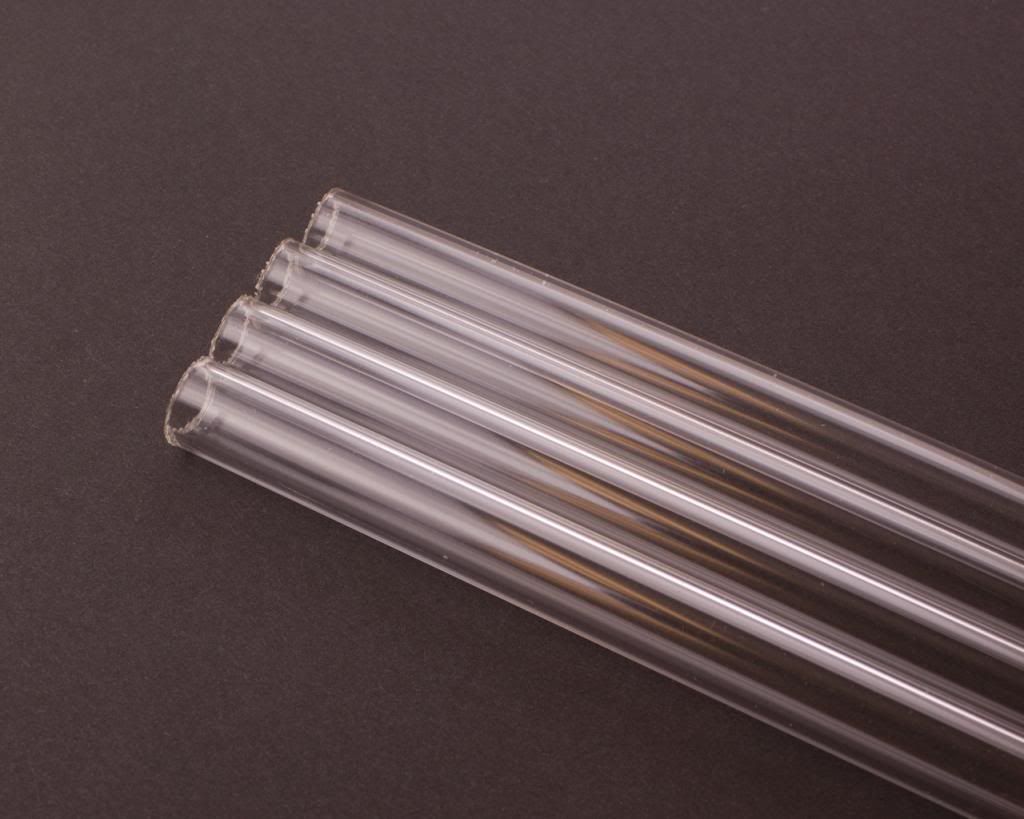
    Ok Lets get started with this Update First off here is the 1/2"OD Primochill Clear Rigid Tubing i will be using (Comes in many colors but i wanted clear for this build)

    Type i am using in Legion:


    And other colors available:


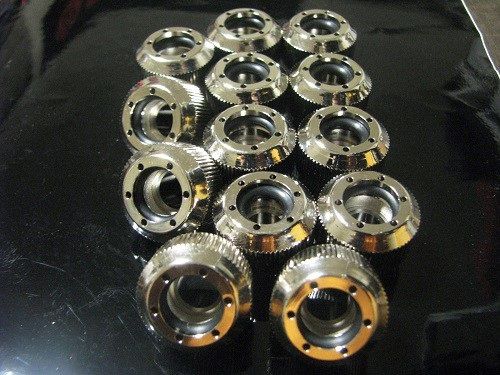
    Also here are the New Revolver Series Rigid Fittings by Primochill in Nickel i will be using.


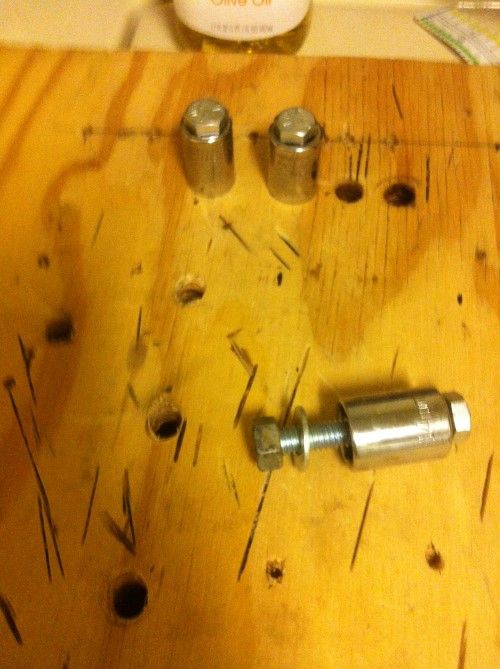
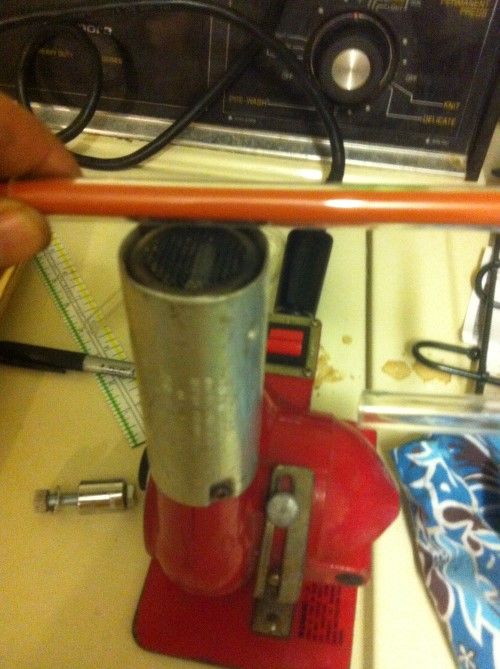
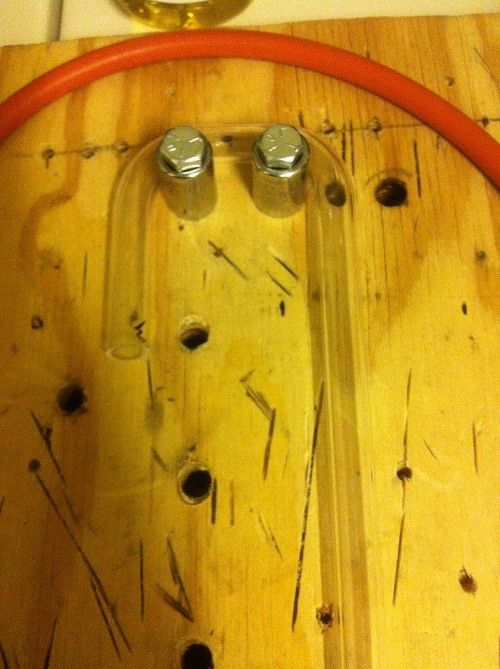
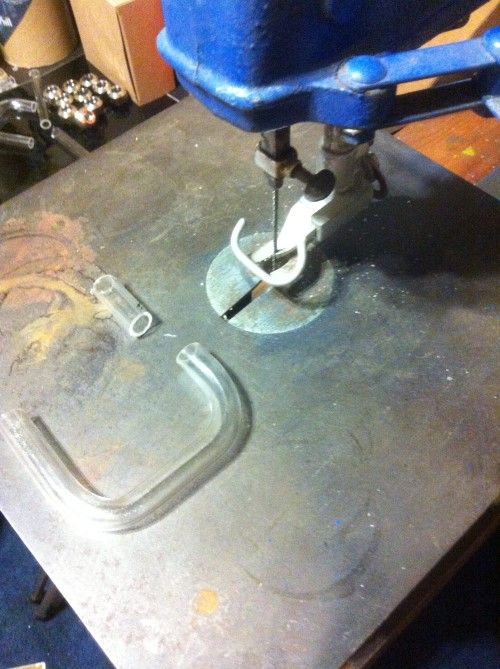
    Here i will try to explain a simple yet productive Bending Jig i made from an old piece of scrap wood in my backyard,A few sockets and nuts ,bolts and washers to fit through them all. Simply drill holes in a bunch of places using a Square ,Protractor or just place the holes any place you like to make whatever angles you want. Nice thing is you can always drill more holes later for even more bends. But figured this was a simple design anyone could build so i went this route rather then pulling welders etc out.


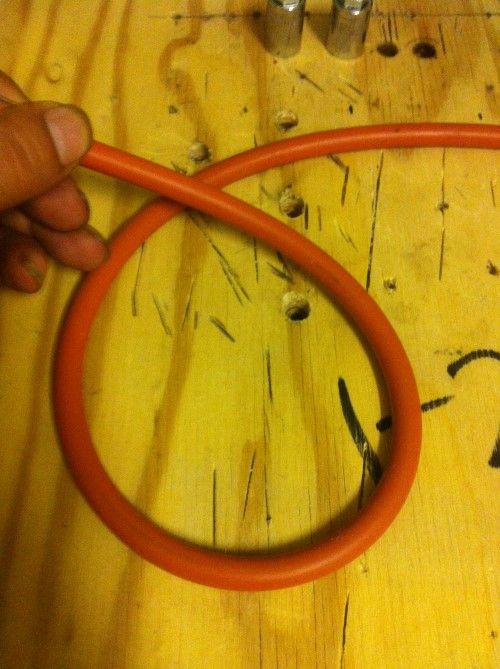
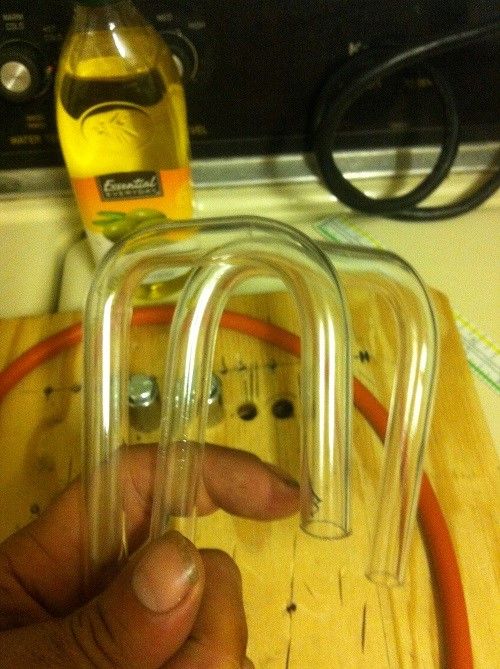
    Next here is the silicone that is a must for making crazy bends and Primochill sells it through most resellers (It comes in different colors either Orange/Black/Grey) but its all the same thing.And here is where you need the olive oil as well and some 1 dollar cheap gardening gloves so you don't burn your hands.

    Simply Dip the tip of the silicone into the olive oil and slide it into the Rigid Tube paste the point you want to bend. (To get the little oil out of the tube after simply use Dawn dish soap)


    Now that the tube is ready with Silicone inside and gloves on use your Heat gun and slowly heat in the area you want to bend until the tubing becomes almost as flexible as the Silicone itself . It really is amazing how flexible it gets. Also at this point when bending dont push hard against anything or it will leave a mark in the Rigid when cooled .Basically the trick is slow and easy the whole time.


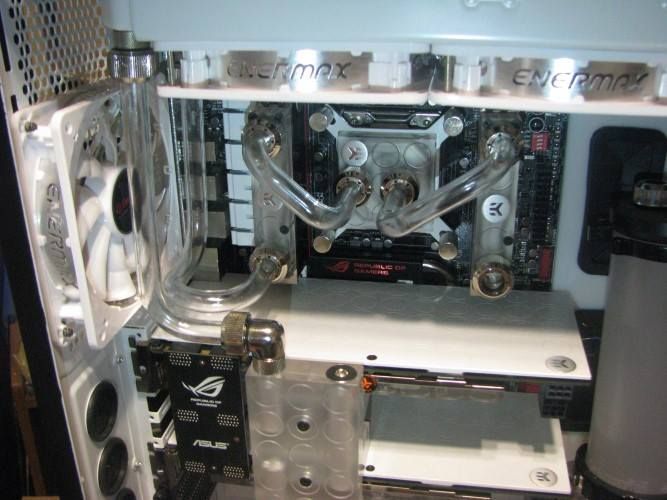
    And here is an example of the bends and don't worry about the excess as we will be cutting that to the correct size soon.


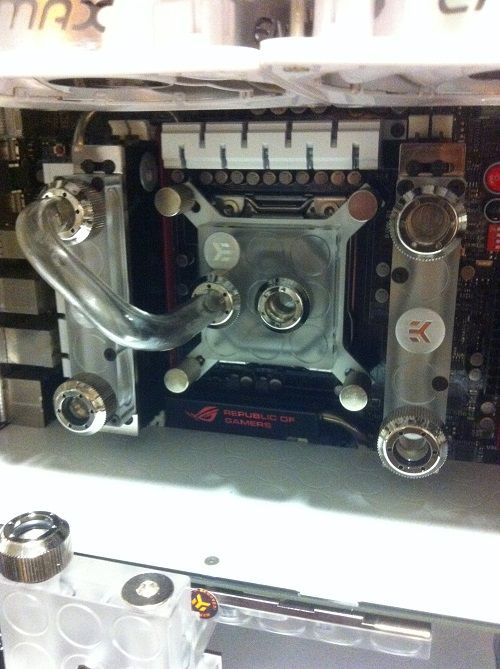
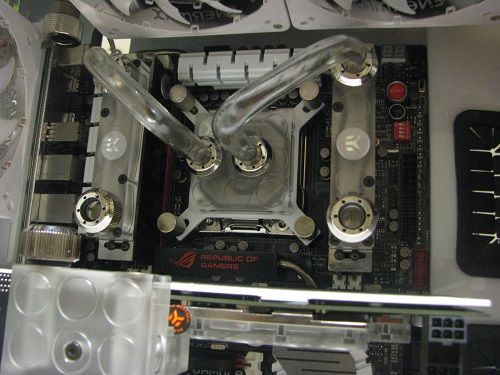
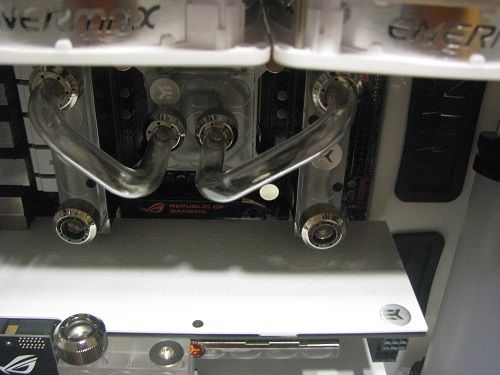
    And the 2 Bends i need for the CPU to Ram blocks:


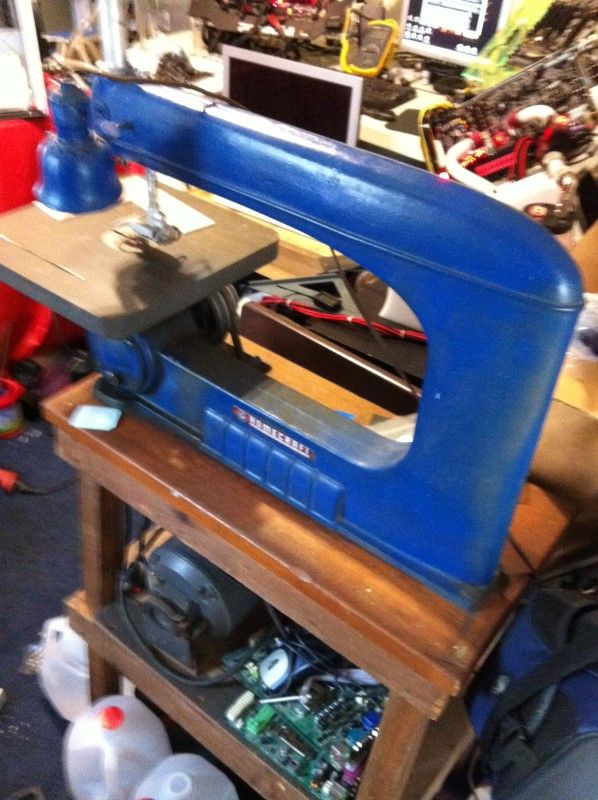
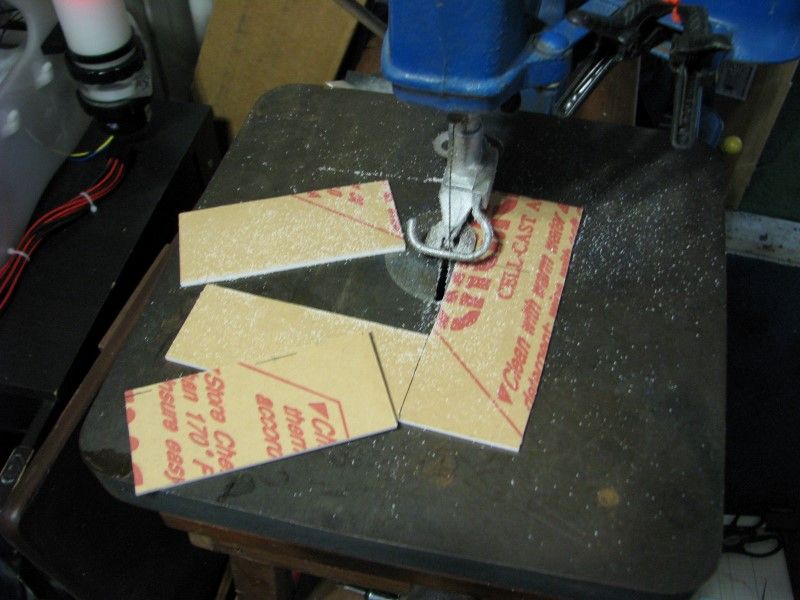
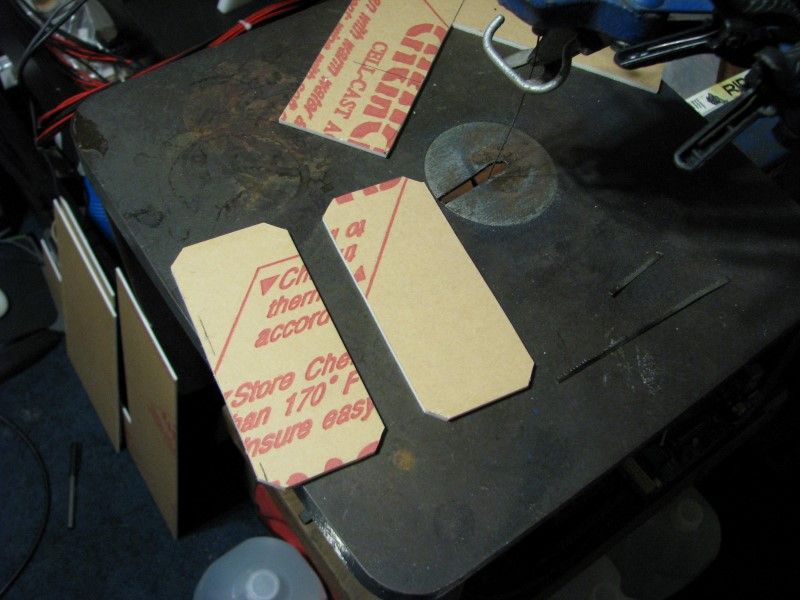
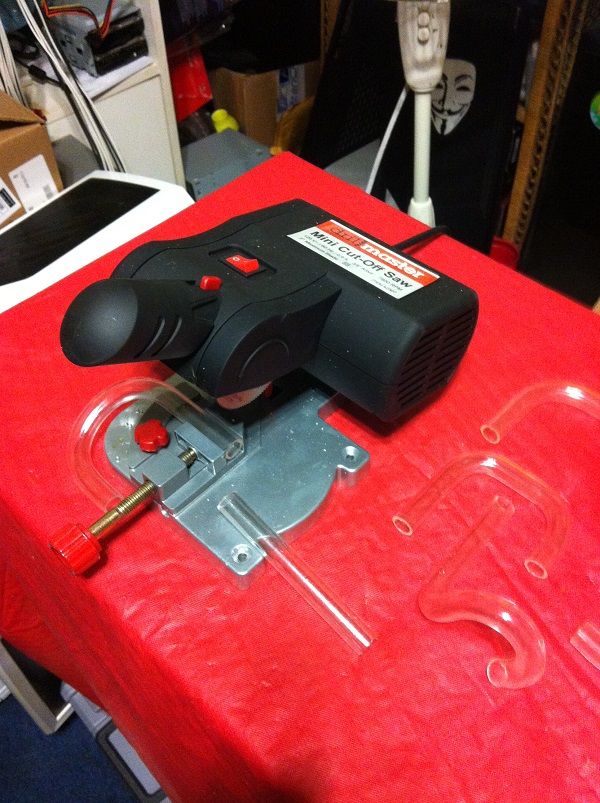
    Now its time for Cutting and you can use just about any kind of saw to cut the Rigid .I have the ultimate little saw that is perfect for it that can be bought at Harbor Frieght for short money but i have used Dremels and Scroll saws as well.Here are a few option but there are many more.

    My Favorite saw for Rigid:


    Also scroll saw works great , just file and sand the edge after:


    And of course what most will have handy is a Dremel and a file or some sandpaper .You can achieve that same results with.


    Ok now that i Bent and cut the Rigid to size i start assembling it and remember these are compression fittings so they hold in very tight with no worries at all.


    And now for the other Ram Block:


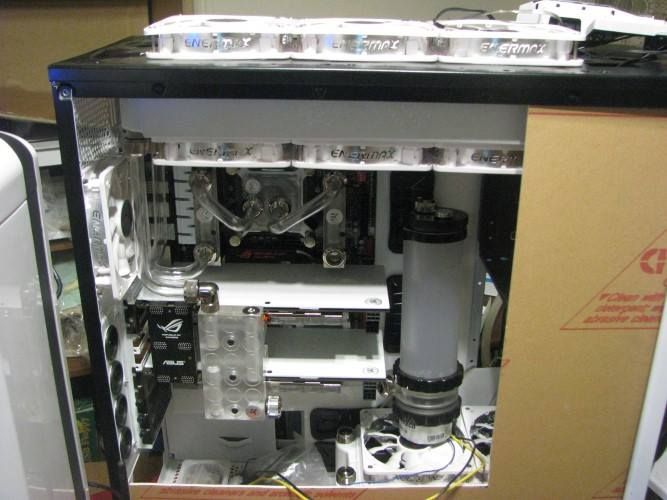
    And after more Bending etc and also don't get me wrong i had some scrap from trying different routing but here is what i ended up with so far.


    Well that's all i have for today guys i hope you like the Update, I still have some really cool updates coming when it gets to working on the Theme of the build so i am very excited now and hope you guys are as well.

    Take Care all and Keep Modding,
    MybadOmen

  2. #32
    Stupidity feeds my children blueonblack's Avatar
    Join Date
    Feb 2008
    Posts
    2,616

    Default Re: "MybadOmen's" New NZXT Build ?

    Wow! That tubing really is excellent-looking stuff. If it bends as easily as you make it look I'll be using it in my next build.

    Thanks and awesome work!!
    “Do not trust people like me. I will take you to museums, and parks, and monuments, and kiss you in every beautiful place, so that you can never go back to them without tasting me like blood in your mouth. I will destroy you in the most beautiful way possible, and when I leave you will finally understand why storms are named after people.”

  3. #33
    Resident 100HP water-cannon operator SXRguyinMA's Avatar
    Join Date
    Jun 2008
    Location
    MA
    Posts
    5,865

    Default Re: "MybadOmen's" New NZXT Build ?

    Looking good man! I need to make myself one of those tubing jigs lol. And that mini chop saw is great idea!

  4. #34
    Resident 100HP water-cannon operator SXRguyinMA's Avatar
    Join Date
    Jun 2008
    Location
    MA
    Posts
    5,865

    Default Re: "MybadOmen's" New NZXT Build ?

    Quote Originally Posted by blueonblack View Post
    Wow! That tubing really is excellent-looking stuff. If it bends as easily as you make it look I'll be using it in my next build.

    Thanks and awesome work!!
    Check out by HAF XB mod blue - I used rigid as well (although E22 instead of Primochill) and it was super easy to work with and looks much cleaner. Plus it won't stain like regular tubing will.

  5. #35
    ATX Mental Case
    Join Date
    Feb 2012
    Location
    USA
    Posts
    184

    Default Re: "MybadOmen's" New NZXT Build ?

    Update!

    This is rather a small but pretty cool update and Mod but i figured i would add it now before i forget and it gets missed.


    A plain old SLI Bridge wasnt going to cut it after i got my 680's all dressed up so something a little more flashy that also gave thanks to NVIDIA for sponsoring me at the same time,So this is what i did.

    First i got a Sheet of Mod/Smart Chrome/Mirrored cast acrylic which is another company that sponsors my work. Here is that Sheet.


    Next i marked it out and to the size i needed and cut it. After cutting i then filed and sanded on a flat surface to get the cut edges straight as possible and rounded the corners a bit.


    So here is the Bridge i will be Modding as its boring as hell and the Raw cut piece of mirrored acrylic with the protective layer still on.


    Next i grab a 2 part epoxy that i use all the time. You can but this at about any hardware or auto store and it also comes in black and white as well but i prefer the clear and use it on all my mods and other projects. (Its super strong and dries fast) I also used a cheap brush with the bristles cut down and just a coffee can lid.Anything can be used instead.


    Next you want to make sure you have a 50:50 Mixture of the 2 part epoxy.


    Make sure to mix the epoxy very good as if you have any that didn't get mixed ,then it will not dry.


    Next i put some epoxy on the bridge more like in globs at different points of the bridge yet not to close. What you want to happen is to make sure you def have the epoxy touching both objects yet not to much that it all comes squirting out when you put the 2 objects together. Also after centering wait a few minutes and recenter if it moves within the first couple minutes.


    While that was Drying i went into Corel Draw and made an Nvidia logo that i liked and though would look good on the Bridge. Here is the Logo i came up with . Very simple yet very nice. (It wont be black ,black is just a base color i use for my plotter)


    And after running the new drawing through my Plotter, weeding out the vinyl i dont want and adding transfer tape this is what a Vinyl Decal looks like.Btw i was very pleased with the results


    Next i simply peeled off the backing of my new decal and centered it on the Bridge,Used a squeegee to make sure it stays forever ,And finally the Custom SLI Bridge is all ready to go.


    And last what it looks like in the build so far although there is still a ton of work to be done inside Legion still before it all comes together.


    I know it was a short update but i really hope you guys enjoyed it.


    Take Care and Keep on Modding,

    MybadOmen

  6. #36
    ATX Mental Case
    Join Date
    Feb 2012
    Location
    USA
    Posts
    184

    Default Re: "MybadOmen's" New NZXT Build ?

    Quote Originally Posted by SXRguyinMA View Post
    Check out by HAF XB mod blue - I used rigid as well (although E22 instead of Primochill) and it was super easy to work with and looks much cleaner. Plus it won't stain like regular tubing will.
    I don't think Nate has Compressions for Rigid as far as i know only Primochill makes them at the moment.The Tubing will work if its 1/2OD though.

  7. #37
    ATX Mental Case
    Join Date
    Feb 2012
    Location
    USA
    Posts
    184

    Default Re: "MybadOmen's" New NZXT Build ?

    Update:

    Hiya Fellow Modders,

    Again another small update just so i don't forget to log it,Unfortunately i broke the blade on my ancient scroll saw and have to wait to find new blades which is a bummer at the moment. My scroll saw is ancient but was built amazing way back then compared to those they sell today as it not only holds the blade straight and from walking it also adjusts down to hold the part your cutting in place.It really is very nice even though its ancient. But ets move on to the Log now.

    First off for those Interested here is my Ancient Homecraft Scroll Saw:


    Ok and now for the beginning of the Mod i am working on right now.

    I start with some white acrylic like i used on the motherboard tray and mark it out to the size i need using a square to make sure its perfect (Paper on the acrylic is just the protective layer) :


    And now drawing out angles on both covers so hey are all perfectly even.


    And what they look like after cutting the edges :


    Next i drill 2 holes in each cover 1/4" from the edge on the covers and the motherboard tray.This will be to make them removable.


    And Finally here is what they will look like in place but they are shiny white acrylic with chrome knurled rounded nuts ,I still need to make the cutouts going on the covers but i want to keep that secret until that update. But for now enjoy these Photos:


    Also a sneak peak at the other Mods for the build i am working on a the same time.This will also be a complete update so just a sneak peek for now:


    Like i said it was a small update but i still don't want you guys to miss anything as i try to share he complete experience of the build process with you.

    Until next Update Take Care and Keep Modding,


    MybadOmen

  8. #38
    Anodized. Again. Konrad's Avatar
    Join Date
    Aug 2010
    Location
    Canada
    Posts
    1,060

    Default Re: "MybadOmen's" New NZXT Build ?

    Excellent work, sir! I am most impressed by your obsessive attention to detail, and perhaps inspired enough to start bending my own rigid plastic tubing (my own limited experimental attempts with glass tubes were disappointingly mediocre). I give you +rep.

    And thanx for demonstrating what the mysterious plastic bit on the pump was for, it wasn't obvious before your updates.

    I note that your processor temps are excellent. Do you have any temp readings on your mobo chipset parts? I'm specifically curious about how hot the mobo vregulator caps get (especially with heavy power draw or "dirty" PSU) because they look - to me - a little physically crowdy in terms of heatflow, especially since you've blocked out so many of the vents. I'm a component-obsessed guy, lol, seeking some "field data" to consider in my eventual (I promise!) DIY homebrewed motherboard project.
    My mind says Technic, but my body says Duplo.

  9. #39
    ATX Mental Case
    Join Date
    Feb 2012
    Location
    USA
    Posts
    184

    Default Re: "MybadOmen's" New NZXT Build ?

    UPDATE,

    Long awaited i know but i'm doing the best i can with real life and all.


    This update is just simply some more work to the 5.25 bays which are still going to need allot of work to be completed. The idea behind this mod is i needed the EK CSQ Spin Res as high as possible as it will be feeding a second Primochill Phase II Reservoir i believe the D5 version but with the 2 huge rads there is tight space to get to Phase 2 res in just the right place to be fed by the EK bay res.

    Anyway here's the work that was done.

    As you can see there have been a couple other mods already done to this small 5.25 bay but in this mod i will be getting the EK spin res to fit in a slot that just isn't there yet.

    You can see me holding the Res where it needs to go in this photo.


    In this Photo i am showing the area i will be cutting out with a Dremel 3000 with a bigger arbor and 2" fiberglass reinforced cutting wheel.


    And here is what it looks like before cleaning it up and completing the other mods


    Here is showing how it will fit in leaving me plenty of room to hardline it. (Also remember it wont look like this as i am only working on the structure right now not the looks.)


    And here is where you can really see it starting to come together perfect. It now lines up perfect with the top of the Primochill Phase II res which is exactly what i was looking for.


    All bays will be filled and it will look totally different then but here is how the Res with sit sorta with the front on. Sorry bad photo..


    Well not a Huge update guys but to me its big progress,I am sorry to those who follow my work and i haven't been Modding to much lately but that is all about to change shortly. I am moving across country and will have a huge shop in my new house just for modding so i am very excited about it.

    As soon as Legion & JukeBench are completed i will be moving right on to more new mods.


    Thanks for looking and the Support Guys and i promise i will be back full force very soon.


    Take Care,
    MybadOmen

Posting Permissions

  • You may not post new threads
  • You may not post replies
  • You may not post attachments
  • You may not edit your posts
  •