Very awesome grill. Makes me want to do some modding! I can't wait. Another year and I'll be done with school and hopefully I'll be able to move somewhere with a little shop space so I can make a mess and leave it without my wife getting mad.


Very awesome grill. Makes me want to do some modding! I can't wait. Another year and I'll be done with school and hopefully I'll be able to move somewhere with a little shop space so I can make a mess and leave it without my wife getting mad.

Thanks d-stilgar. Yes, having your own workspace is imperative!
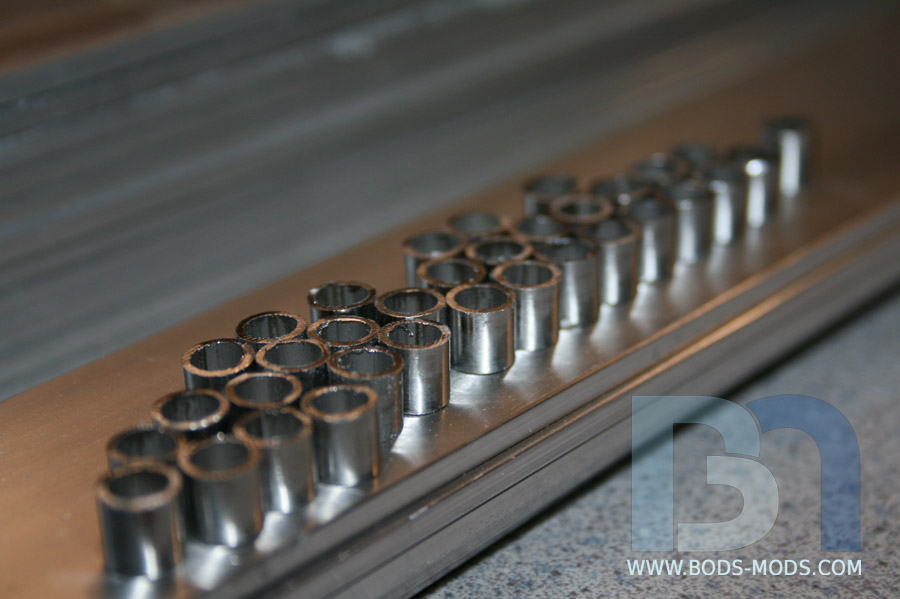
More Grill progress...
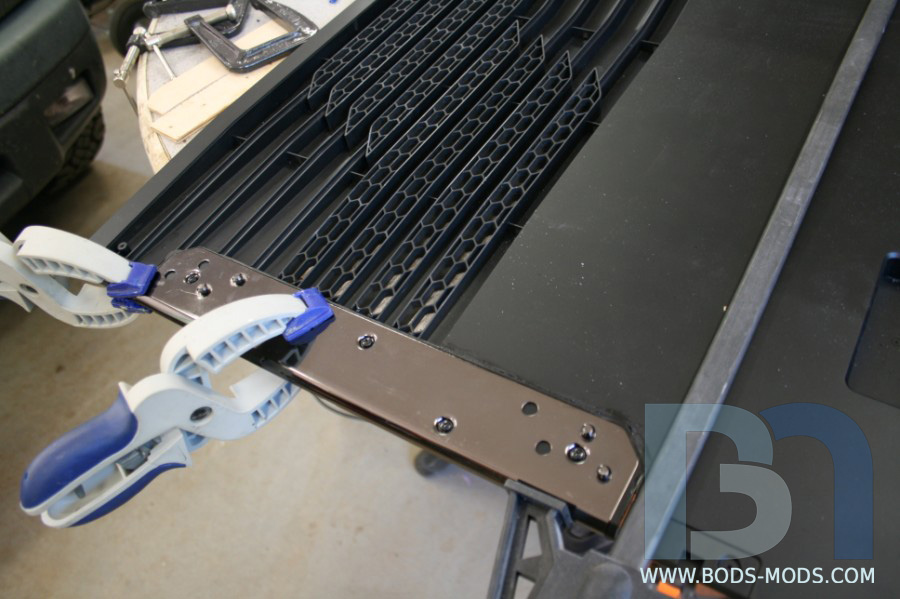
Made my own metal spacers from 5/16" stainless steel tubing. I took this shot before I deburred the ends.
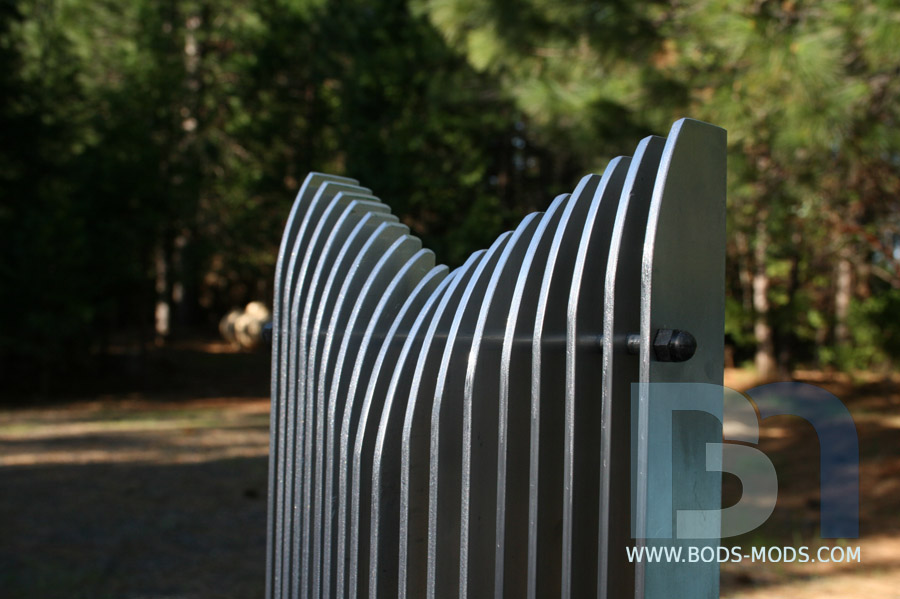
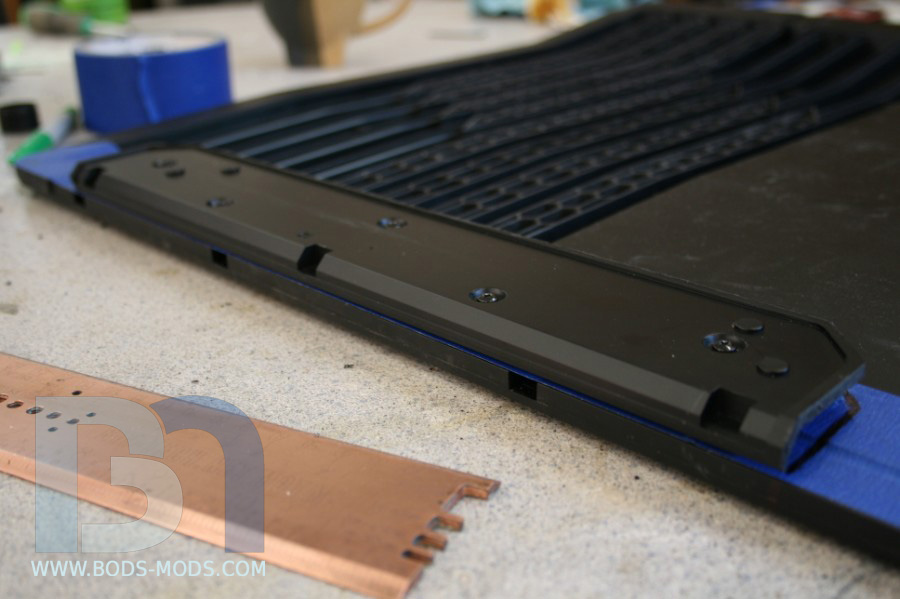
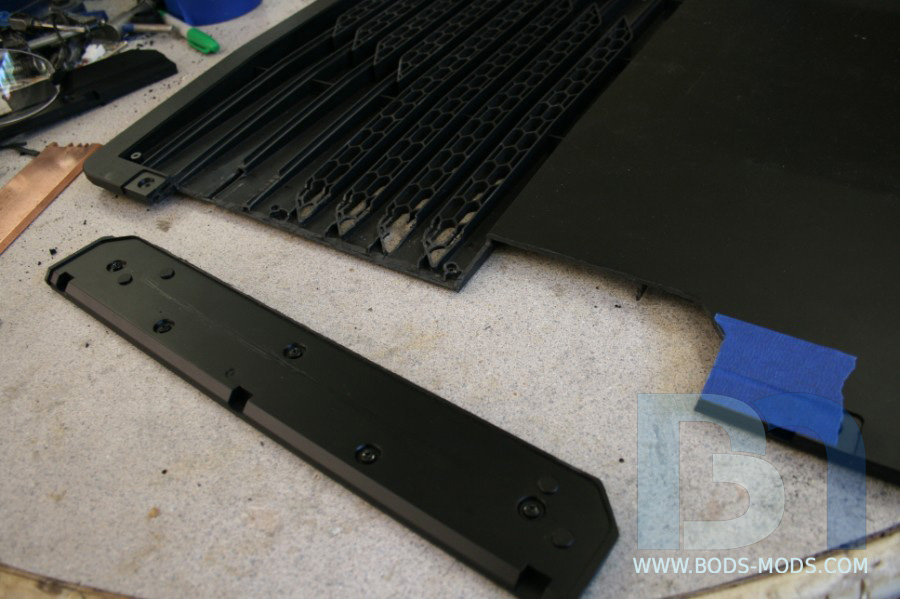
And I got the top ends of the bars rounded. This was kinda tricky since they are offset, and I needed to have the all curves end in a straight line so it will mate up with the top faceplate.
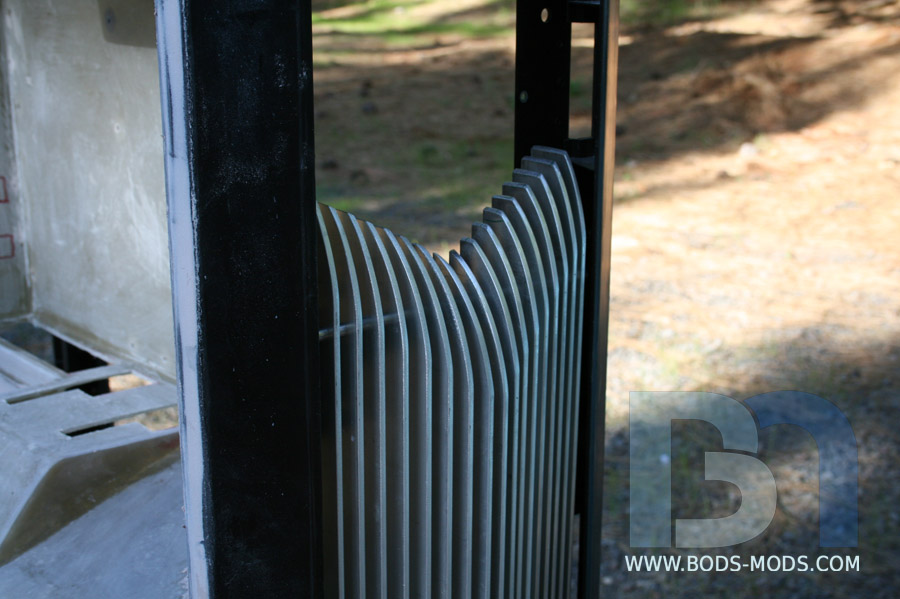
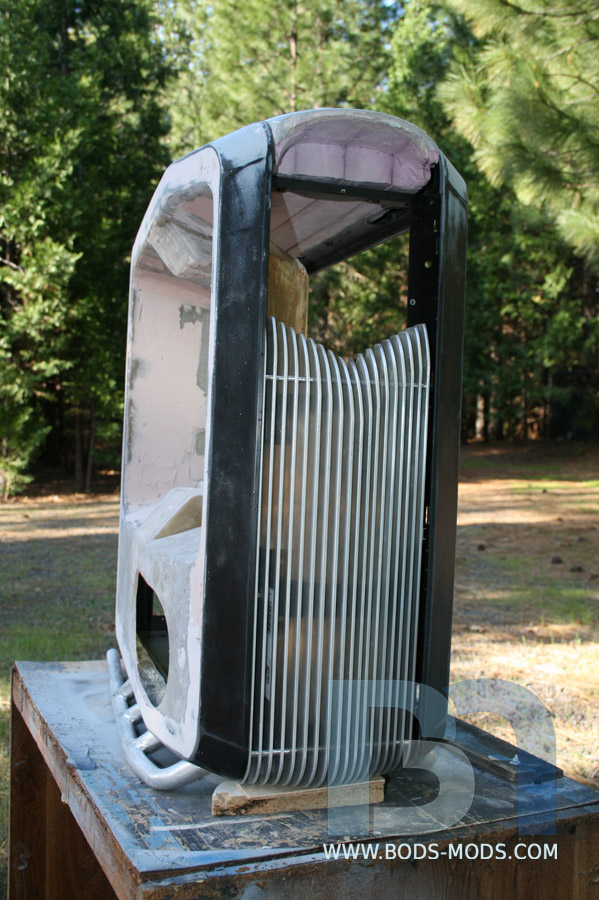
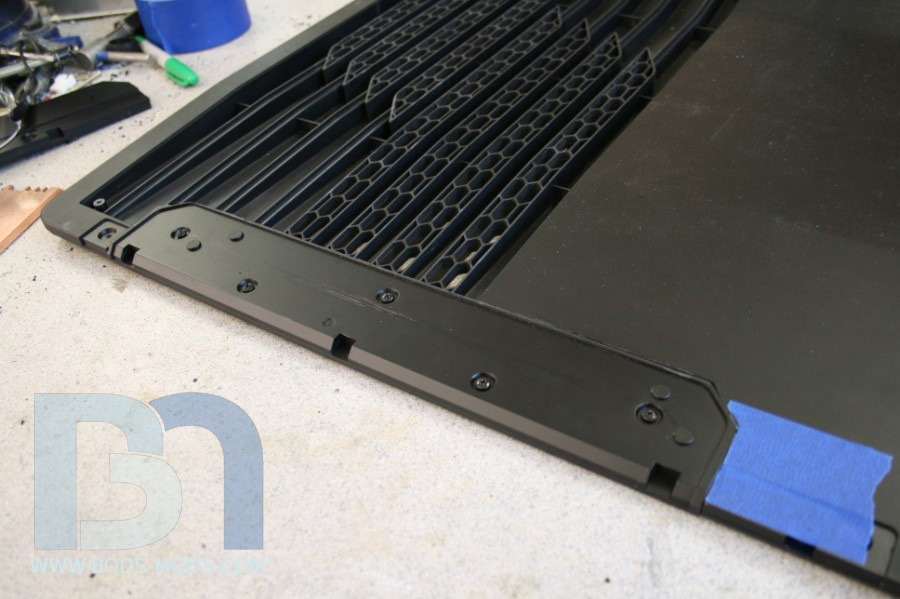
Here's a couple shots of the grill on the case..
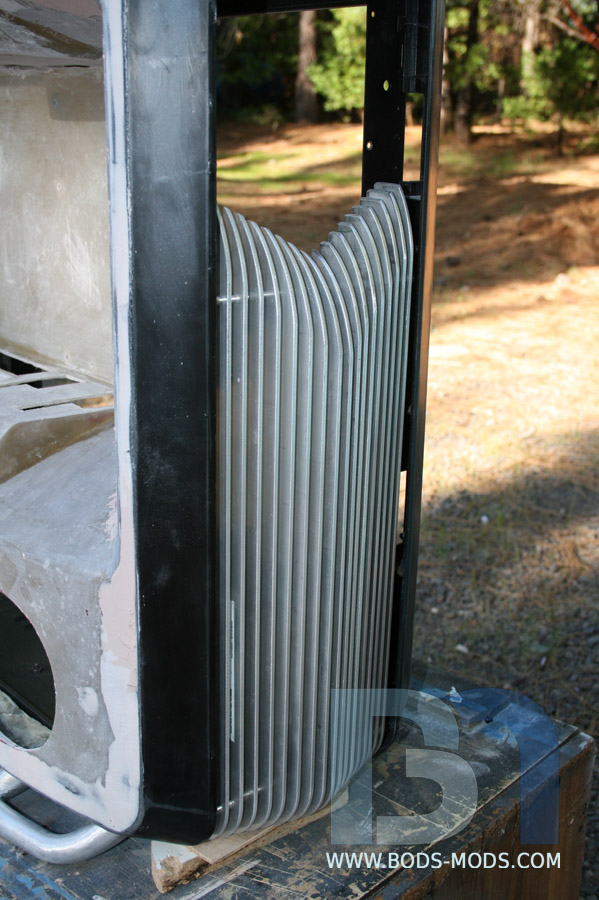
And an over-all wide shot.
Hoping to have a productive weekend, as the weather should be very nice.
Cheers!
Honey Roasted Peanuts Ingredients: Salt; Artificial honey roasting agents; Pressed peanut sweepings.

Well that just makes it even more AWESOME!!!
Originally Posted by SXRguyinMA

so far left of center i'm in right field
Thanks msmrx57!
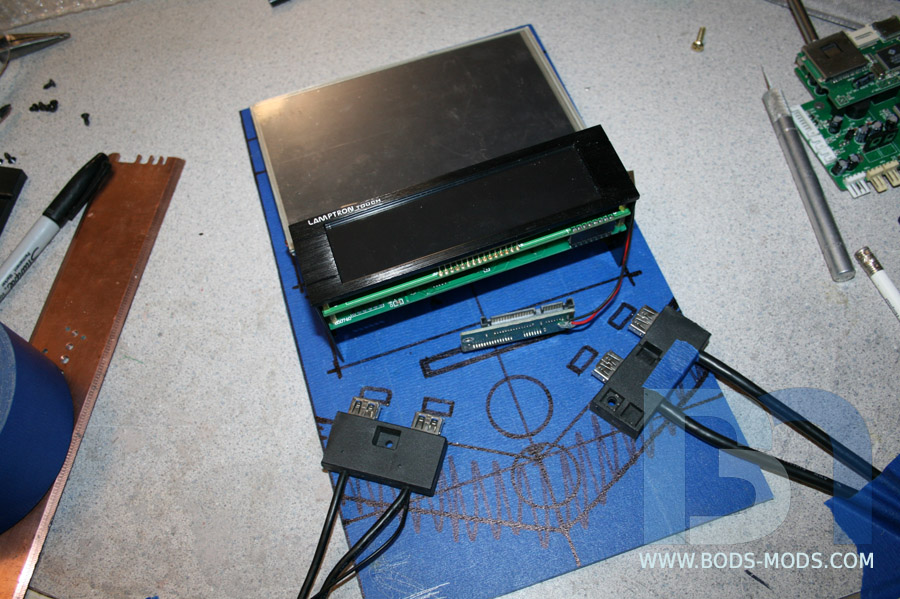
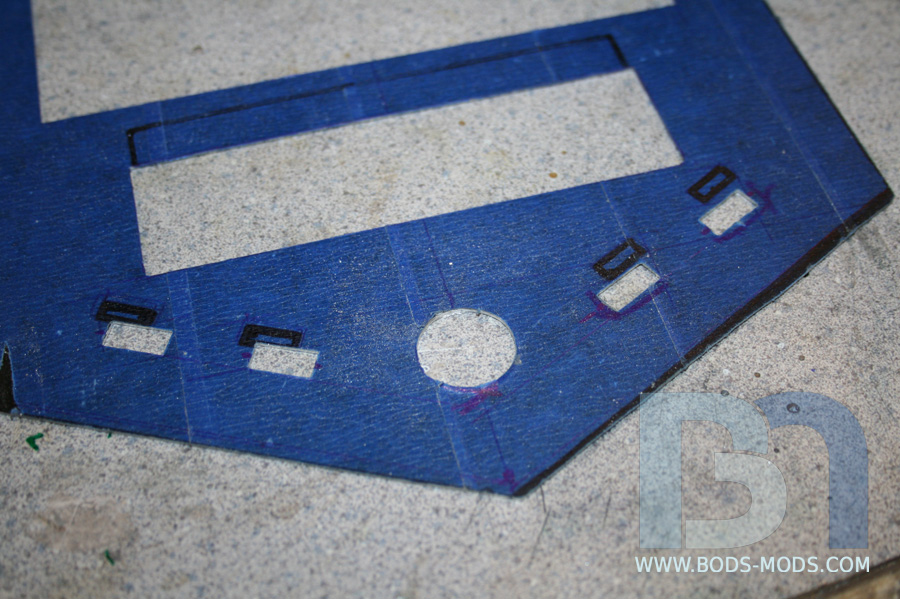
Well the weather did hold last weekend, but of course I got called into work on Saturday, robbing me of most of my modding time. But I did manage to get some work done on the front bezel. I started with a piece of 1/4" acrylic, mapping out the item placement.
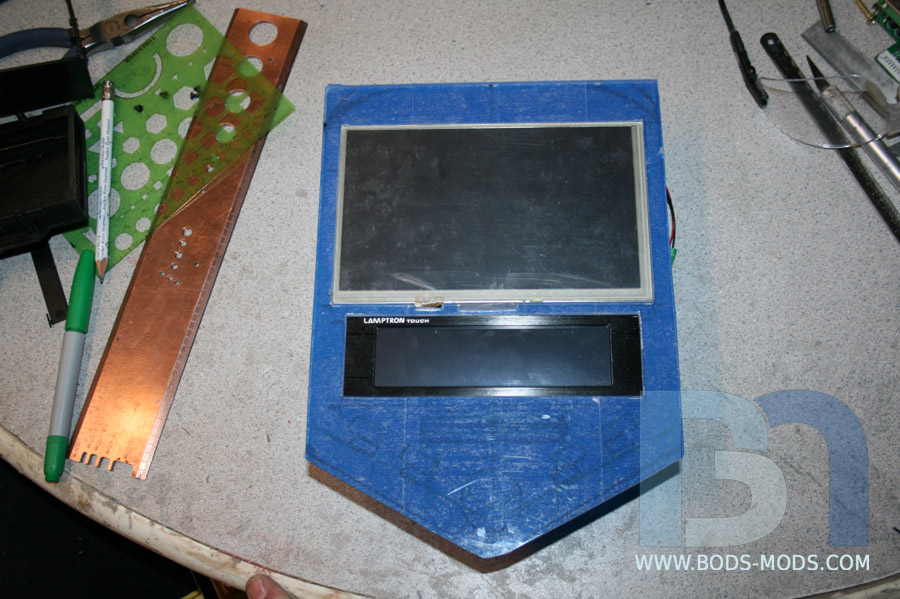
Here is what I'll be mounting in the bezel: 7" lcd touch screen, Lamptron Touch fan controller, a hot-swap 2.5" drive bay, a pair of USB 2.0 and USB 3.0 ports, and finally an ignition keyswitch in the lower center (not shown).
Once I got things where I wanted, I began cutting out the holes, then filing down to a nice snug fit.
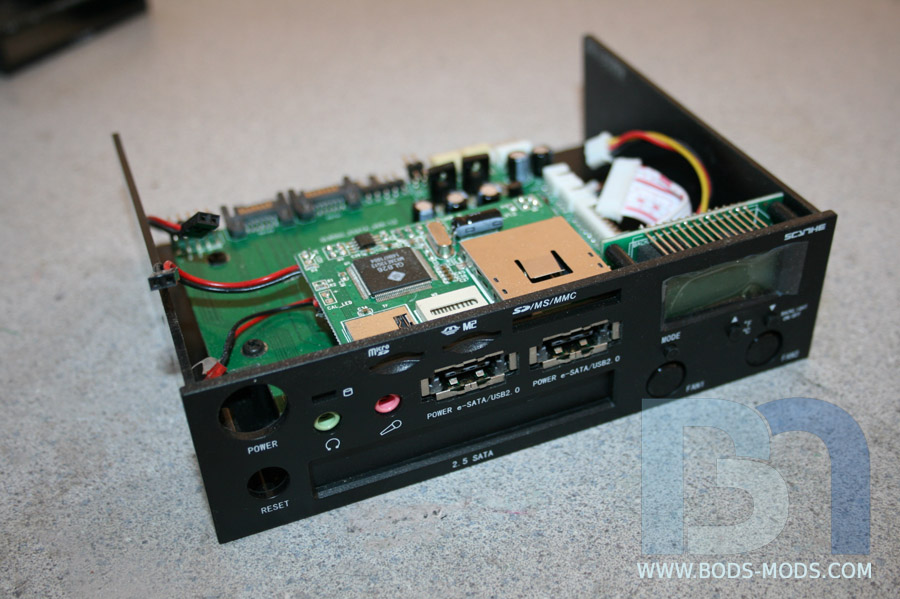
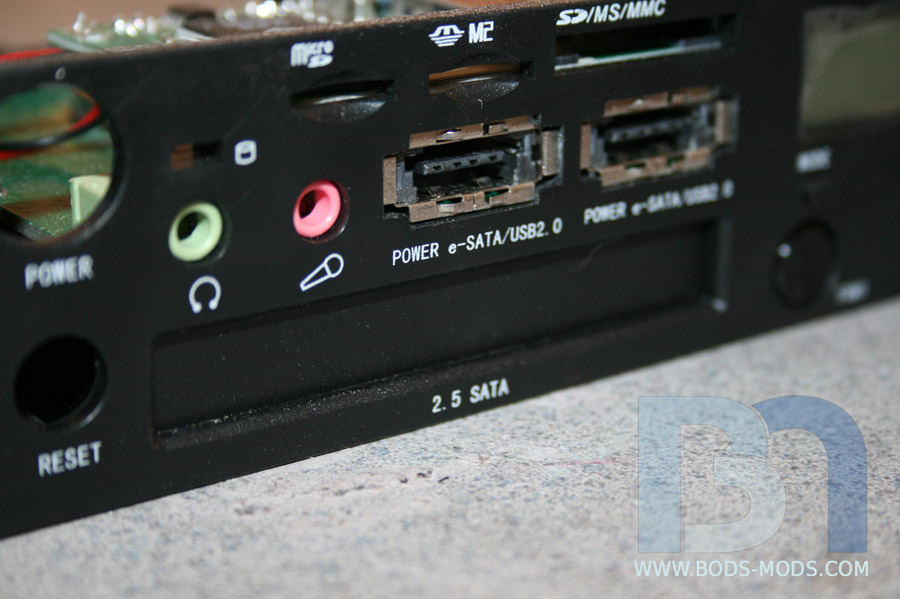
I found one of these all-in-one units lying around (big mistake on its part!) and thought I could utilize it in some fashion.
But I only wanted the 2.5" hdd bay.
So it got extracted from the rest. It will get mounted just underneath the Lamptron fan controller.
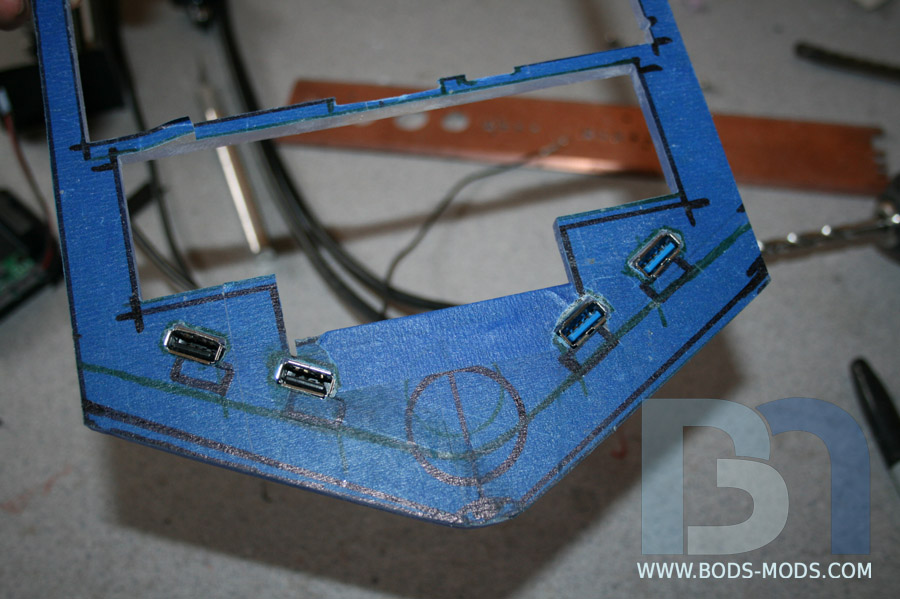
Here is a shot of the bezel after fitting the USB ports.
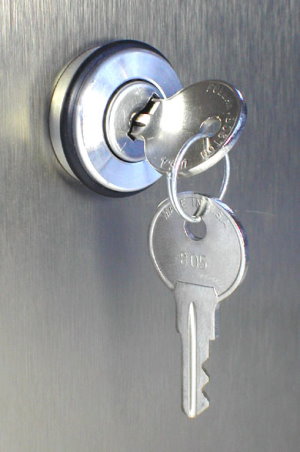
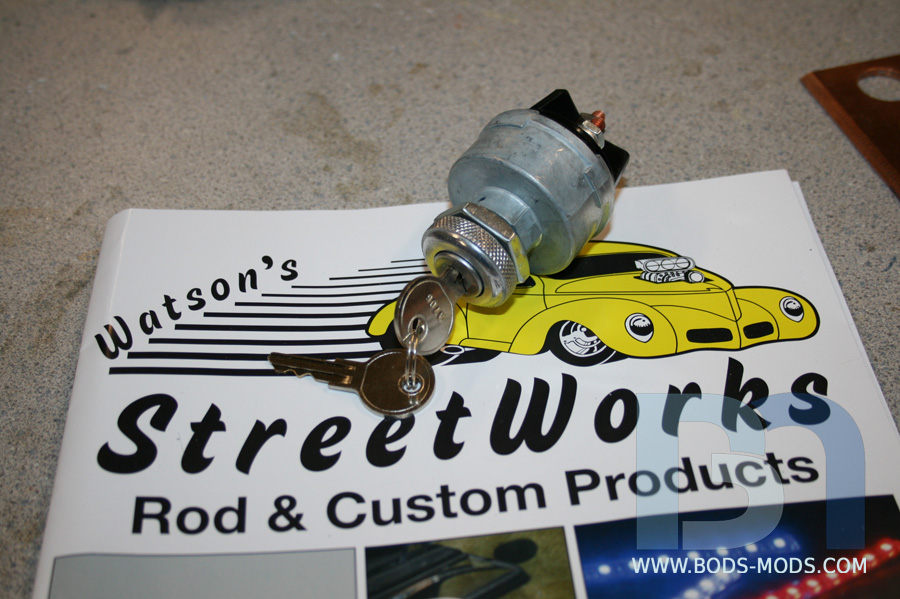
I haven't purchased it yet, but I'm thinking something along the lines of this for the Ignition switch. It has four detents: Off, Acc, On, and Start (momentary). I can use the Acc to turn on fans, or the pumps prior to firing up the computer.
Hoping to get mounting brackets made tonight, and possibly some finish work.
Honey Roasted Peanuts Ingredients: Salt; Artificial honey roasting agents; Pressed peanut sweepings.
Guess I'd better update this log, now that TBCS is back up and running.Got a few entries to post...
July 18
What's this?? A Cosmos Cruizer update?? :shock:
Yep, believe it or not, some progress has been made! Now that the Maker Faire PC is all but completed and ready to be delivered to NVIDIA, I can continue work on this. I'm really going to push to get this thing done, without any more breaks. So there will be a steady stream of updates from here on out!
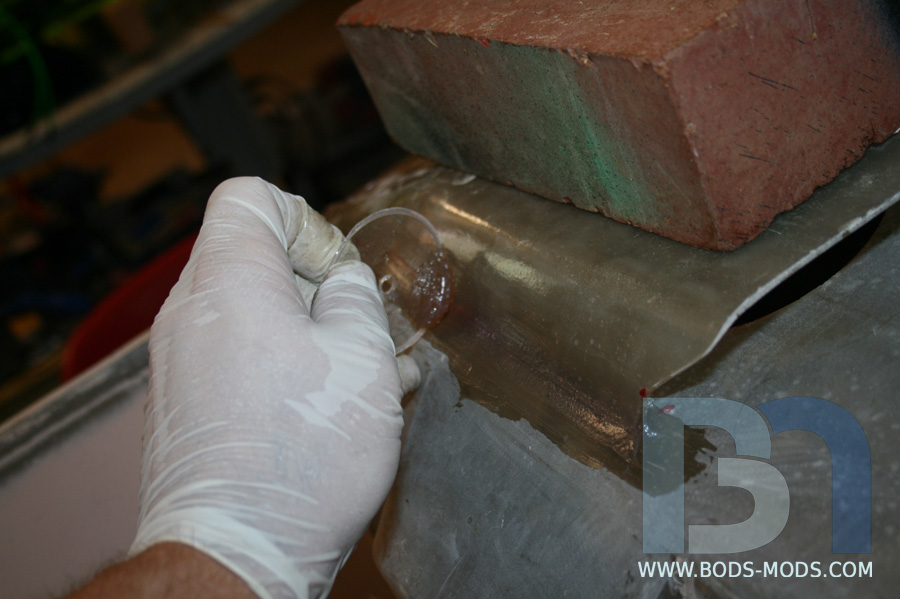
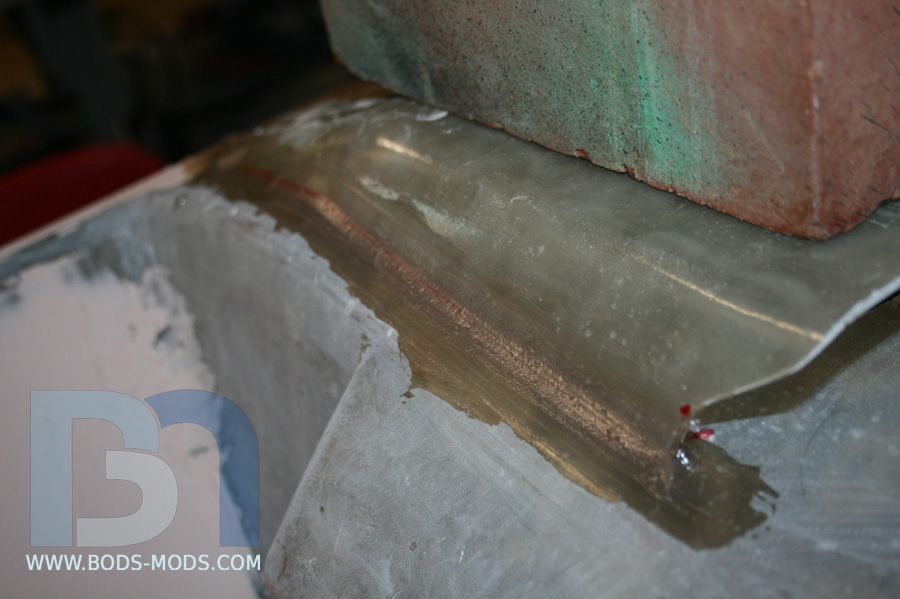
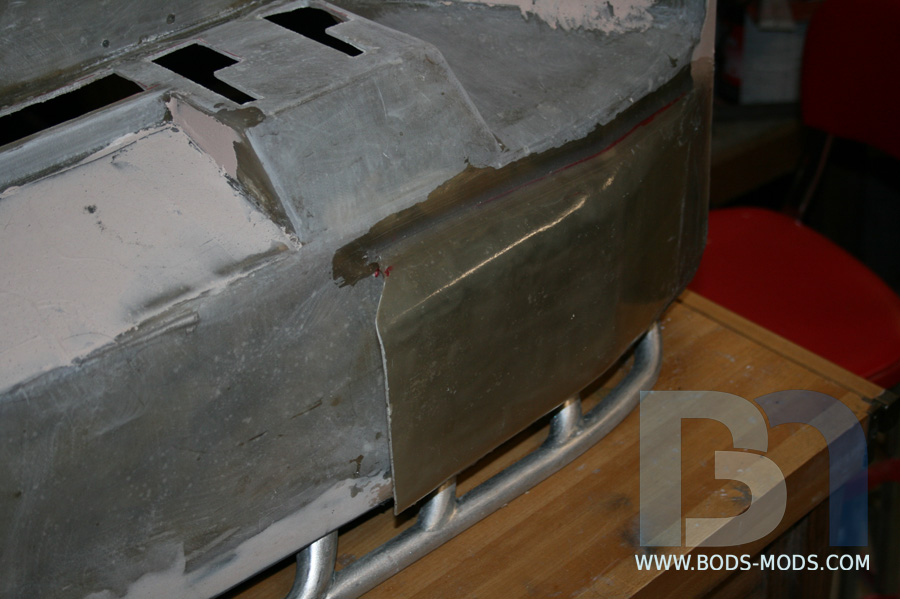
I've been slowly working on several components of the build simultaneously, one being the side scoops. I've got the form re-prepped to 'glass the second one, and I finally got the first scoop attached to the panel. I mixed up some resin paste and, after cleaning the surfaces, gooped it on the edges of the scoop and set it in place. Then I applied more paste all around it, inside and out. I used a 2" acrylic disc I had lying around to scrape off the excess paste, leaving a nice rounded fillet between the scoop and the panel.
I used a wooden dowel to get the inside edges. And I always employ the highest tech, state-of-the-art clamping/holding devices available to keep the parts stationary while gluing. ;-)
After a few hours, the paste had set up so I could remove the hi-tech holding device and put the panel on the case for a look-see.
This weekend, I'll do a little sanding and hit it with a coat of primer to see how it looks.
Feels good to be back at it. woot!
Honey Roasted Peanuts Ingredients: Salt; Artificial honey roasting agents; Pressed peanut sweepings.
July 22
So over the weekend I managed to cross a HUGE item off my to-do list... The Suicide Door!
Anyone familiar with the Cosmos II doors will know they are a royal PITA to do anything with because they are so complex. Just adding a basic window is a massive undertaking due to the door's varying thickness and compound curves. Well, not only am I adding a window, but I'm also relocating the hinge point of the door from the front of the case to the back, mimicking the old "suicide door" style seen on many custom rods.
This modification affects not only the door itself, but the side bezel and case chassis need to be altered as well. But first up is the door panel. I took the left door, removed the aluminum door skin, and flipped it so the solid part was at the bottom. But in order for the hinges to work properly, I had to harvest it from the other door.
So I took the dremel and separated the hinge from the donor door.
Marked its new position on the back side of the new door.
After removing that portion, I did some test fittings until the new hinge fit perfectly.
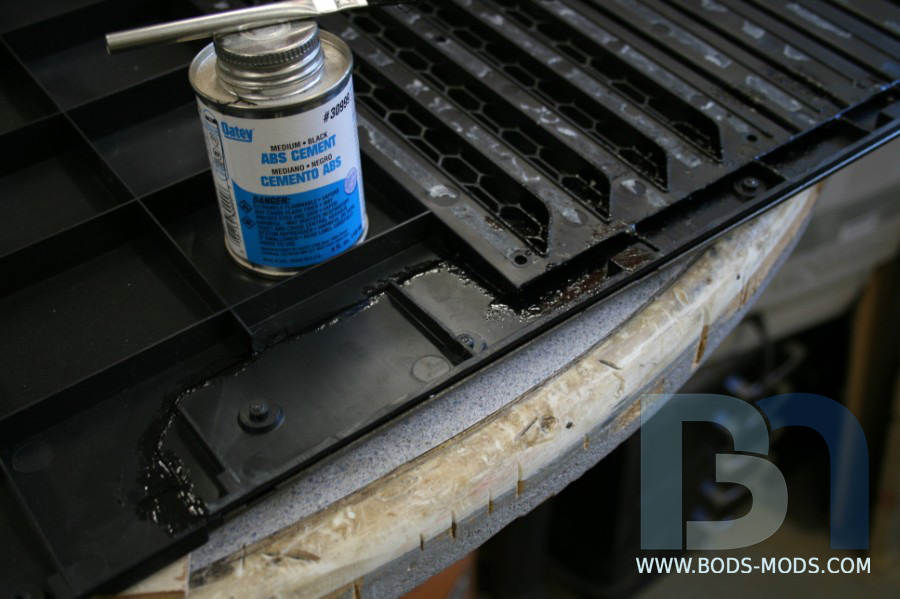
Then I glued it into place. I screwed the metal hinge in temporarily to give it more rigidity while gluing and to check for level.
After the initial tacking set up, I used some ABS cement to fill in all the gaps and add reinforcements where needed.
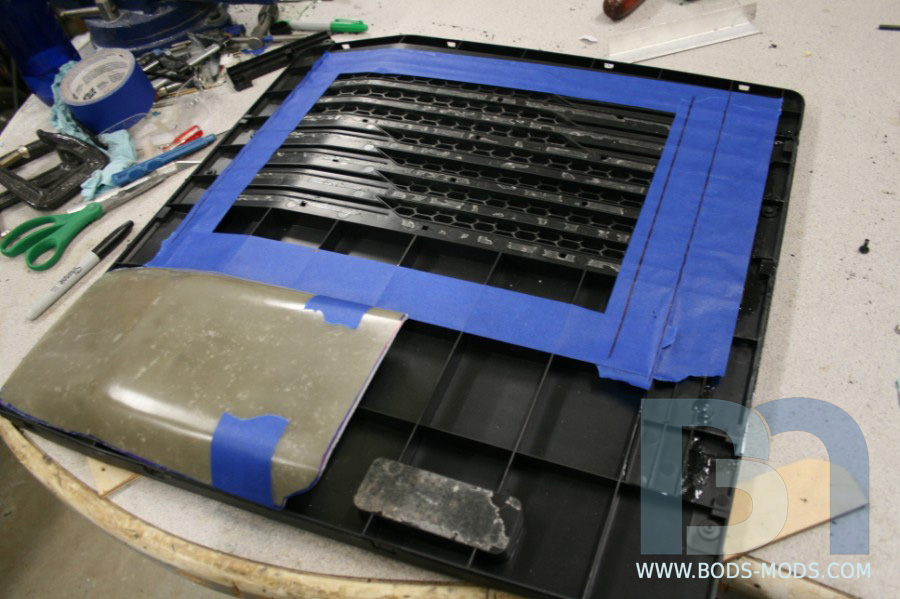
Once the new hinge was in place, I turned the door over and started marking out the window. I added the side scoop on for a quick visual.
After I was satisfied with the window arrangement, I proceeded to cut it out.
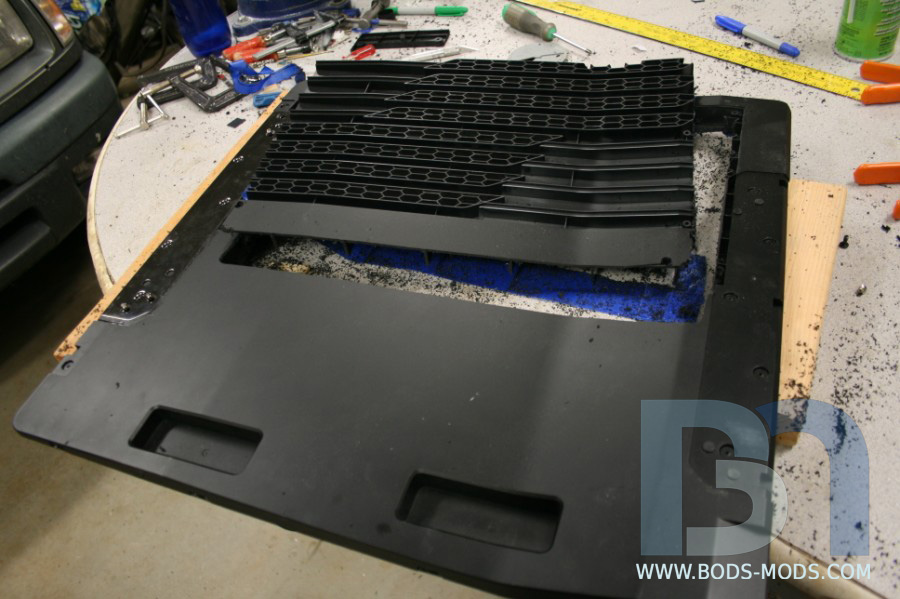
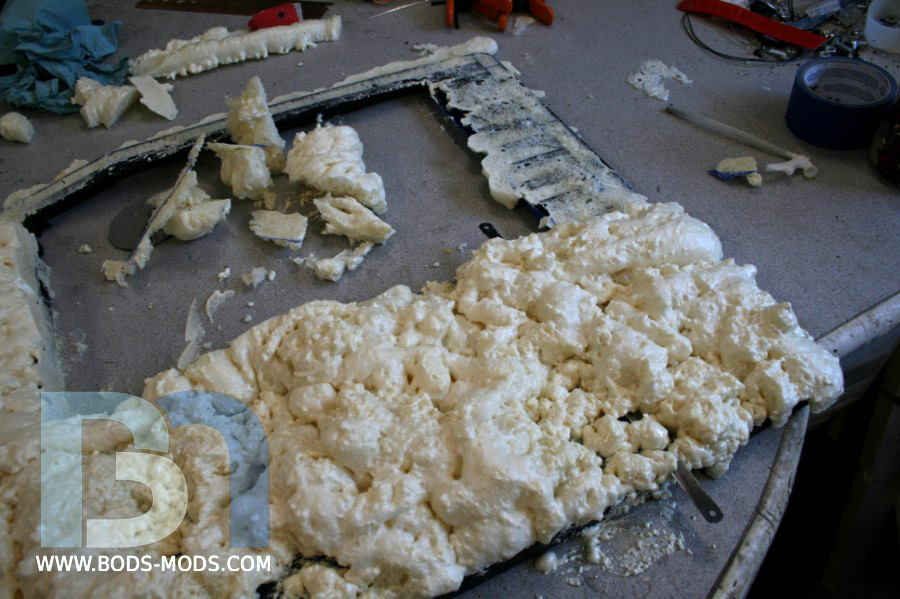
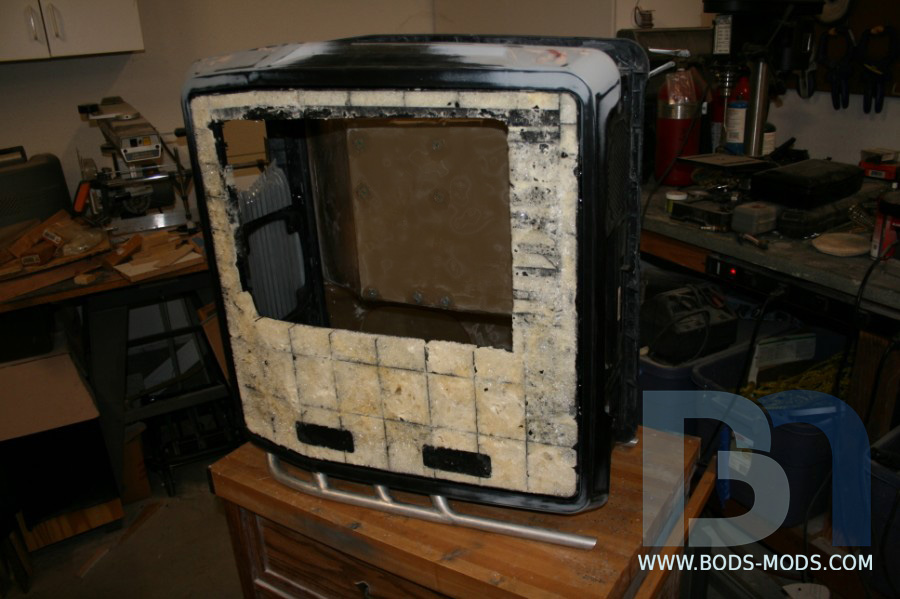
Next I prepped the core for foam by taping off the window edges and roughing up all surfaces. Adding foam in the center will allow me to re-skin the door in fiberglass, and also aid in sound deadening.
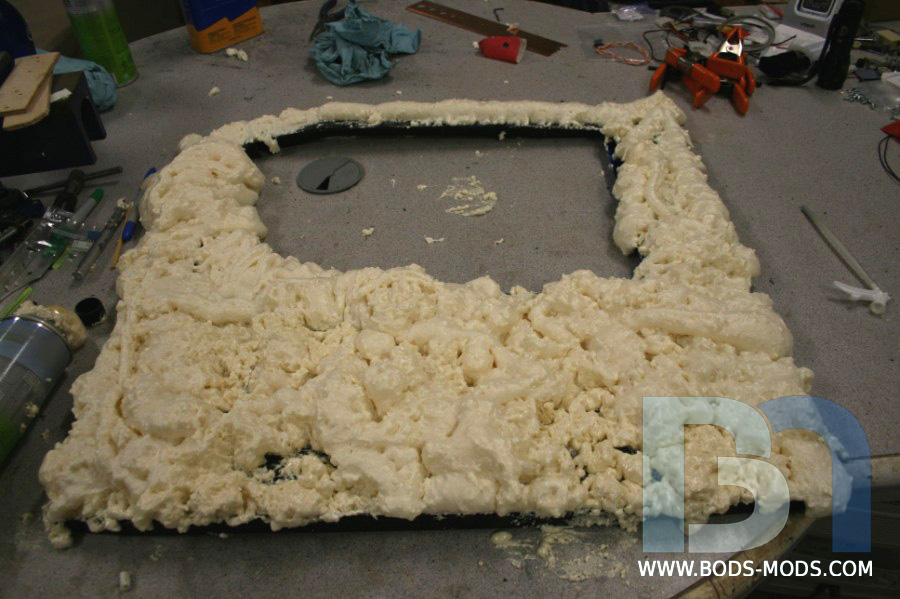
Let me just state for the record that I despise spray foam in a can! You can never use this crap more than once or twice, otherwise the tip gets clogged, rendering the nozzle useless. So you use a screwdriver to try and clear the passageway, and you end up breaking it off, sending spray foam all over the garage! (TIP: If you get spray foam on your clothes or in your hair, wait until it cures before attempting to remove it. Much easier! lol )
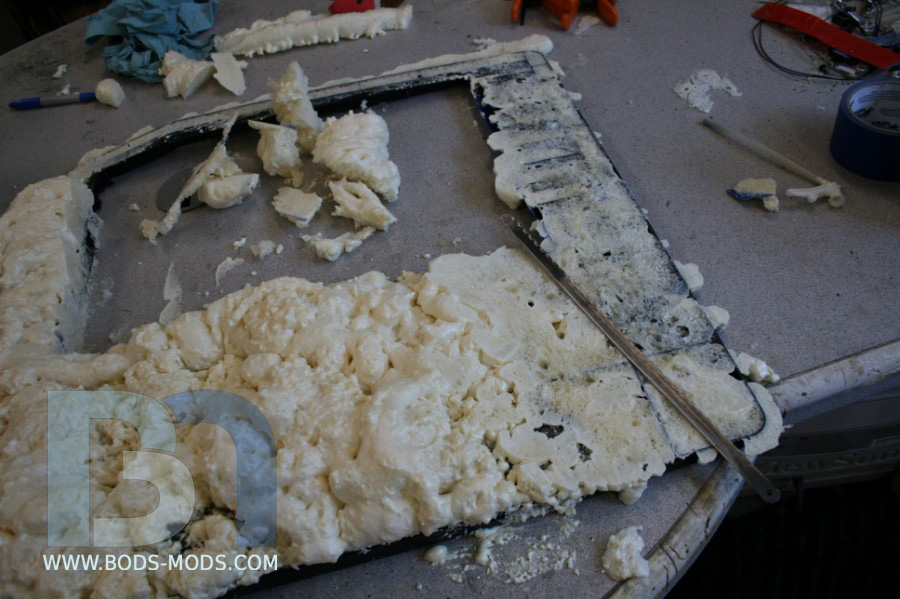
After the foam cured, I took a hacksaw blade to carve away the excess.
I was able to use all the ribbing as a guide to get the foam flush.
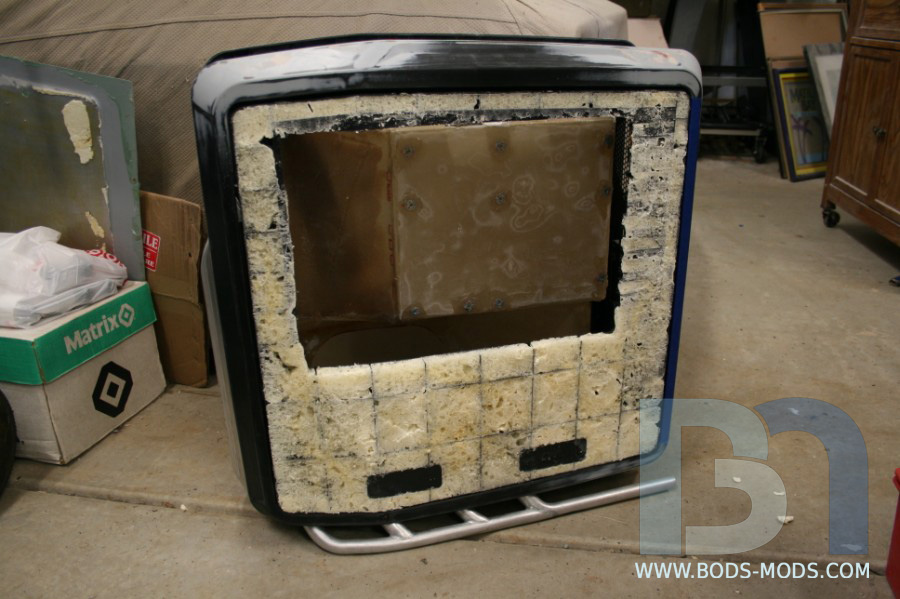
And a quick final shot of the door on the case...
Next up I'll get to the door frame and chassis modifications.
Honey Roasted Peanuts Ingredients: Salt; Artificial honey roasting agents; Pressed peanut sweepings.
July 23
Now that the door hinge is moved, I need to modify the door frame to accept the new hinge location. This was relatively easy, since I just had to transfer the measurements for the two notches from one side of the frame to the other.
An overall shot of the frame.
With that done I could mark the hinge locations onto the chassis.
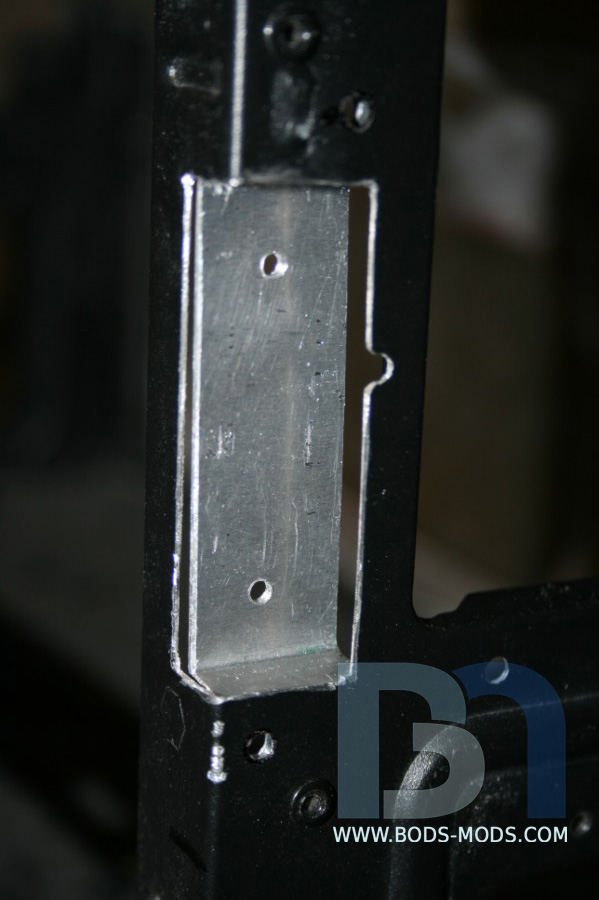
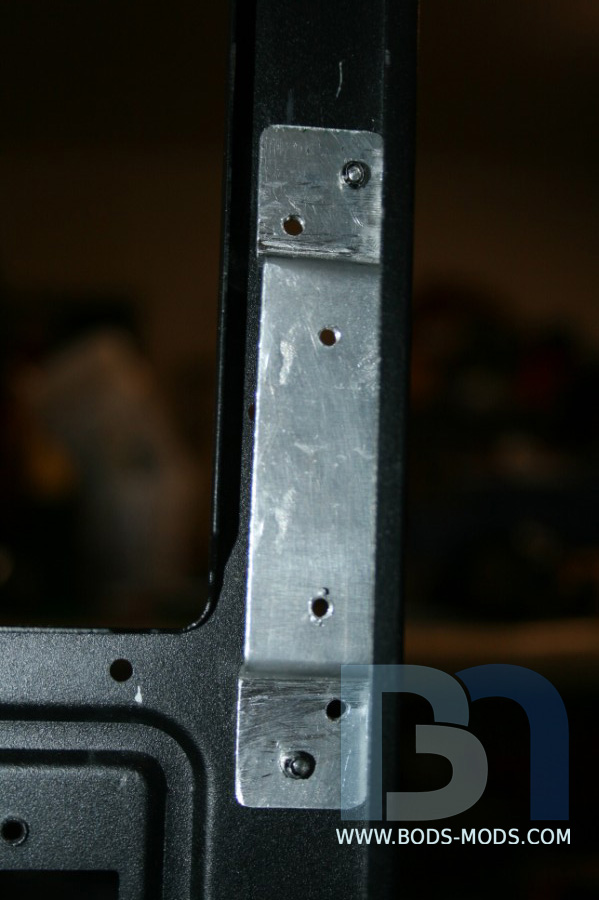
I went to town on the chassis, cutting out the marked areas and fabricating some brackets to fit in behind. This proved quite the challenge, since the bracket's positioning was crucial to having the door line up correctly.
A couple close up shots of the bracket, from the outside...
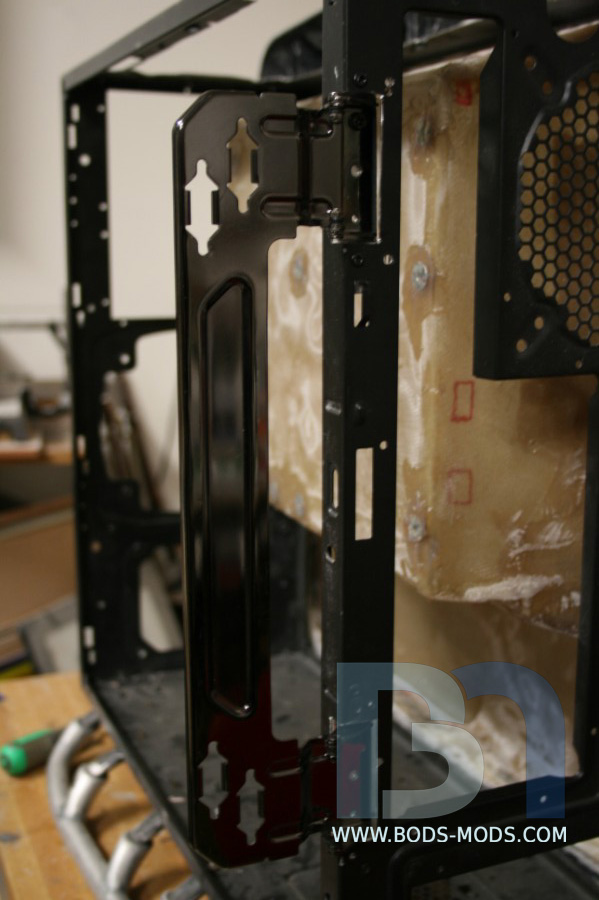
...and from the inside.
Mounting the hinge...
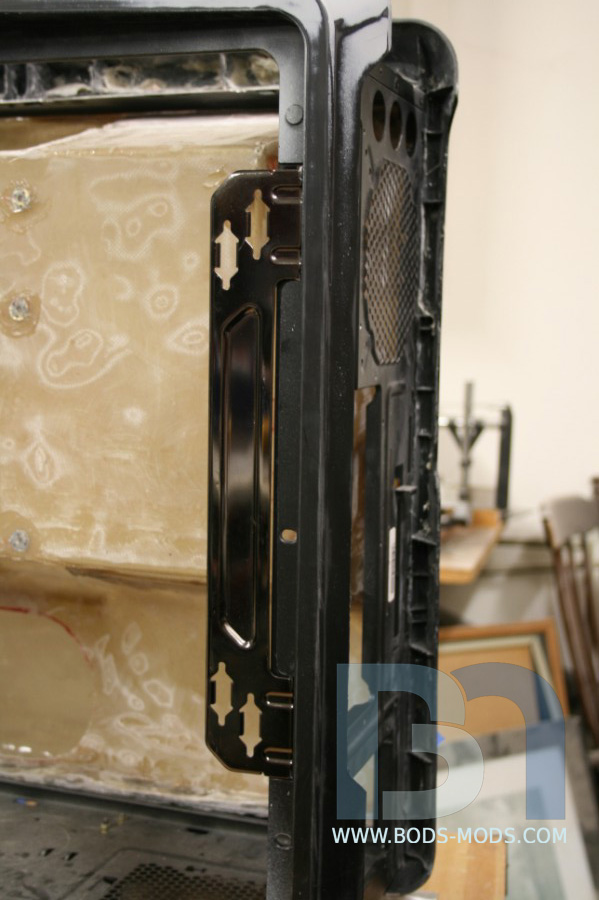
Test fitting with the door frame...
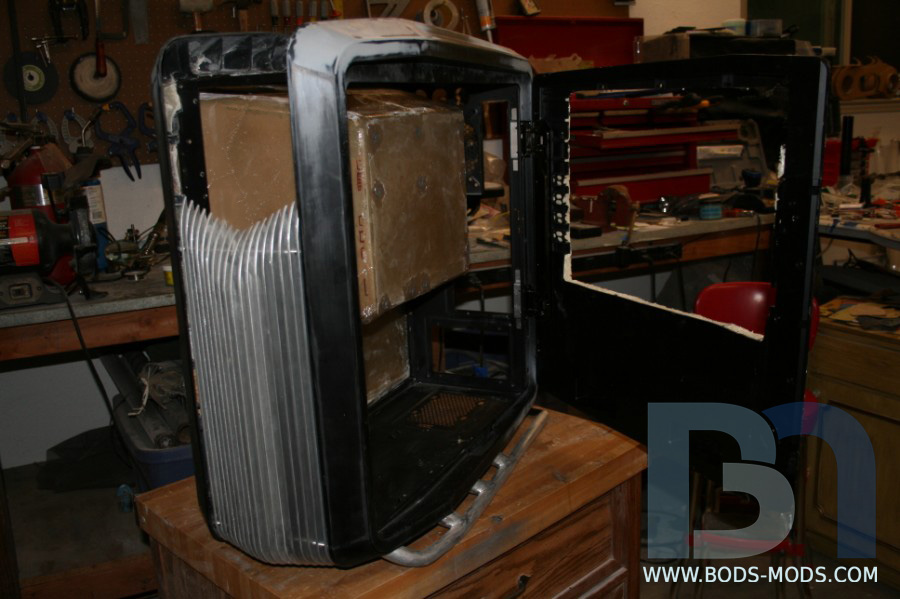
... and with the door.
After a few adjustments, I could then permanently secure the brackets to the chassis with black pop rivets.
Next step is adding a fiberglass door skin over the foam, unfortunately I ran out of resin and need to order more.
Honey Roasted Peanuts Ingredients: Salt; Artificial honey roasting agents; Pressed peanut sweepings.
July 24
I also managed to get some more fiberglassing done last weekend as well. It was a fine display of mindful modding multitasking.
Here are a couple shots of the second side scoop I made.
After it cured, I started trimming it down, matching the original. Here is a side-by-side comparison in mid-trim.
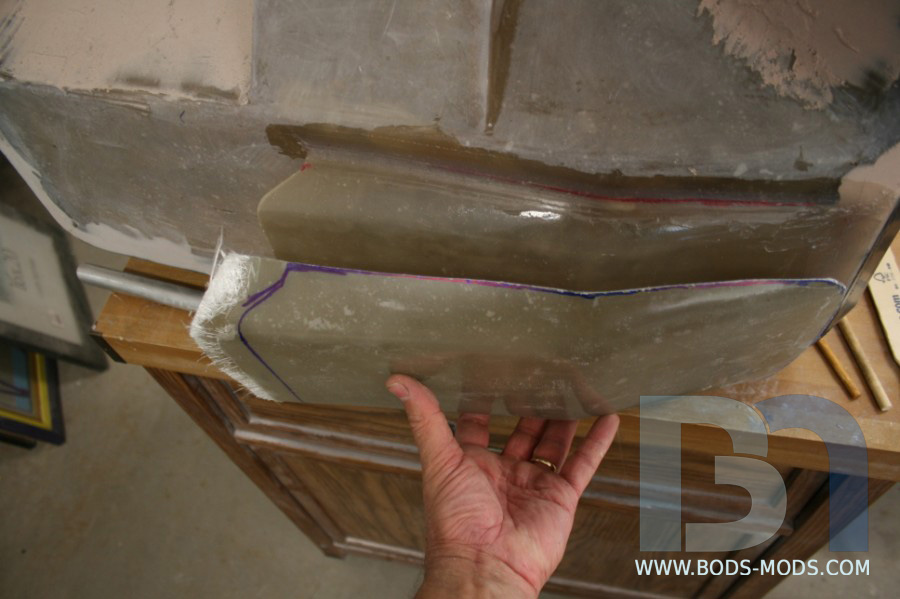
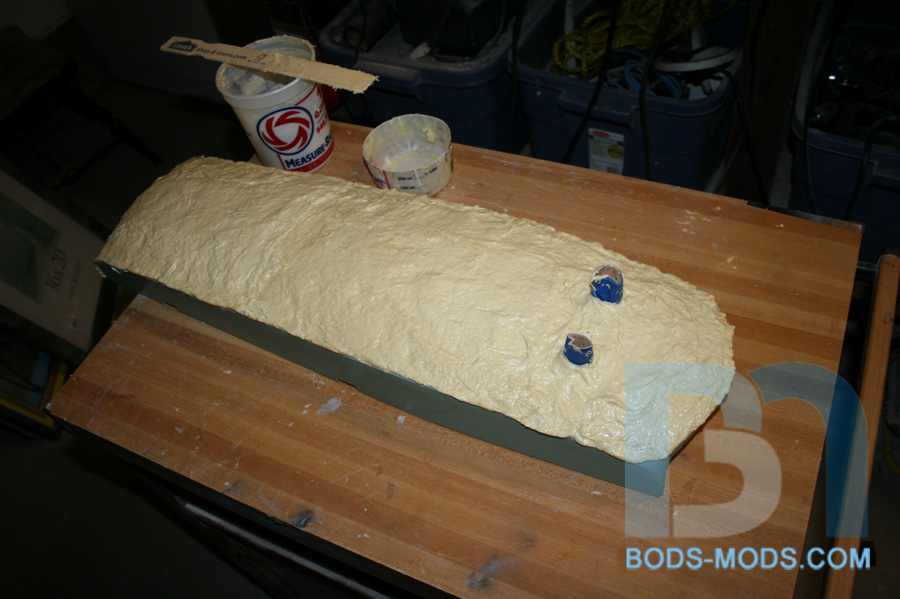
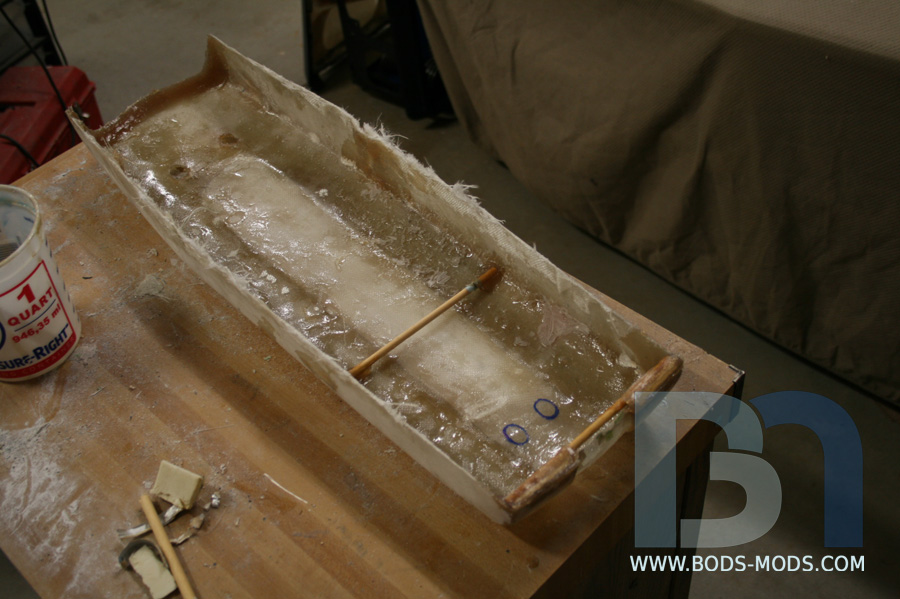
I also made significant progress on the top panel. I was not happy with how the epoxy dough mold came out last time, so I ditched that in favor of a new Plasti-Paste mold. The epoxy dough, as I found out, would not stick to itself which was crucial since I had to make the mold in two parts. So here is the first part of the plasti-paste mold, the top.
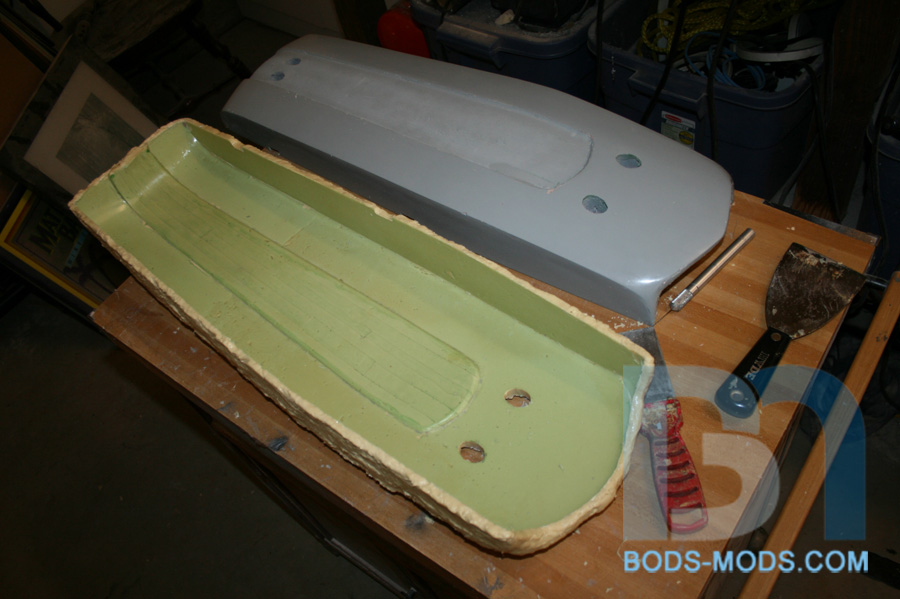
With the top piece fully cured, I could demold it, then proceed to add the sides. I had to do this in two parts because it would be almost impossible to demold it all at once without ruining the original form.
I set the top back on the form and added the sides and front. Once that cured I could demold the entire things as a whole.
Had a bit of trouble with the fiberglass lay-up this time. I had mixed too much hardener in the resin and it started curing too fast, so I only managed to get two layers of cloth down. And I had just used the last bit of resin so I couldn't mix up any more. It's probably ok, but I think I will want to add some form of reinforcement underneath for strength. I will have to add some mounting posts or something to secure it to the case anyways.
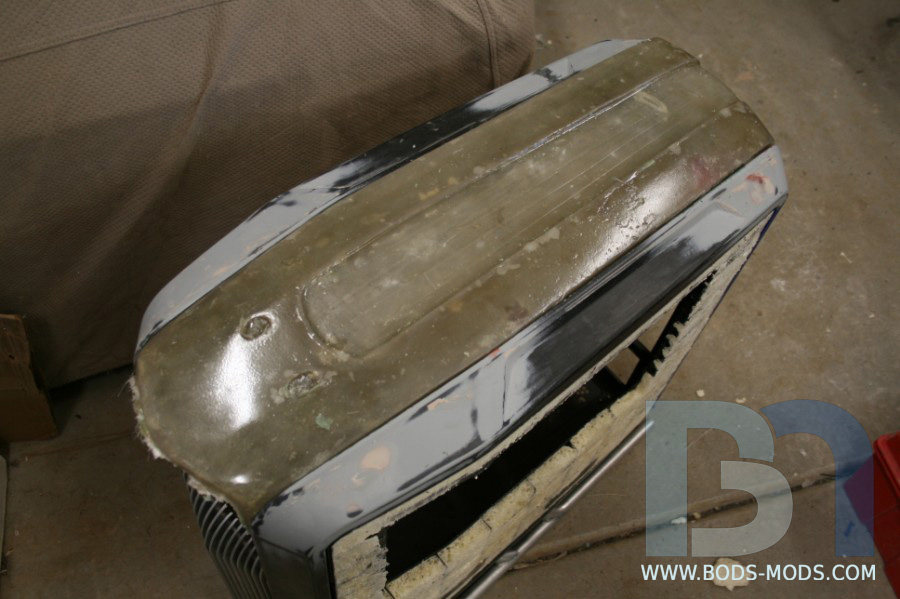
Here's a shot of the top panel on the case. It's not pretty, as it still needs to be trimmed, but I can work with it.
Work continues!
Honey Roasted Peanuts Ingredients: Salt; Artificial honey roasting agents; Pressed peanut sweepings.
August 8
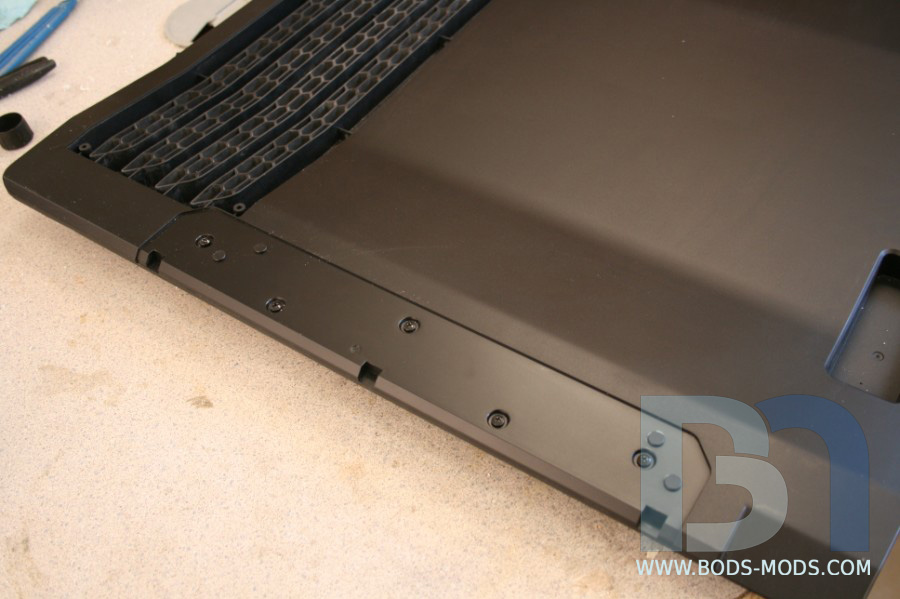
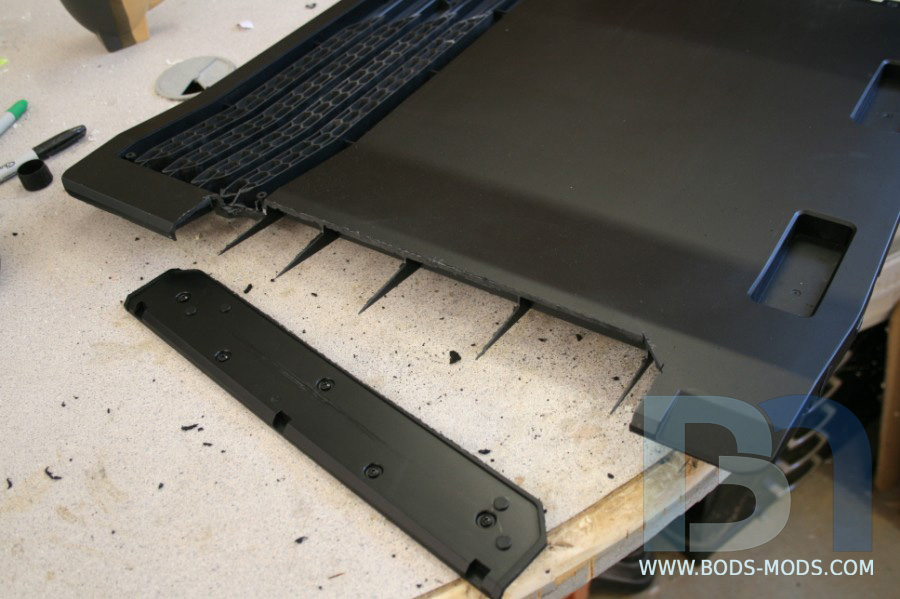
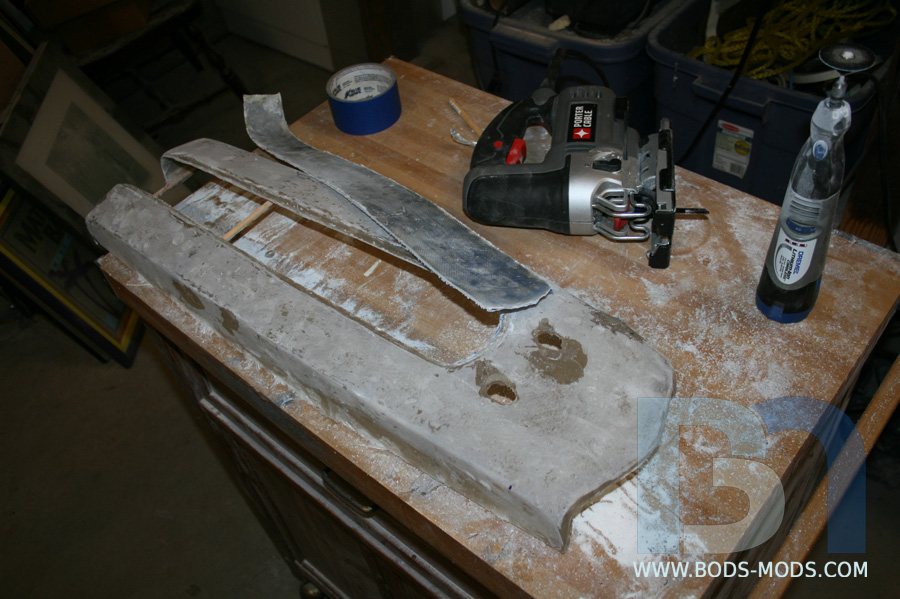
More progress on the top panel! I got more resin in, so I was able to mix up more paste and fill in bubbles and other problem areas. I also added some temporary dowels underneath in preparation for cutting away the center section. This will reinforce the piece and help retain its shape.
Center section cut out.
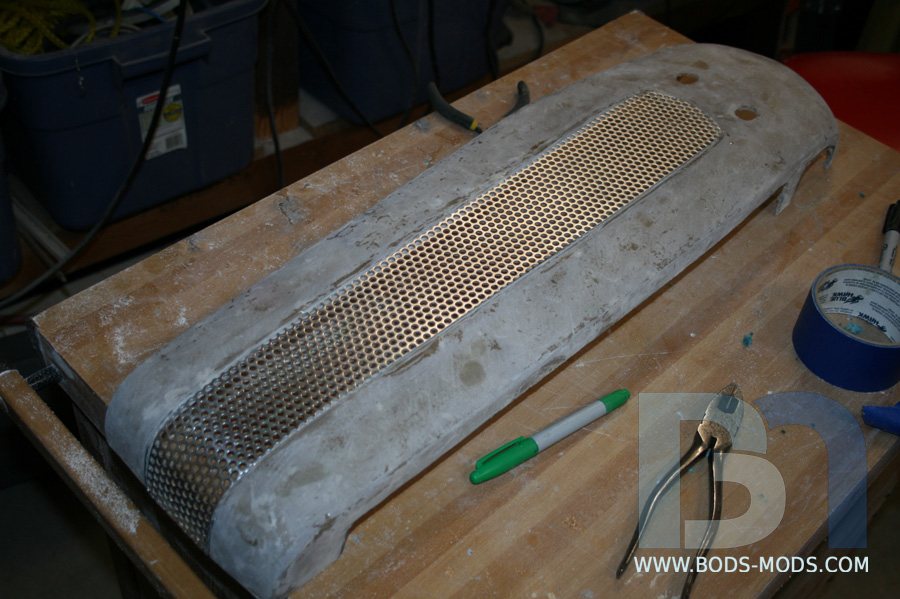
Now I can work the edges and smooth out the lip where the mesh will sit.
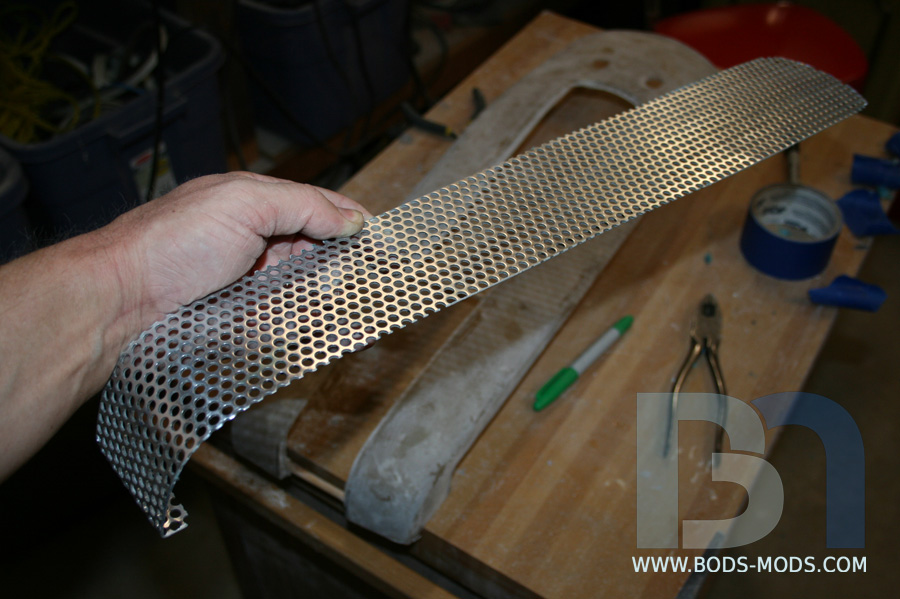
I cut out a piece of mesh roughly to the size of the center area and marked the edges.
Here's the mesh after cutting and bending the back end down and around the bottom.
After some additional cutting and filing, I got the mesh to sit flush with the top surface.
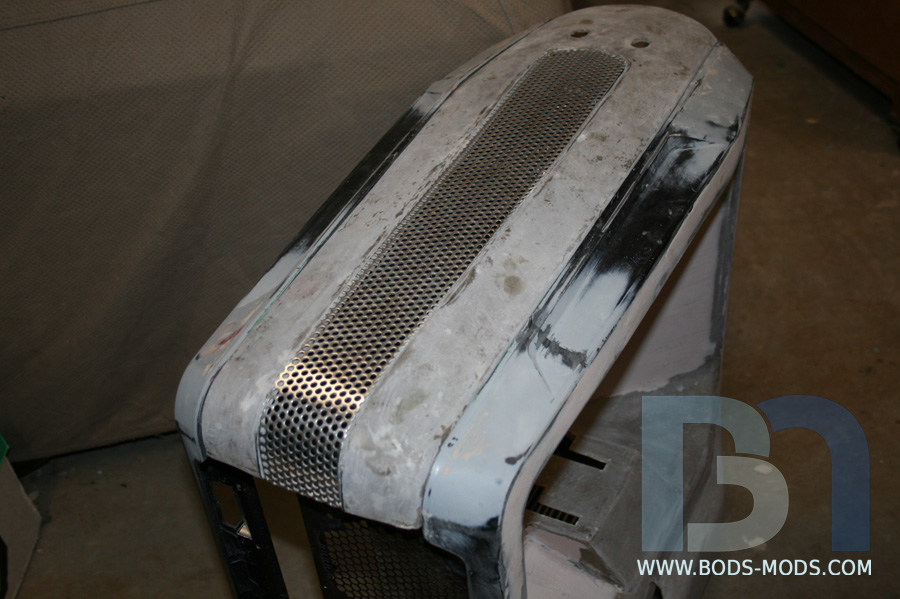
I placed the top panel with mesh onto the case for a look-see.
It's getting there! Still have some bodywork to do to smooth it out a bit more, and I have to add holes in the mesh for the top bars. If all goes well, I might be able to get a shot of the whole case this weekend, with everything assembled thus far. Maybe even a coat of primer on it all so its all one consistent color! :shock:
Honey Roasted Peanuts Ingredients: Salt; Artificial honey roasting agents; Pressed peanut sweepings.
August 9
Thanks guys, I can't wait either!
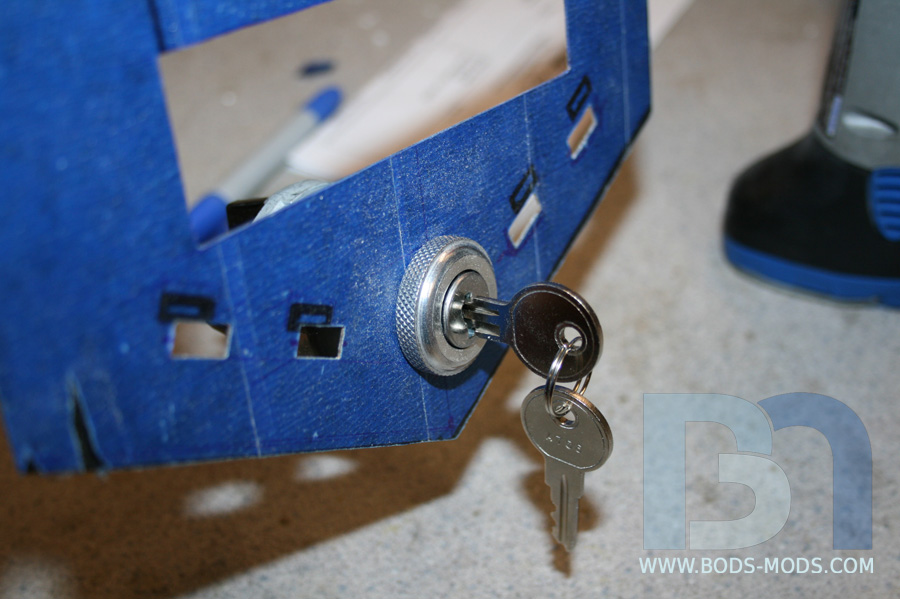
Ordered the 4-position key switch from Watson's Streetworks. Super fast shipping, only took 2 days from New Hampshire to CA.
Drilled a 3/4" mounting hole in the front faceplate
And did a quick pre-fit to see how it looks.
Looks pretty good, however, if I can find a better looking finish nut without the knurled sides, I'll swap this one out. But it will suffice for now.
I'm hoping to get the whole front bezel assembled and mounted on the case this weekend, and get the top panel to fit over it. This has been one of the most difficult parts of the build because the top front of the case is where everything meets, and is the most visible, so it has to line up perfectly. Not to mention I'm creating both the top panel and front bezel completely from scratch, which compounds the situation. I predict more trial fits in my near future!
Honey Roasted Peanuts Ingredients: Salt; Artificial honey roasting agents; Pressed peanut sweepings.
 Posting Permissions


 Reply With Quote