Can't wait to see more!


Can't wait to see more!

Got my fiberglass supplies in!Hoping I can lay up the side panel this weekend if the weather holds up.
Pics to follow of course!
Honey Roasted Peanuts Ingredients: Salt; Artificial honey roasting agents; Pressed peanut sweepings.


Awesome.. I have been waiting for some motion on this! Well I should specify .. the side panel.
Ok, so I didn't get as much work done over the weekend as I thought. In fact, I never even got a coat of primer on the plug. Still sanding and perfecting the surface because it has to be absolutely flawless. Any blemish on the plug will be transferred directly to the finished fiberglass piece. So better to try and eliminate all the issues now, than have to fix it later.
That, and this was the last great weekend weather-wise before the rains come this week, and I spent it with the kids doing Halloween stuff. :mrgreen:
But I did promise pics, so here's my progress thus far...
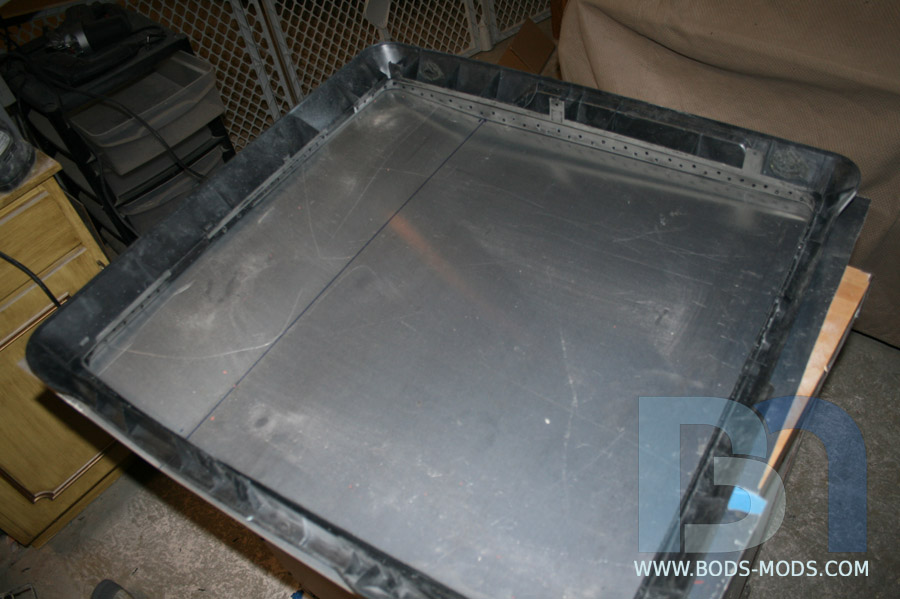
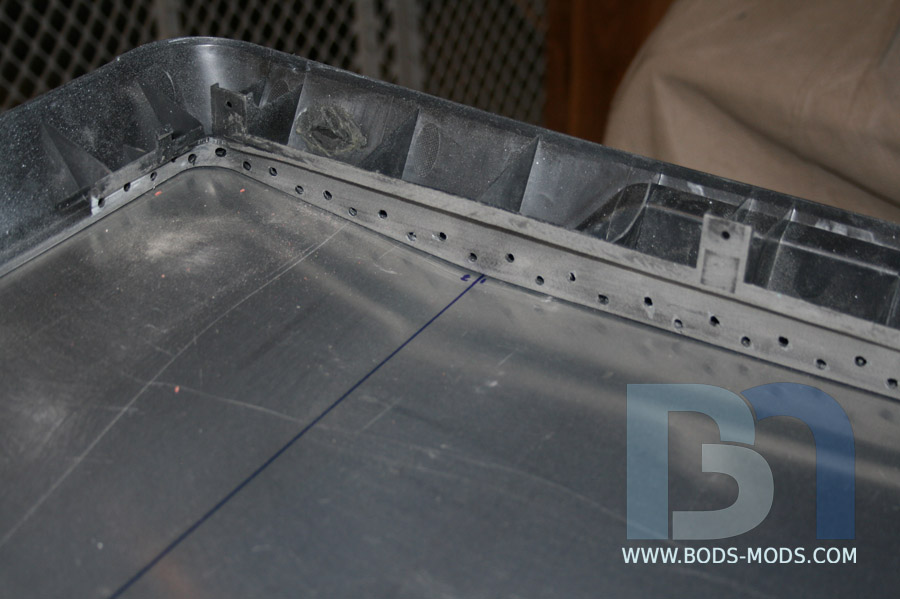
When all is said and done, the side panel trim piece will be integrated with the new fiberglass panel, so it will all be one unit. So more preparation was done to the trim piece. Holes were drilled all along the inside edge to help facilitate the adhesion of the fiberglass to the plastic. Typically, the two materials don't stick to one another, so the holes will allow the resin to flow through the plastic. I'll add the fiberglass cloth to the back side as well to sandwich it together.
I bent a sheet of aluminum to match the curve of the side panel. The bend was very slight, all I had to do was set it over a 4" acrylic tube and apply a small amount of downward force to replicate the curve.
I set the trim piece face down onto the alu sheet. Here's a closeup of the curve.
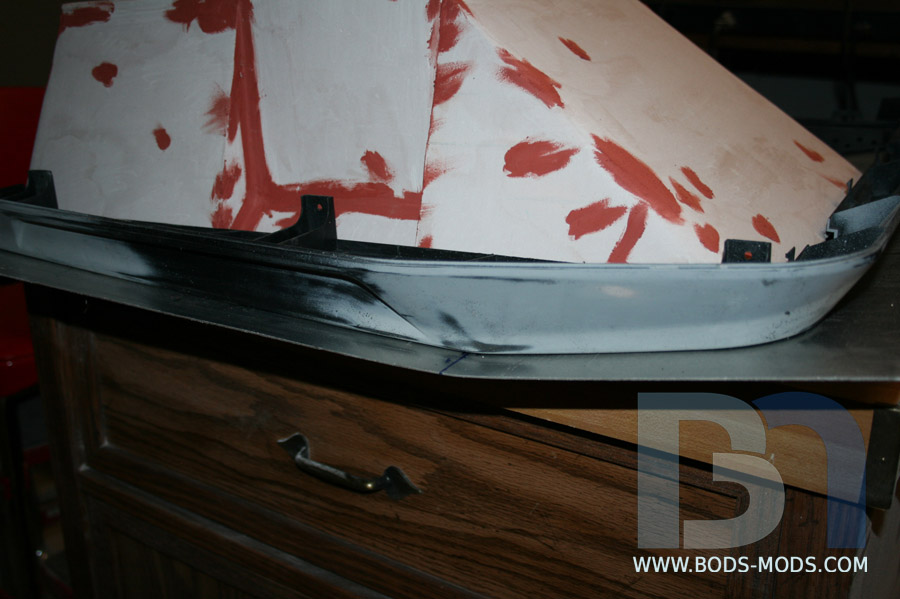
Using the trim piece as a guide, I placed the plug on the sheet and marked it.
Here's a closeup again showing the curve of the alu sheet. It will serve as a backing for the fiberglass, and support for the plug.
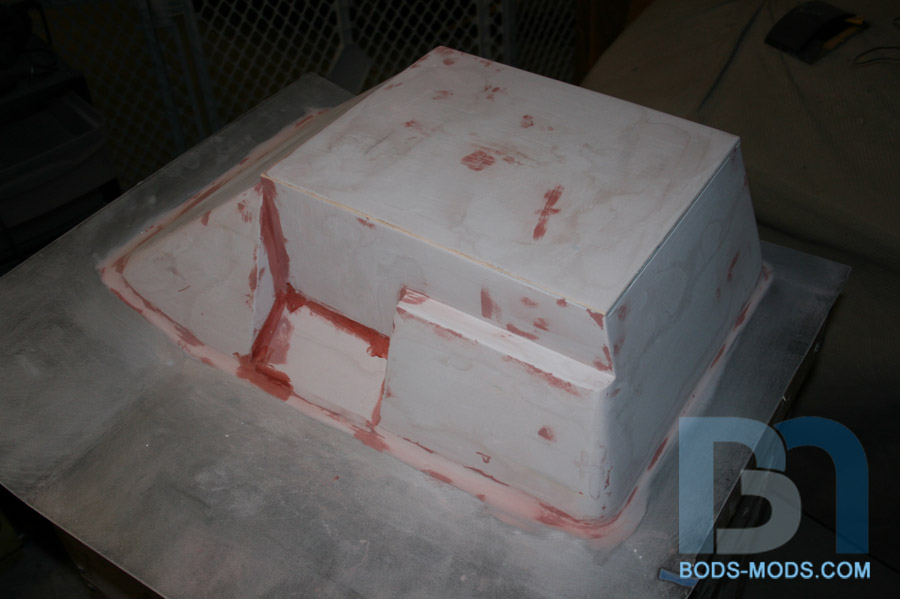
I set the trim piece aside, then removed the plug from the sheet and applied contact cement to both parts, and put them back together. This was to ensure the plug didn't move while I added epoxy putty all around it, shown here.
Here's the plug in its current state. The putty is all smoothed out, and creates a nice curved transition between the alu sheet and plug. It's getting real close to being done! It will start looking a whole lot better once I get some primer on it and it's all one color.
Once I get a few coats of primer on it and sanded smooth, I'll have to polish it and apply a couple coats of mold release wax, so the fiberglass won't stick to it. Only then will I be able to start the layup process!
Honey Roasted Peanuts Ingredients: Salt; Artificial honey roasting agents; Pressed peanut sweepings.

very cool man very cool DAMN I have have really missed this place and you guys
Just a quick update on the plugs. I got a couple coats of epoxy primer on them a few weeks ago, and have been sanding them down, working my way up to 1000 grit. Not really sure when I will get to lay some fiberglass, as it's now getting colder out, and I will most likely have to step away from this project yet again for another build.
Anyway, here's a few shots...
Back when I can!
Honey Roasted Peanuts Ingredients: Salt; Artificial honey roasting agents; Pressed peanut sweepings.
Ok, I think it's about time I got back on this project!After I wrapped up the Level 10GTS-M case, I was able to spend some time installing some newly acquired parts from EK.

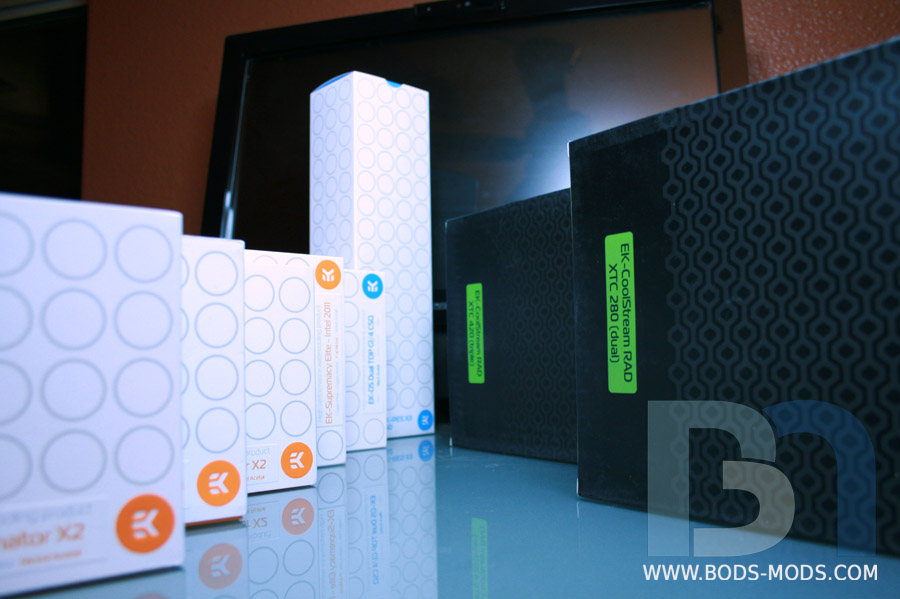
Yes, they were gracious enough to offer up some very cool products for this build, and I can't thank them enough. Here's a shot of what they sent me:
We got a CPU waterblock, motherboard blocks for the X79, Dominator memory blocks x2, ram module adapters (to fit the dominator blocks on my Crucial memory), a 250mm tube res, a 280 and a 420 radiator, and a dual pump top.
I had been searching for a WC solution for my Crucial Ballistix memory, and there are a few universal blocks out there, but I was very pleased to find out EK offers these adapters to fit the ever popular Corsair Dominator blocks.
They come very securely packaged in bubble wrap.
Opening it up we have two sets of adapters, with all the necessary thermal padding and hardware.
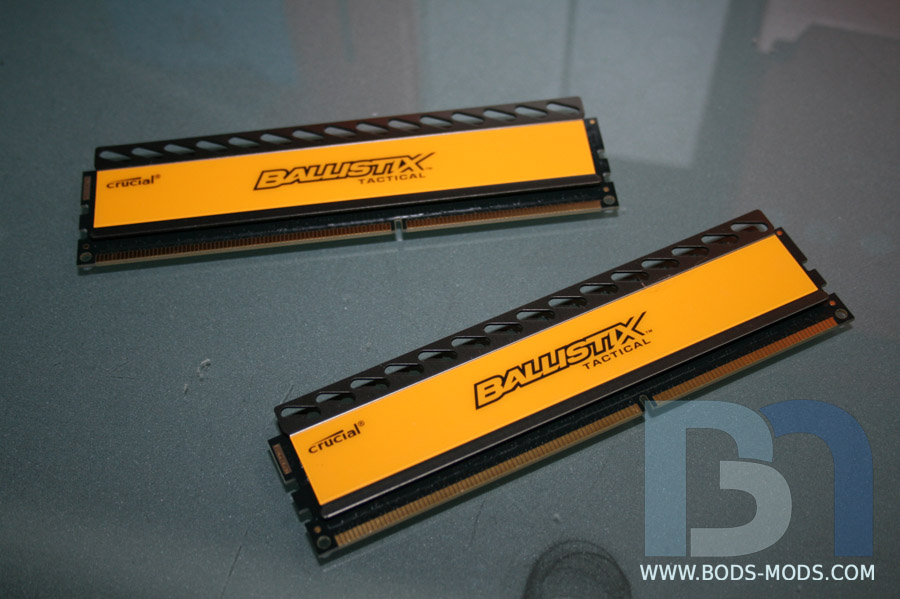
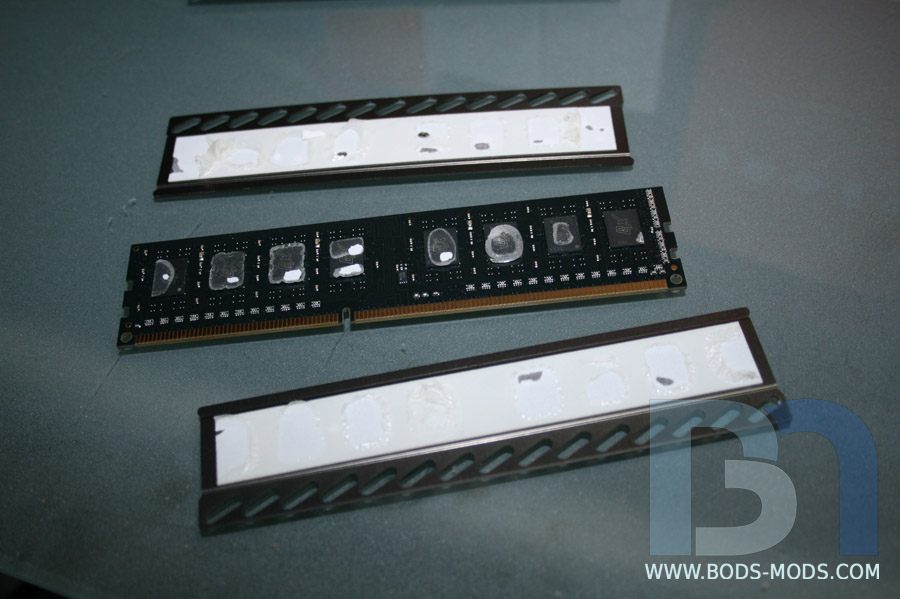
Here are the memory sticks with their heat spreaders which will need to be removed.
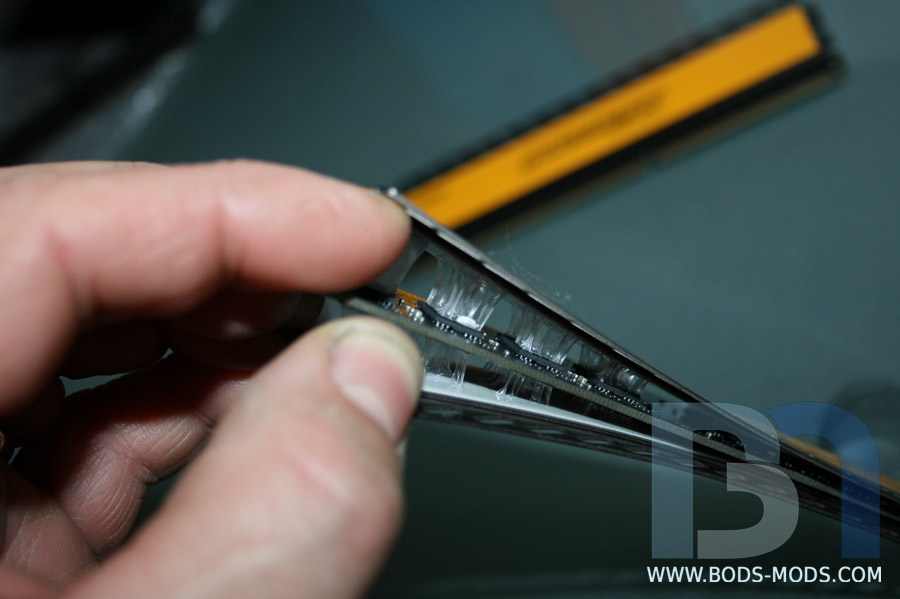
I had to be extremely careful not to damage the memory in the removal process. I found that pulling both sides off at the same time alleviated any bending of the memory stick.
Crucial uses some really tough adhesive on their thermal pads. It took awhile to get it all off the chips.
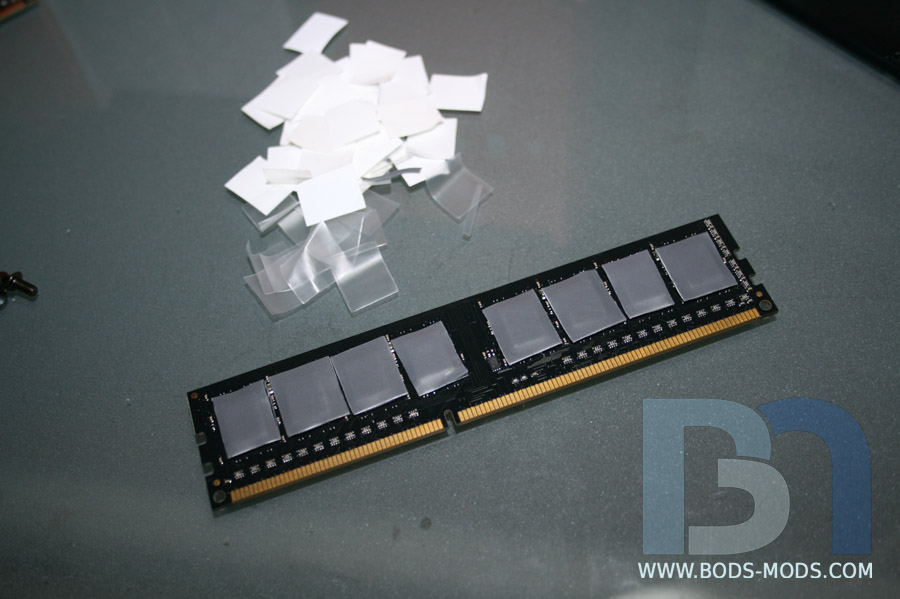
All four sticks cleaned off and ready for the adapters.
Applying the new thermal padding. The strips were too short to just lay over all the chips, so I had to cut them up into individual squares, one for each chip. Now for the other side.
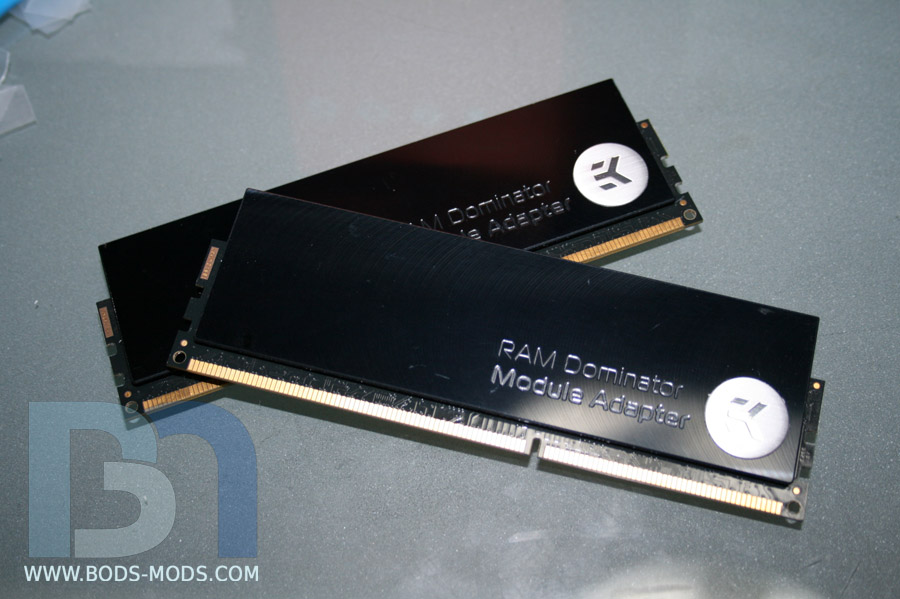
Once the thermal pads were all on, it was just a matter of sandwiching the memory stick in between the two adapter plates and screwing them together. Two down, two to go!
All done! I had to install the ram onto the motherboard and add the actual Dominator blocks to see how it looked. Looks very nice along with the Supremacy CPU and motherboard blocks.
I'm super excited to be back on this. I'll be updating more consistently from now on, as this case is top priority!
Honey Roasted Peanuts Ingredients: Salt; Artificial honey roasting agents; Pressed peanut sweepings.
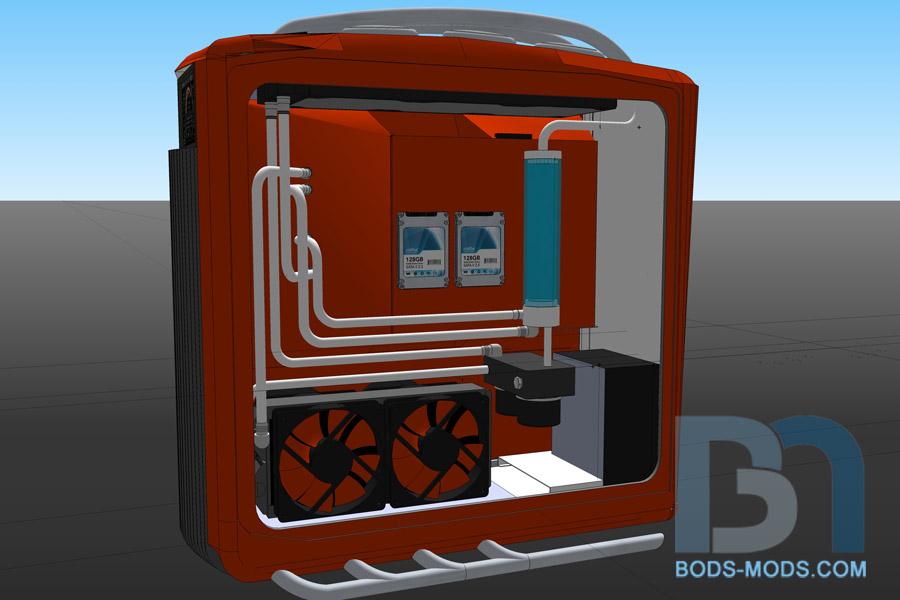
Planning out the plumbing on the backside of the Cruizer. I'm going with stainless steel tubing, to simulate automotive fuel/brake lines. Should look pretty sweet! But before running the lines, I had to figure out the best placement for the wc components. It's amazing that even on a cavernous case such as the Cosmos II, I still had to deal with clearance issues lol.
I'll be running two separate loops: CPU/motherboard/ram, and graphics cards. I got the 420mm EK radiator up top cooling the CPU loop, and the 280mm EK rad in the GFX loop. I figure the 680s won't be putting out as much heat as the processor, especially since I want to do some OCing this time. Both loops go into the EK 250mm X3 res, with one line connecting the res to the dual pumps. Then the two loops split off again from there. I'm a little concerned about the bottleneck there, but I'm trying to eliminate any unnecessary tubing where possible. And with the dual D5 pumps, I'm hoping it will be a non-issue. Lemme know what you guys think.
Honey Roasted Peanuts Ingredients: Salt; Artificial honey roasting agents; Pressed peanut sweepings.
After designing out the plumbing in Sketchup, I've been placing the real parts in the case, to verify my plan will work as it is layed out. So far things have been lining up with minimal adjustments.
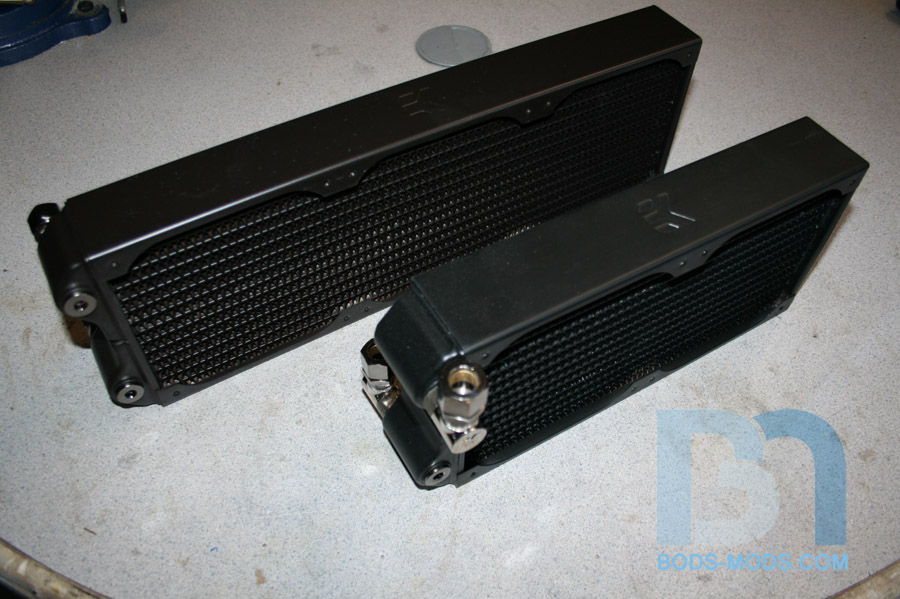
Here are the 280 and 420 radiators from EK. These things are massive, at 2" thick, but they fill the Cosmos II nicely.
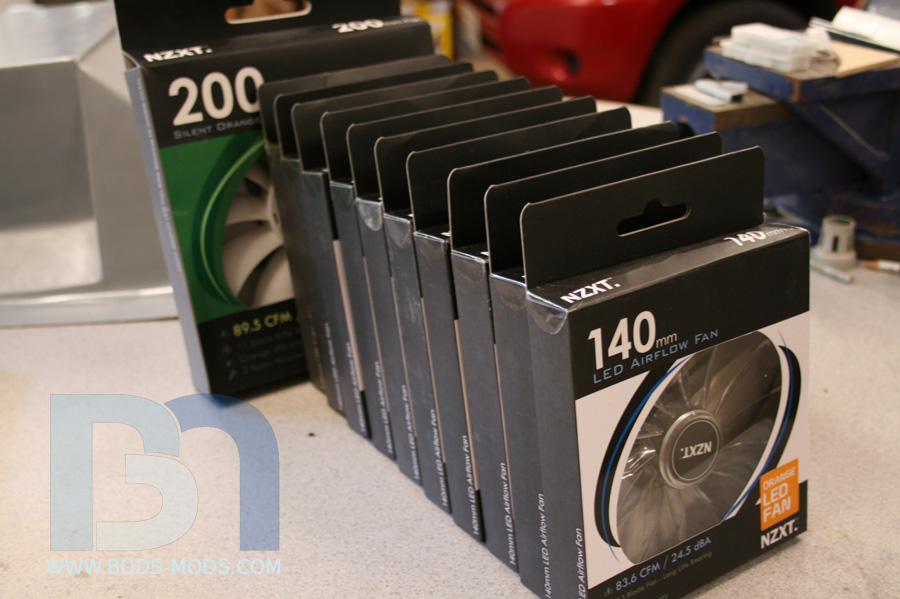
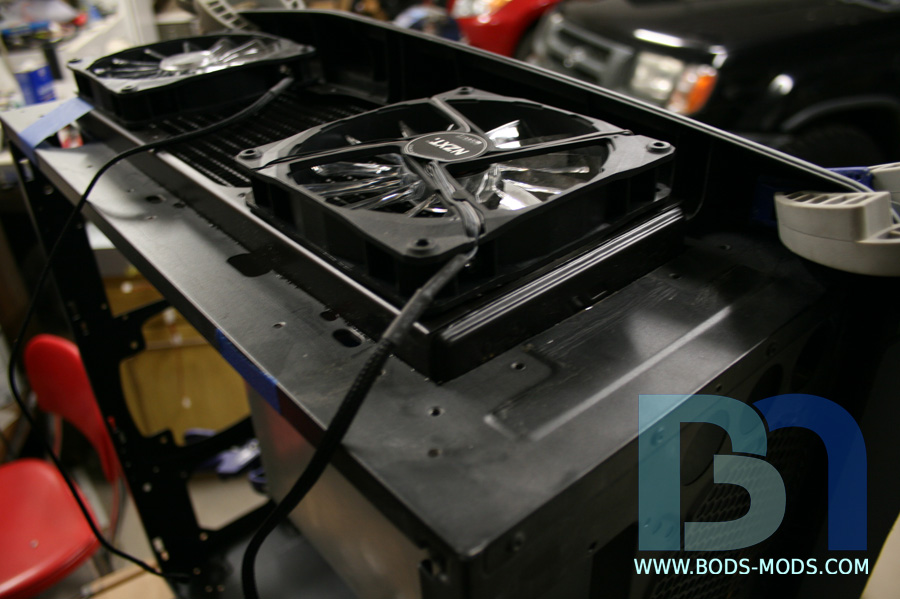
Got my stack of 140mm fans plus a 200mm intake fan for the case.
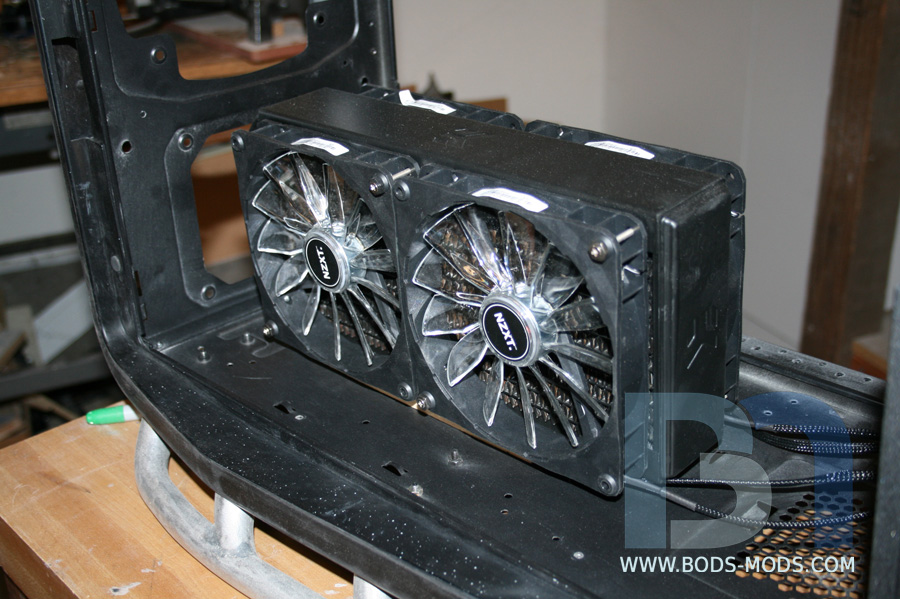
Trying the fans out on the 280 rad, and placing it in the case.
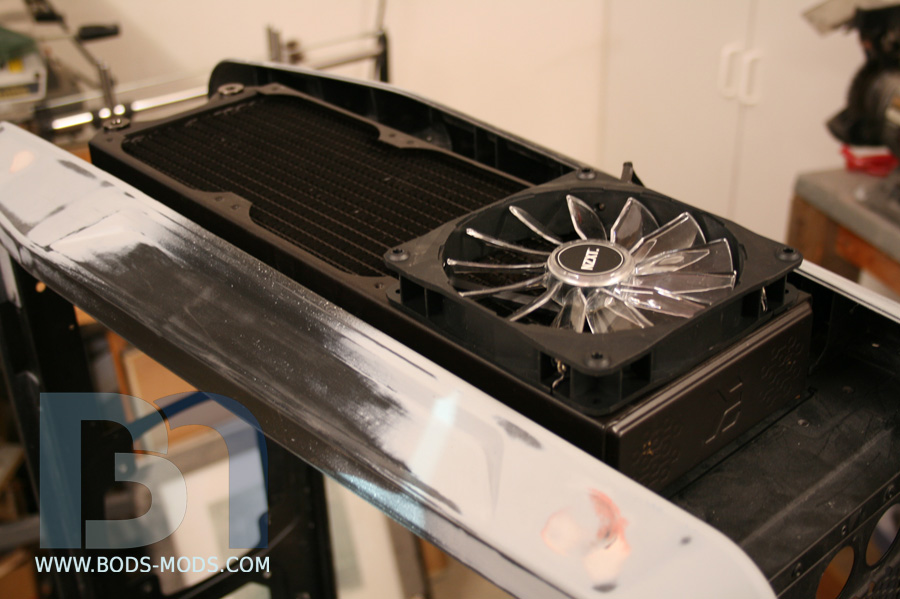
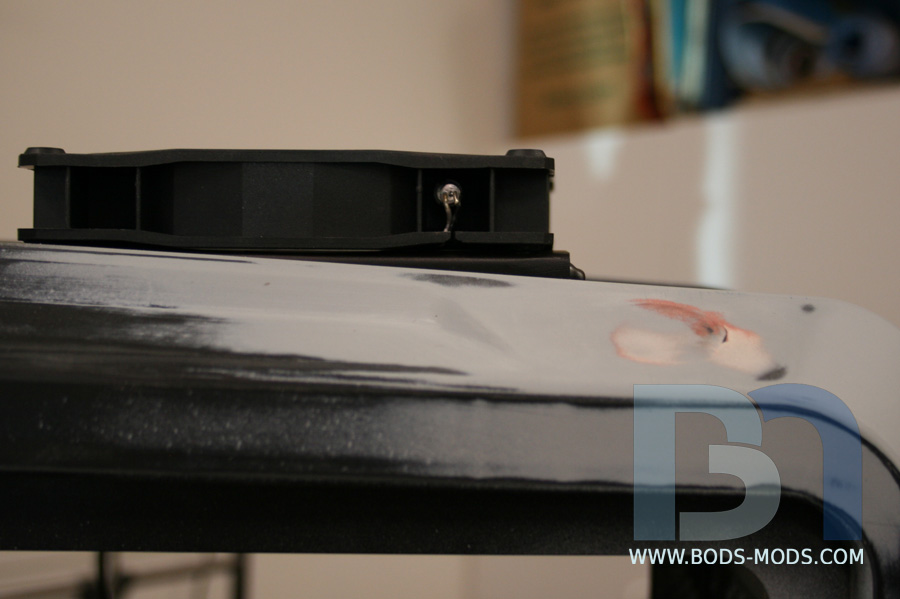
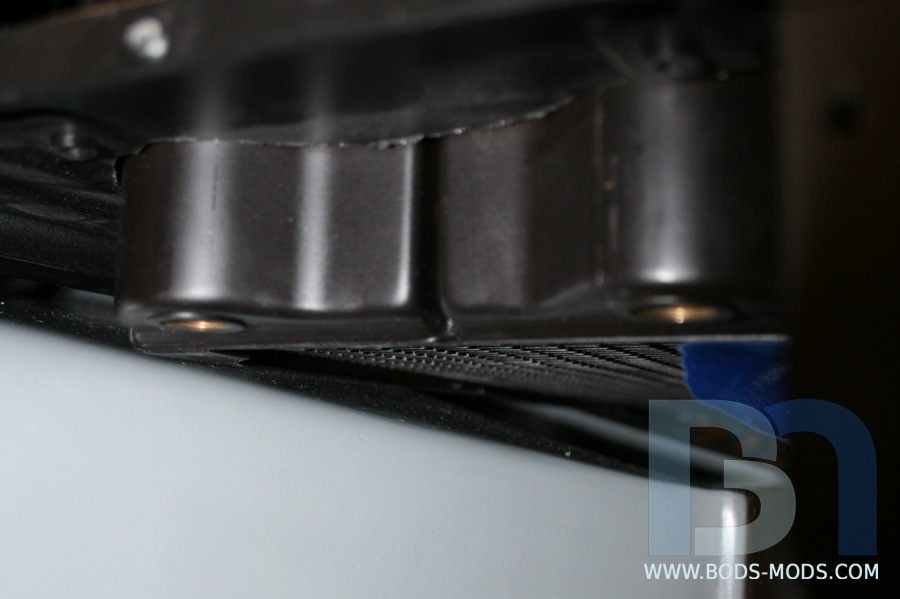
The top 420 rad will go up top, but just barely.
As you can see from the side, the radiator will need to be mounted lower into the case so it fits below the bezel. The Cosmos II only has provisions for a 360mm radiator, so I'd have to cut the top panel anyway.
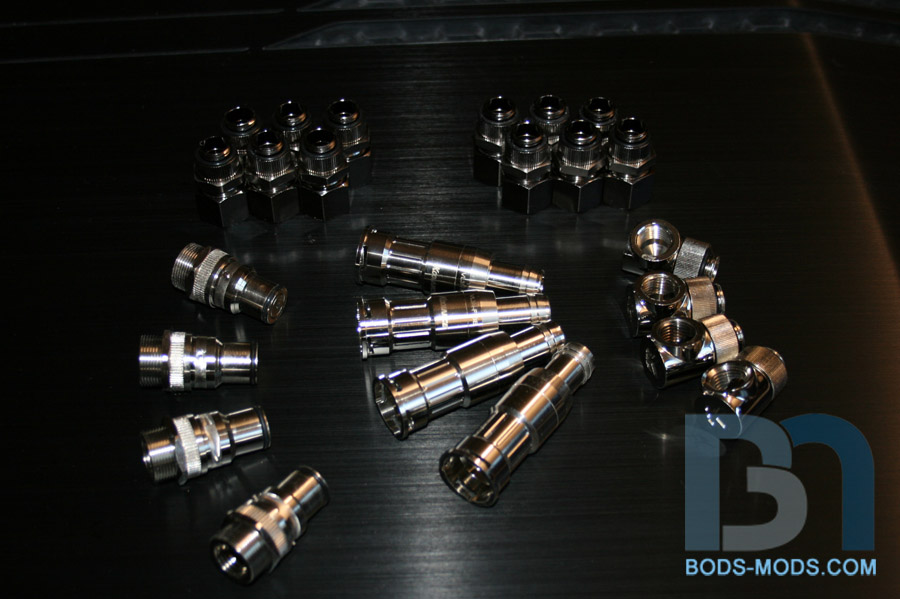
Lastly, here is a shot of the Koolance quick disconnect fittings I'll be using to connect the custom manifold, along with the Koolance 1/2" pipe adapters and EK 90º elbow fittings.
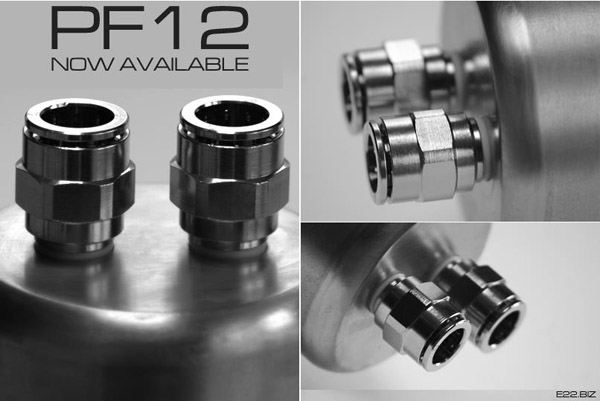
And I've got more fittings on the way! I found some really awesome push fittings from E22 that will be a perfect fit for this project...
They also carry the 12mm rigid tubing I'll be using along with these fittings. So as soon as I get those in, I'll be able to get the custom manifold together and mounted on the hardware. Can't wait!
Honey Roasted Peanuts Ingredients: Salt; Artificial honey roasting agents; Pressed peanut sweepings.
Got a little bit more work done last night on the rads.
I cut out the top panel to fit the 420mm EK radiator. You can see the size difference between it and the stock provisions for a 360mm rad.
Here is the radiator set in place with a couple fans to check height clearance.
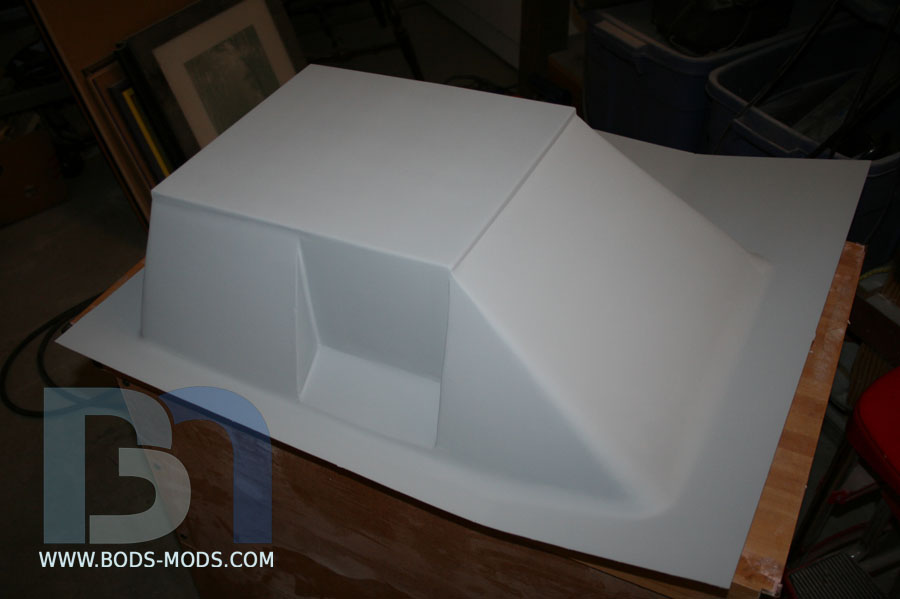
I also checked the lower radiator clearance. To do this, I set the fiberglass form into the case to give me an idea where the actual fiberglass piece will be. Right now the rad is resting on the form, so it will need to raise up just a bit to clear. I still have about 1/4" room above the fans on top, so I think I'm good.
This weekend, I'll file the edges down and get the mounting brackets made up for this rad as well as the lower 280mm rad.
Honey Roasted Peanuts Ingredients: Salt; Artificial honey roasting agents; Pressed peanut sweepings.
 Posting Permissions

 Reply With Quote