Your metalwork continues to impress. I love the Art Deco look of the curves and the thick mesh!


Your metalwork continues to impress. I love the Art Deco look of the curves and the thick mesh!
Do not trust people like me. I will take you to museums, and parks, and monuments, and kiss you in every beautiful place, so that you can never go back to them without tasting me like blood in your mouth. I will destroy you in the most beautiful way possible, and when I leave you will finally understand why storms are named after people.

This is looking Amazing so far! love the straight tube look.
Will

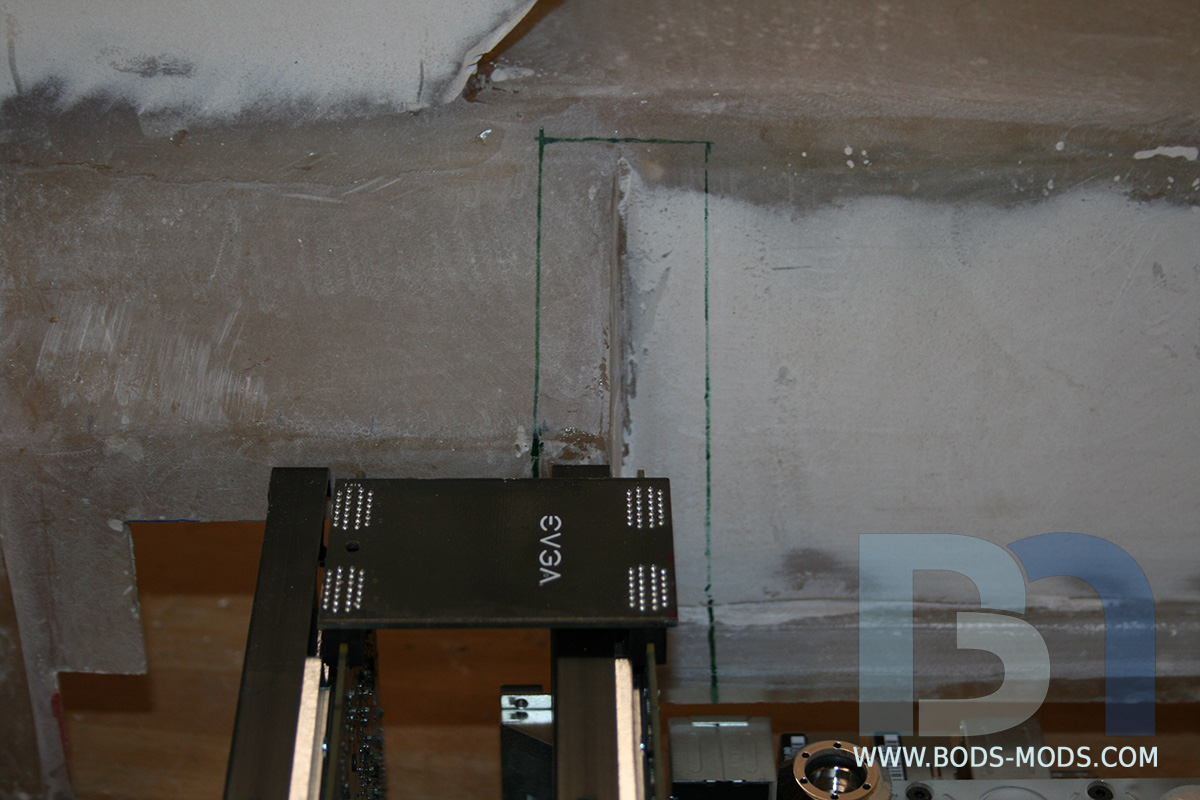
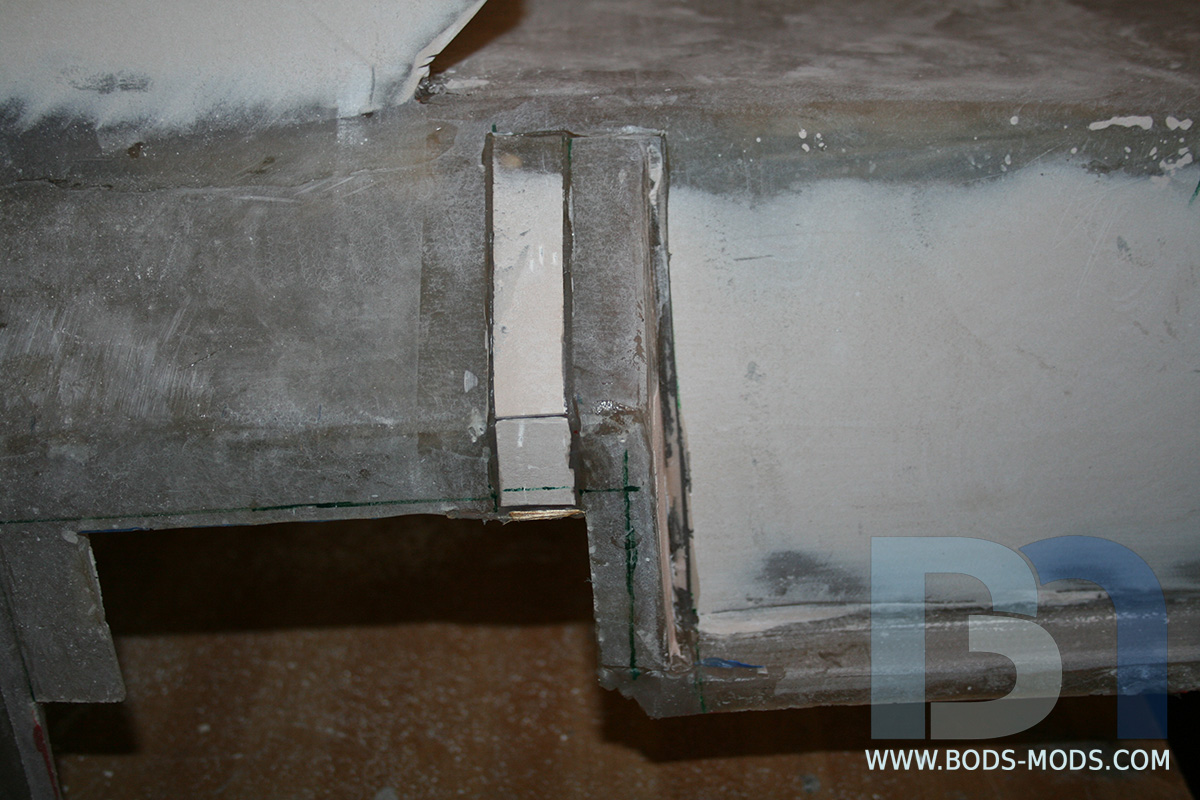
Was a beautiful weekend, so I took this opportunity to take care of an issue I had with the fiberglass panel that's been bugging me ever since I switched motherboards. I originally designed the panel to accommodate the EVGA X79 FTW, but when I exchanged that for the X79 Dark, the graphics cards did not line up with the cutout anymore. Slot #1 is positioned differently, so now the first card interferes with the edge of the cutout. And widening the cutout didn't solve the visual problem.
As you can see here, the card goes past the "shock tower" of the panel and just looks like a mistake. It's been driving me nuts, so I gotta fix it!
This close-up shot shows that the HDMI ports are inaccessible.
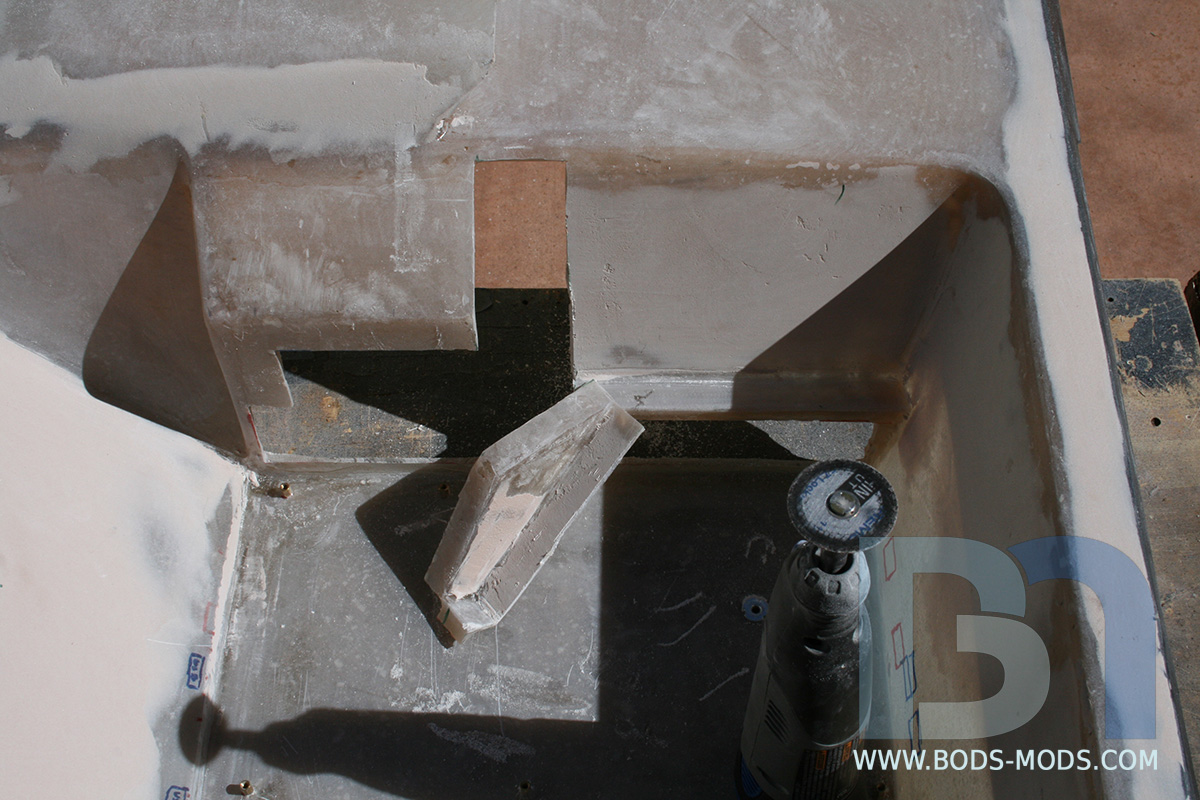
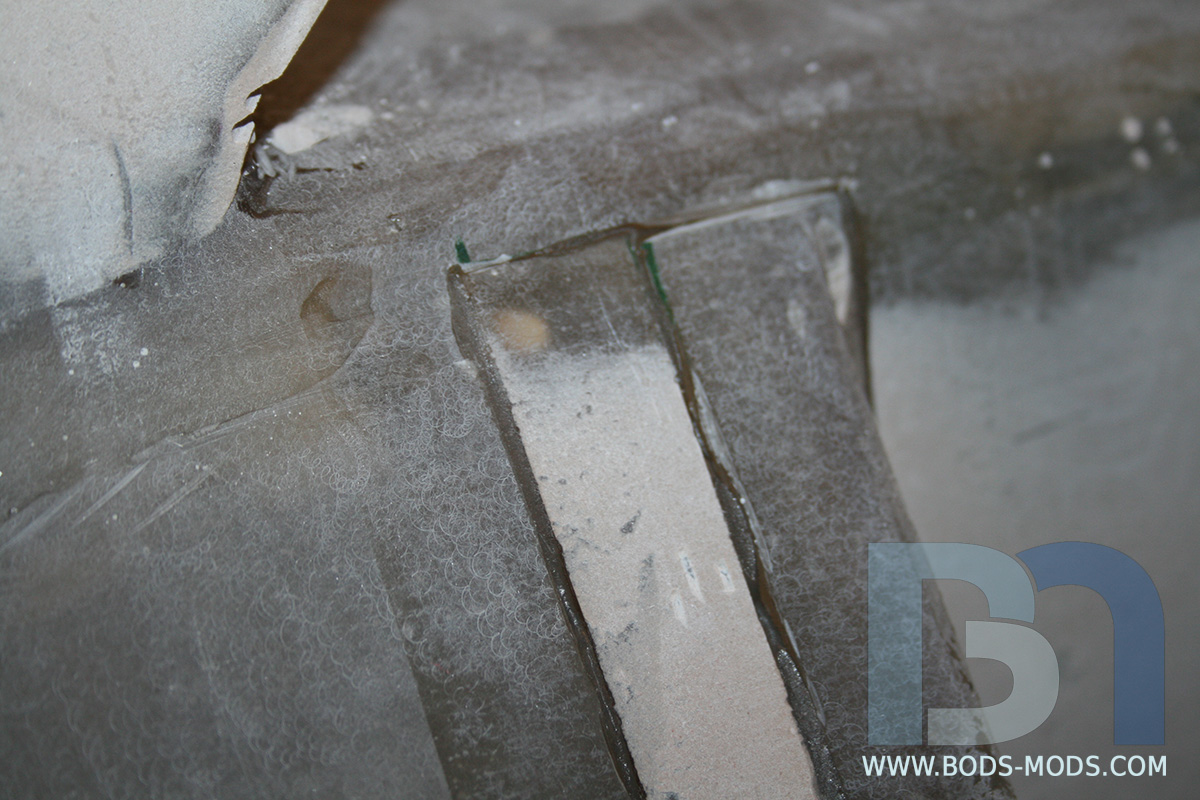
Thanks to the forgiving nature of fiberglass, this is a relatively easy fix. I cut out the corner of the shock tower on both sides...
Then cut 5/8" off the right side and put it over on the left to fill the gap, effectively moving the corner over and widening the towers. I temporarily tape it all together from the back.
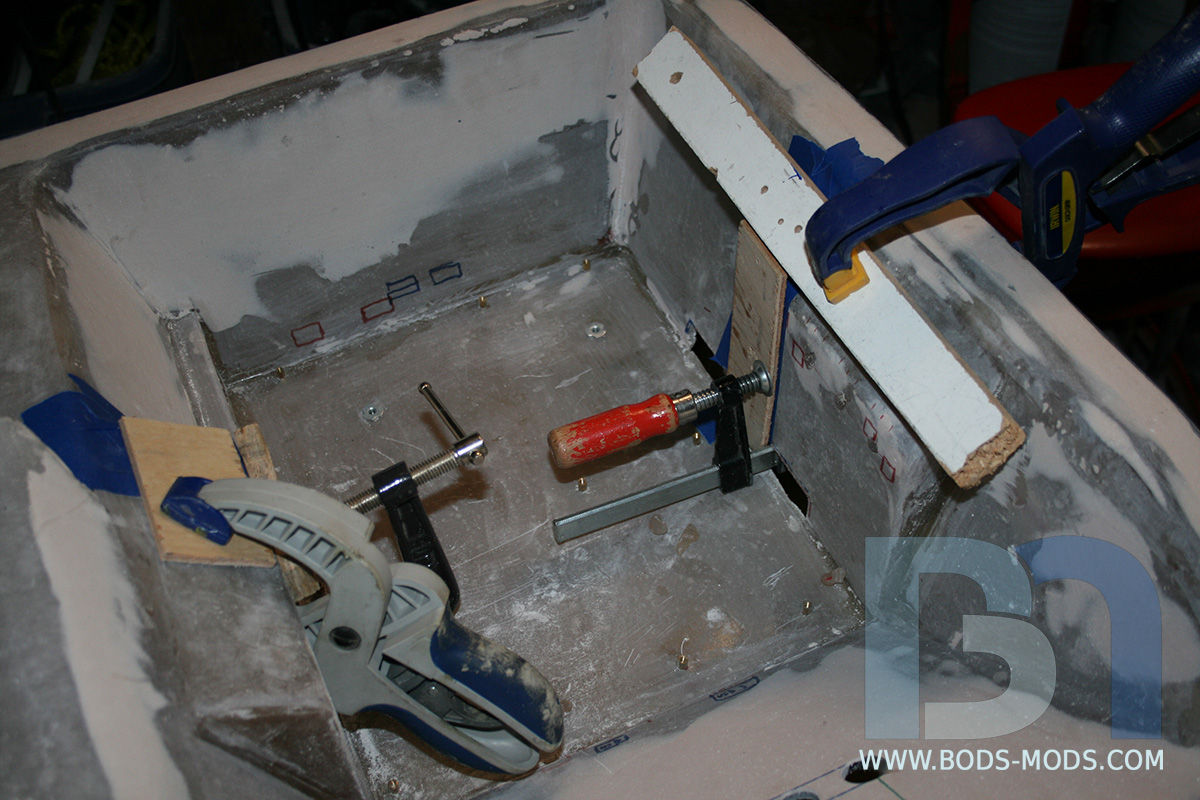
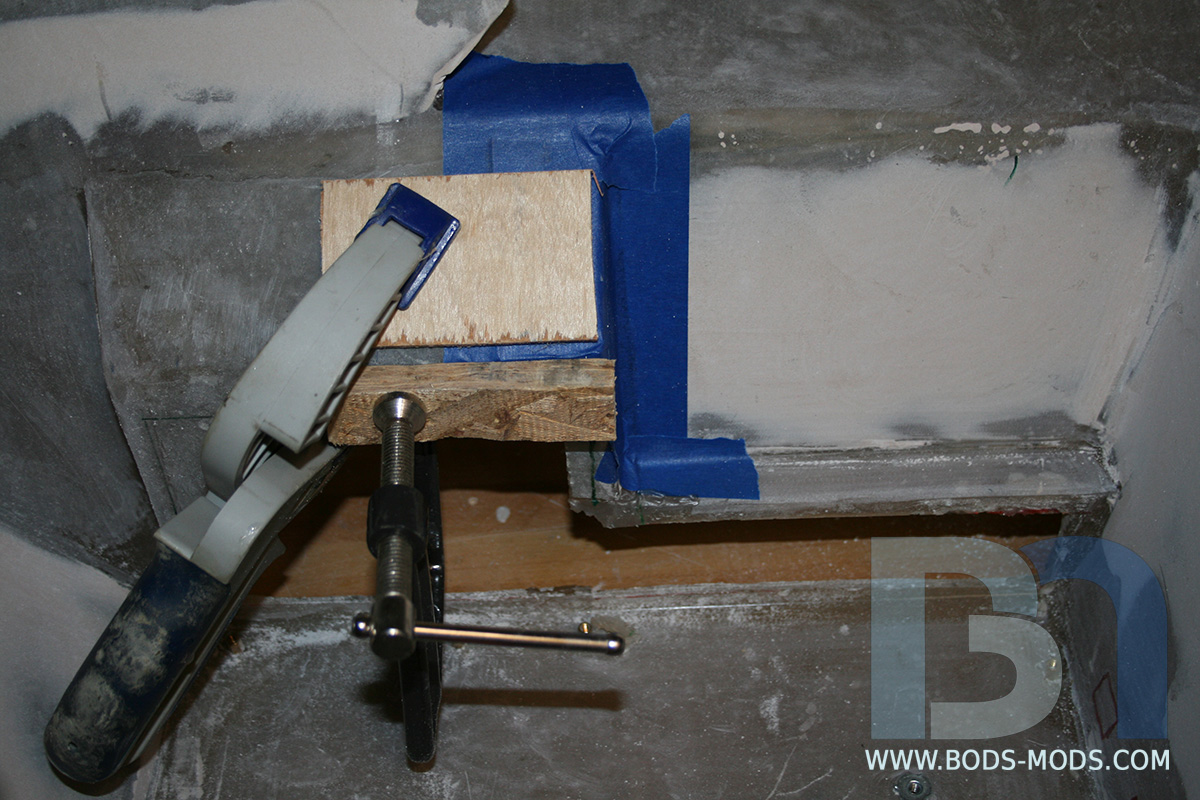
Then I tape it from the front and block it so the pieces stay flat.
Then I removed the back tape and proceeded to fill in the gaps with thickened resin. After a few hours of curing, I removed the blocks and tape.
Everything is filled in for the most part, and level with the rest of the surface. All I need to do now is apply a bit of bondo filler and sand smooth.
A slight set-back, but well worth the effort. My OCD is once again back down to nominal levels.
Honey Roasted Peanuts Ingredients: Salt; Artificial honey roasting agents; Pressed peanut sweepings.

You said in the first post that in the end we would still be able to distinguish this case as a Cosmos II but I am wondering how much of that case is even left under all the scratch built components haha looking good
lol I guess I did say that didn't I. Hey, at least the frame is still intact.. for the most part.Originally Posted by Stonerboy779


Honey Roasted Peanuts Ingredients: Salt; Artificial honey roasting agents; Pressed peanut sweepings.

Easy for you to say.....
so far left of center i'm in right field
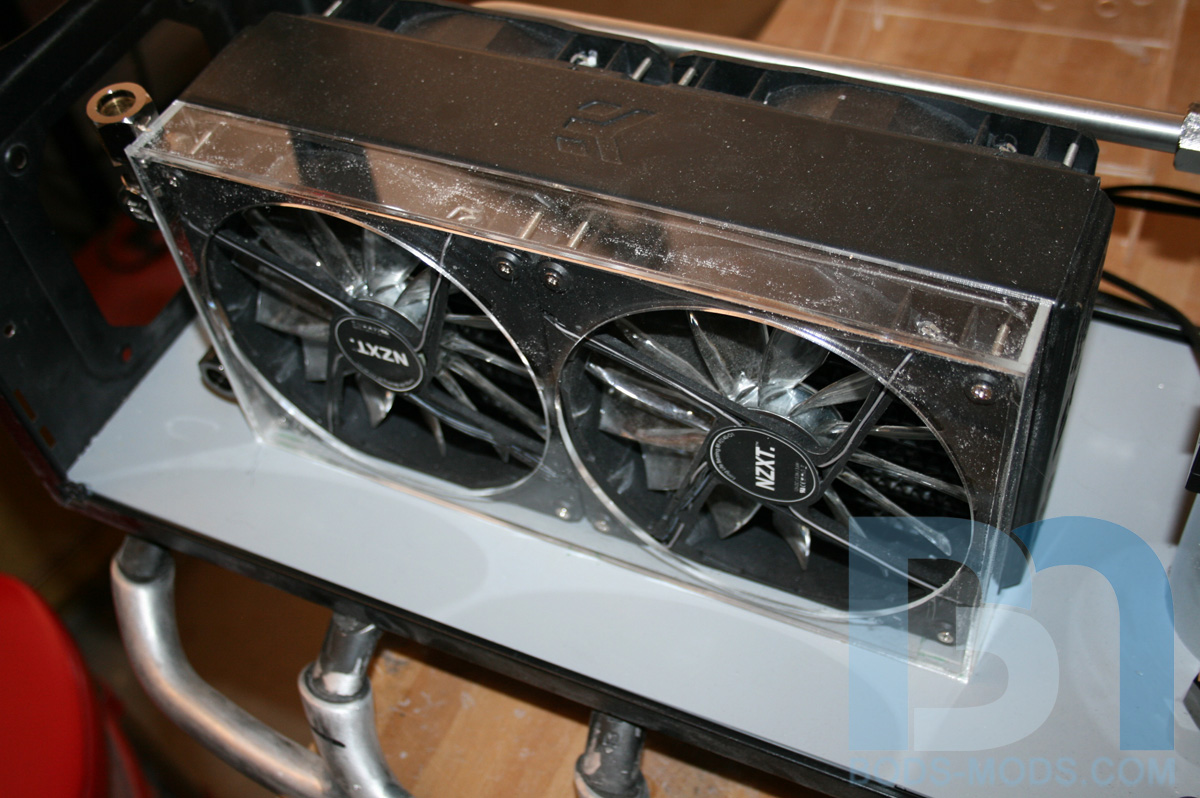
Hey guys, got some updates for you. Yes, plural, as in more than one!I just got back from my vacation in Hawaii, and I'm refreshed and ready to make the final push to finish this project by PDXLAN 24 in July. I returned home to a bunch of acrylic pieces waiting and ready to assemble, thanks to Brian at Primochill/ModSmart. This update will cover one of the parts I got... actually two: Fan shrouds for both sides of the 240mm radiator.
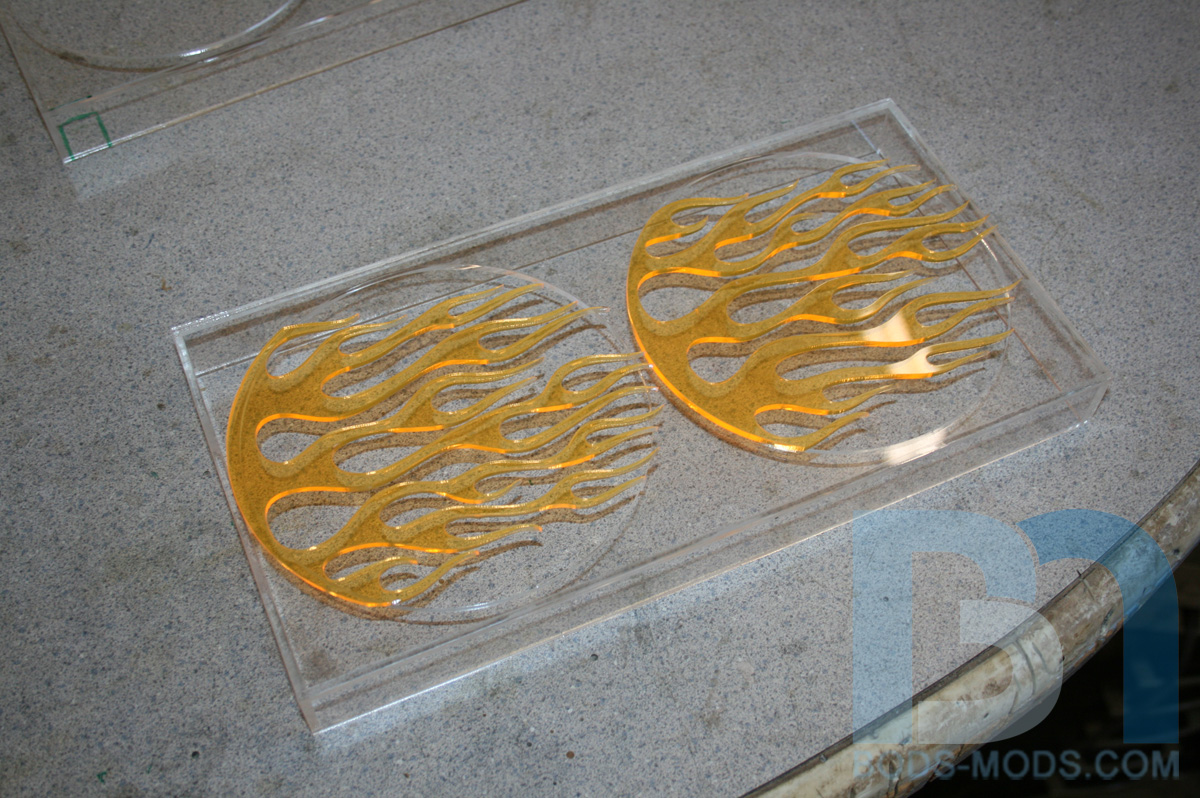
I designed a shroud that would cover both fans, and incorporate a cool flame grill for them as well. Here are the pieces for both shrouds, straight from the laser.
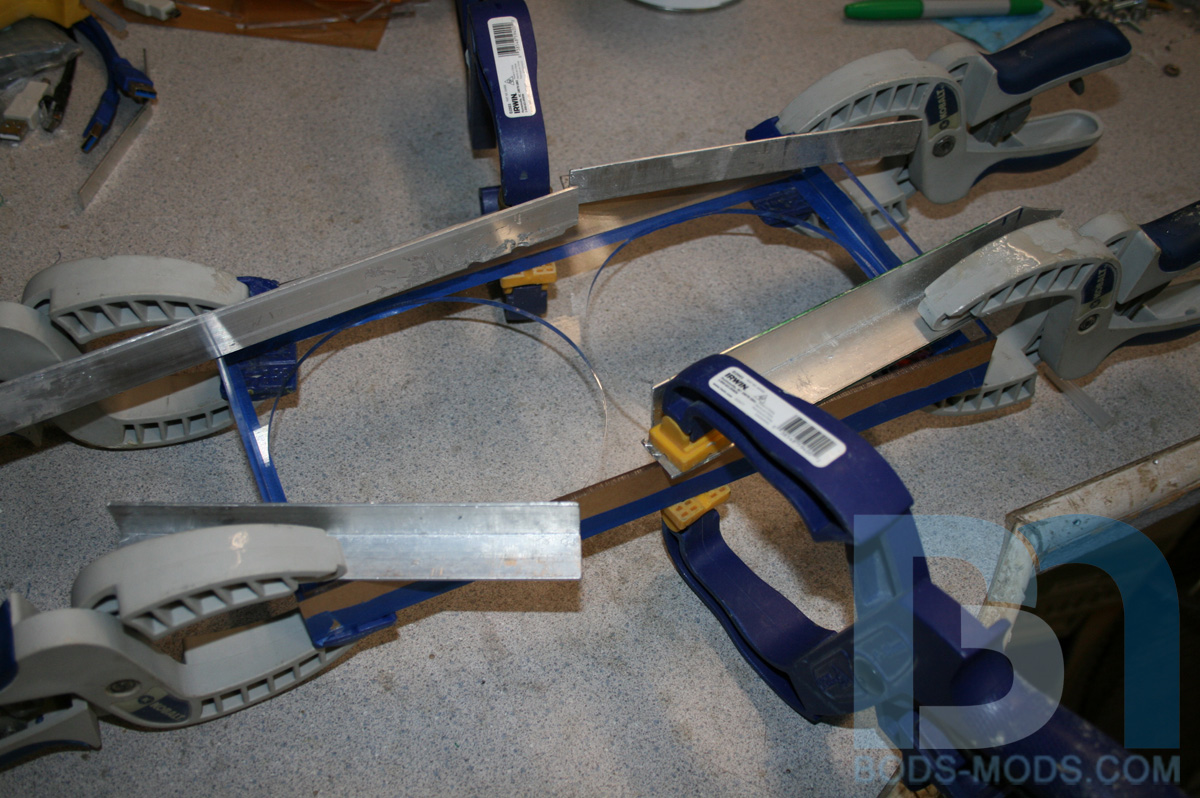
I took the pieces for one of the shrouds and taped them all together. As you can see, it's just a simple box.
After some aligning, I clamped them down and glued them together.
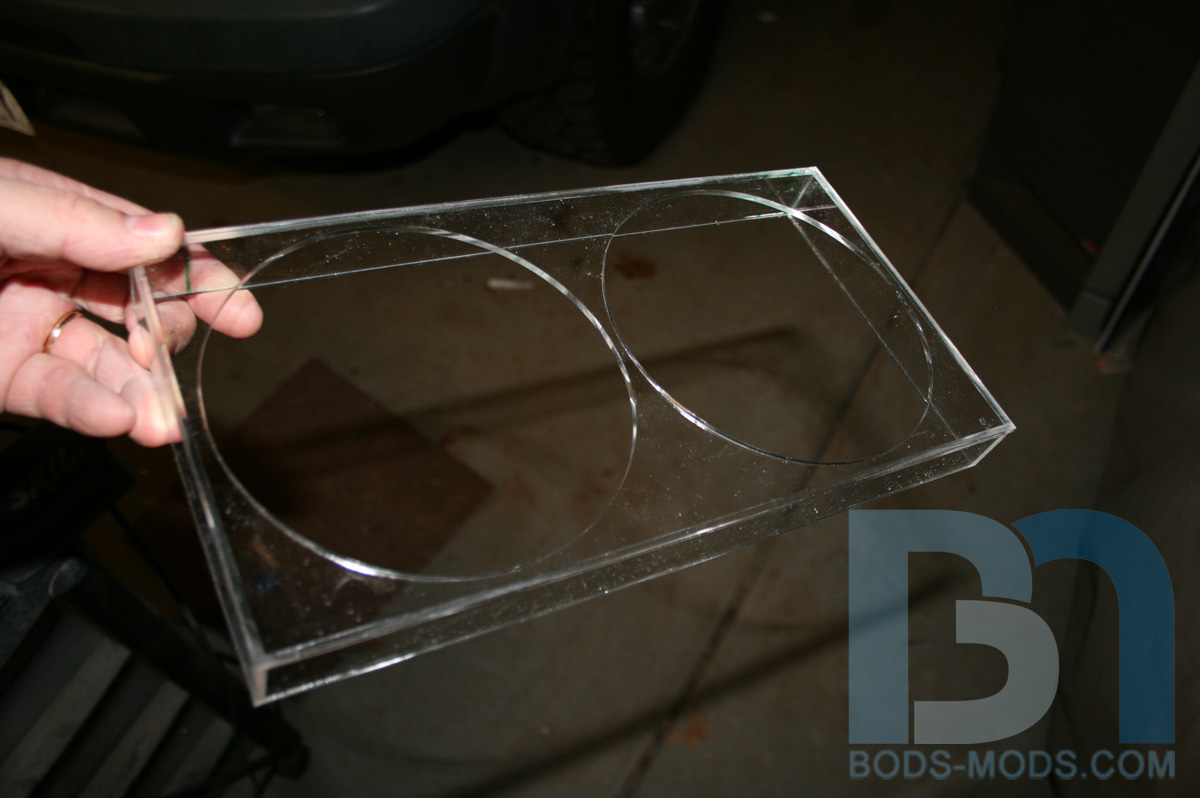
A few minutes later and I could take the tape off.
It fits snugly around both fans. Only thing I had to do was cut some notches in the bottom to clear the alu mounting posts underneath.
Now here's the coolness factor... Flame grills! Cut out of UV orange, these will be glued into the circle cutouts of the shroud. I elongated the flames so the tips extend over the edge. That way I can glue them down and they won't be prone to breaking off.
I should be able to finish these tomorrow, as well as a few more part assemblies. So I'll have another update for you then.
Honey Roasted Peanuts Ingredients: Salt; Artificial honey roasting agents; Pressed peanut sweepings.
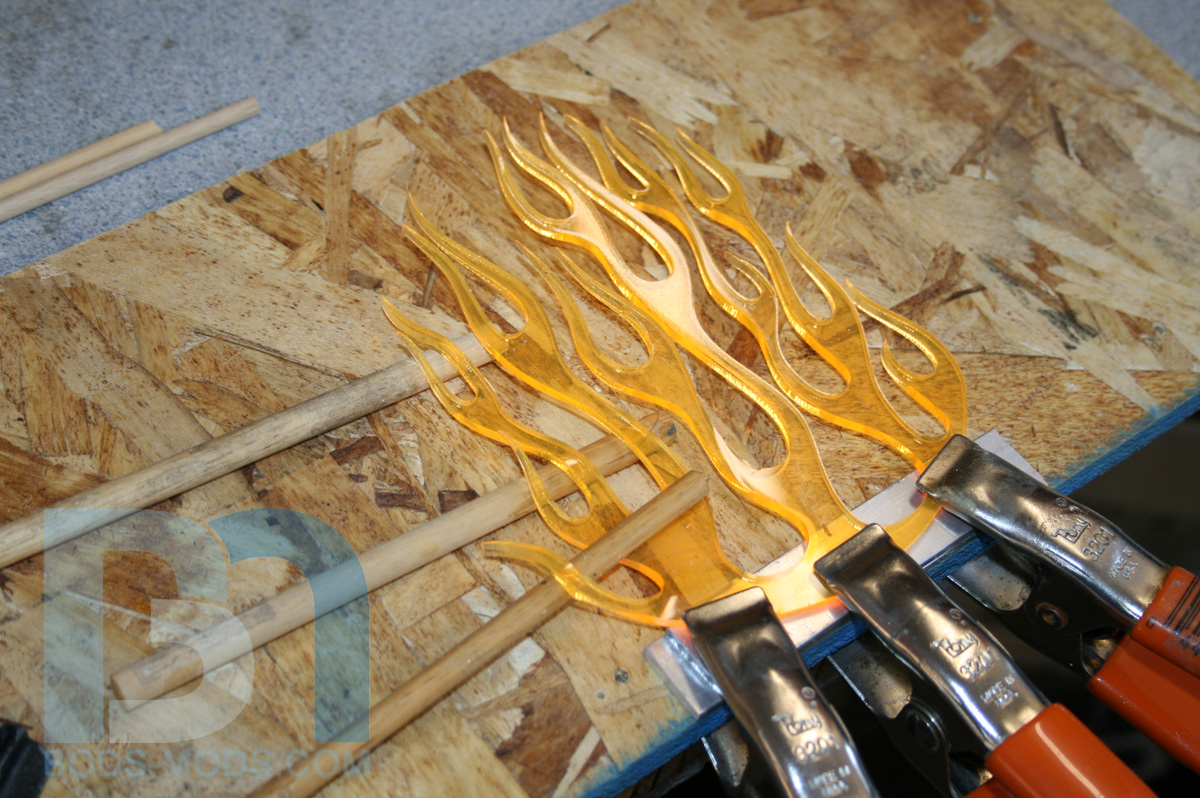
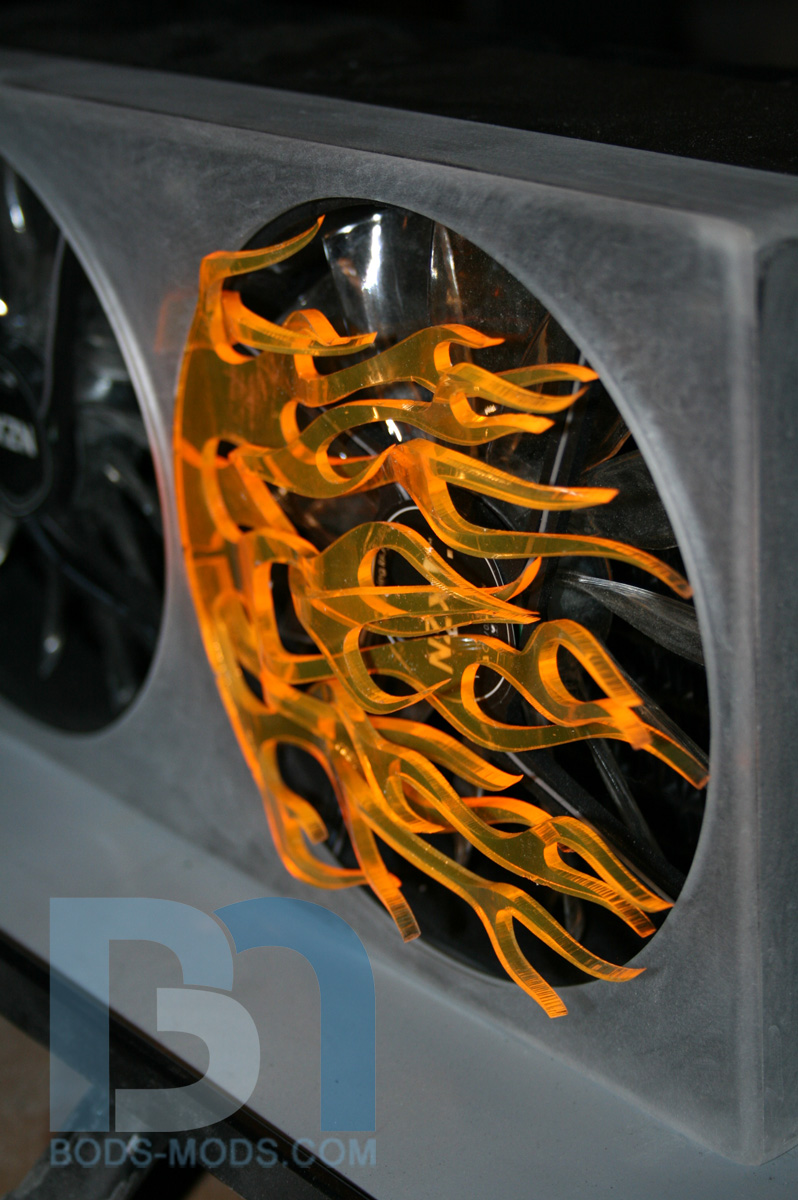
Fan shrouds part 2: Flame grill bending
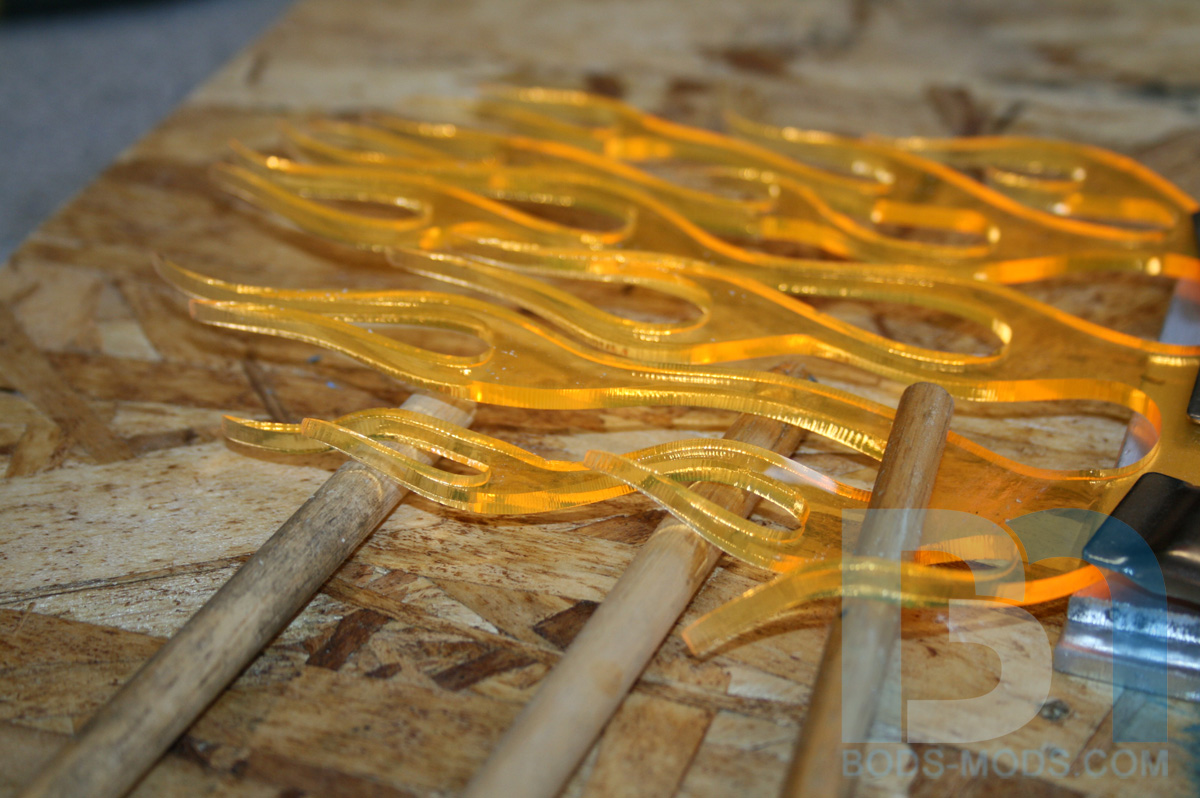
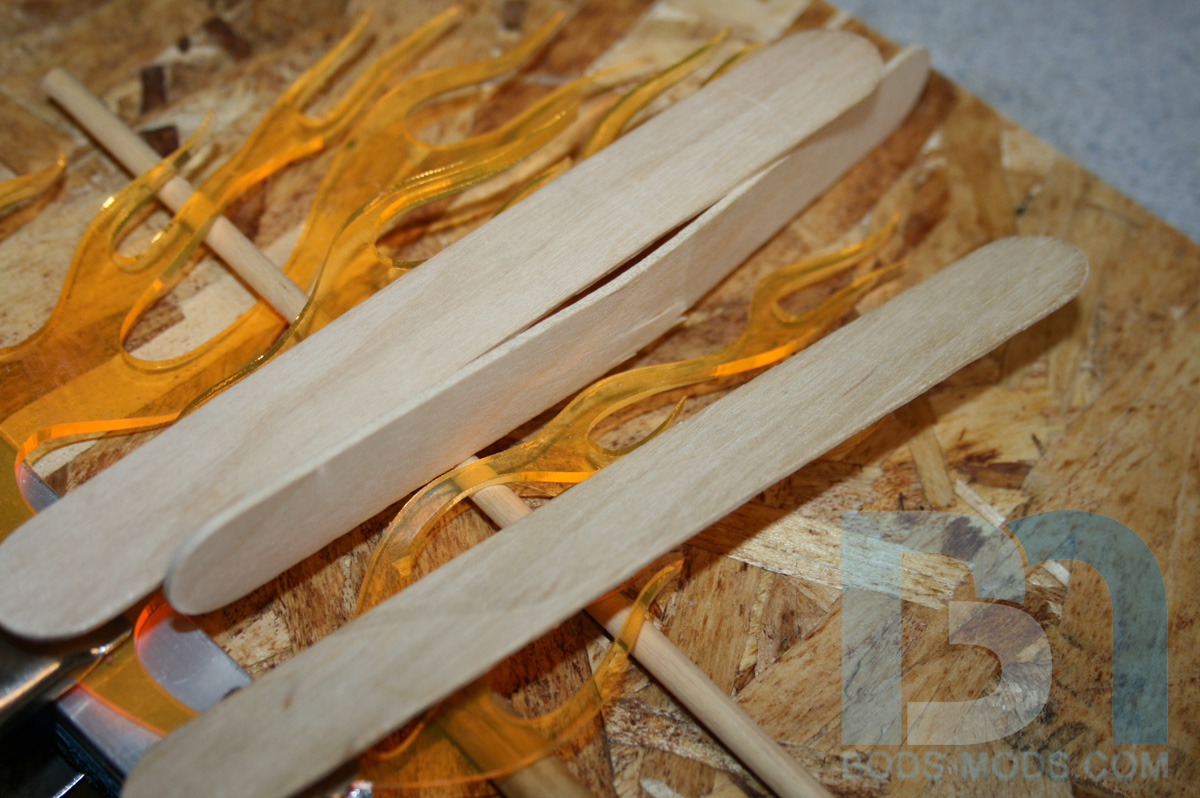
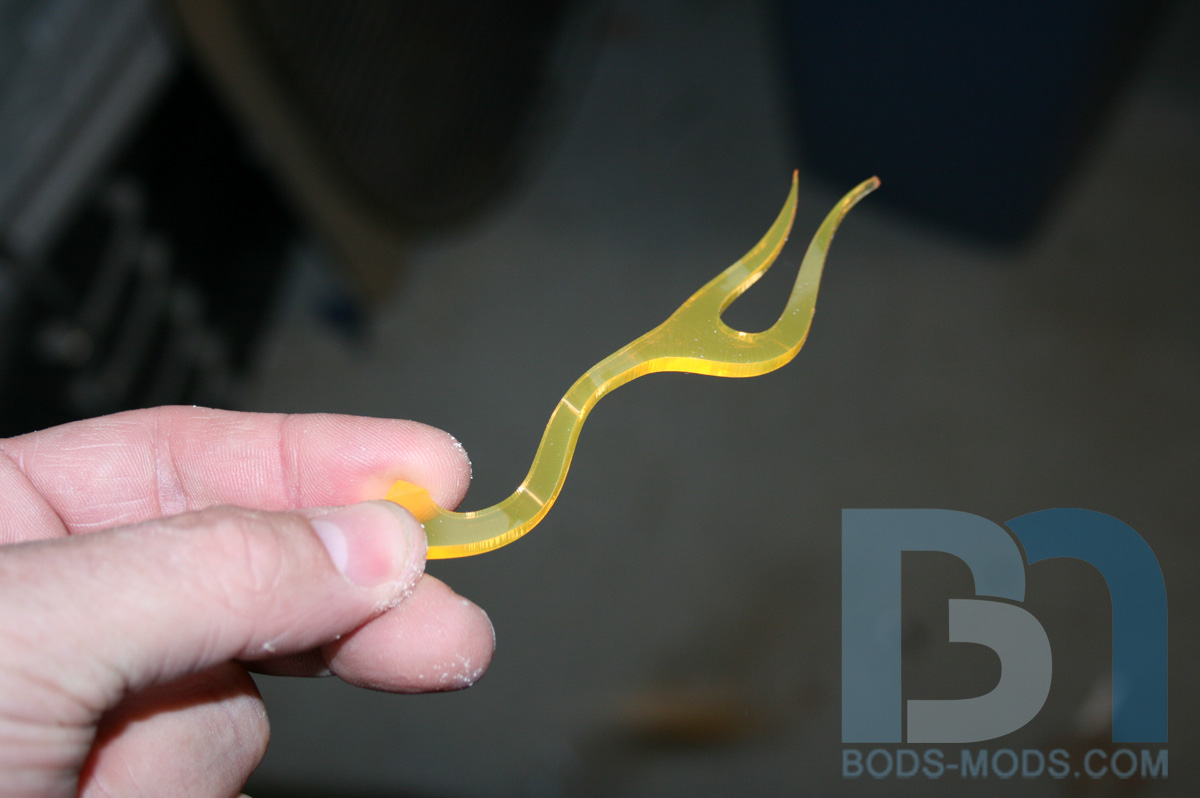
I wanted to push the flame grill concept a bit further and see if I couldn't get a more realistic 3D look by adding some heat. I grabbed a bunch of dowels, some craft sticks, and my heat gun and went to work.
A lower angle shows the curves better.
It doesn't take much to get the thin licks soft. I used the craft sticks to shield the other parts I just bent from getting soft again.
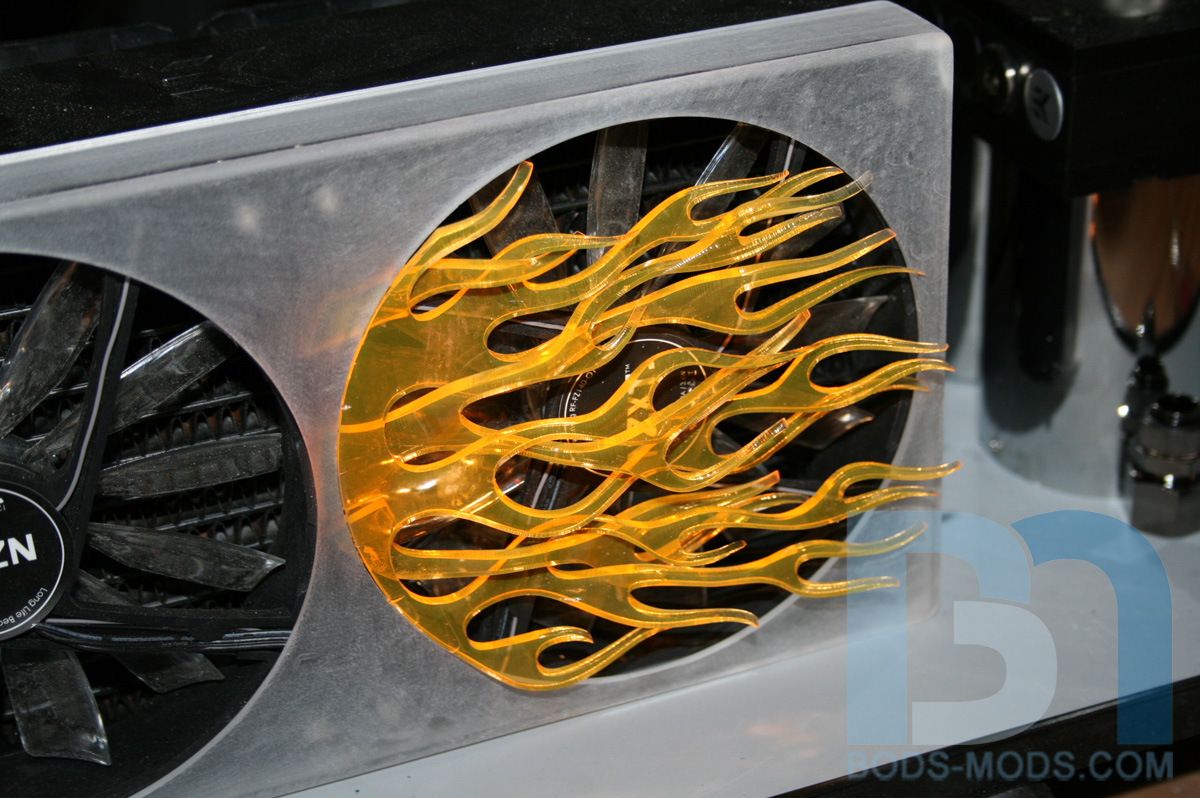
After finishing all the bends, I stuck it on the shroud to see how it looked. I made sure there was enough clearance between the fan and the flames.
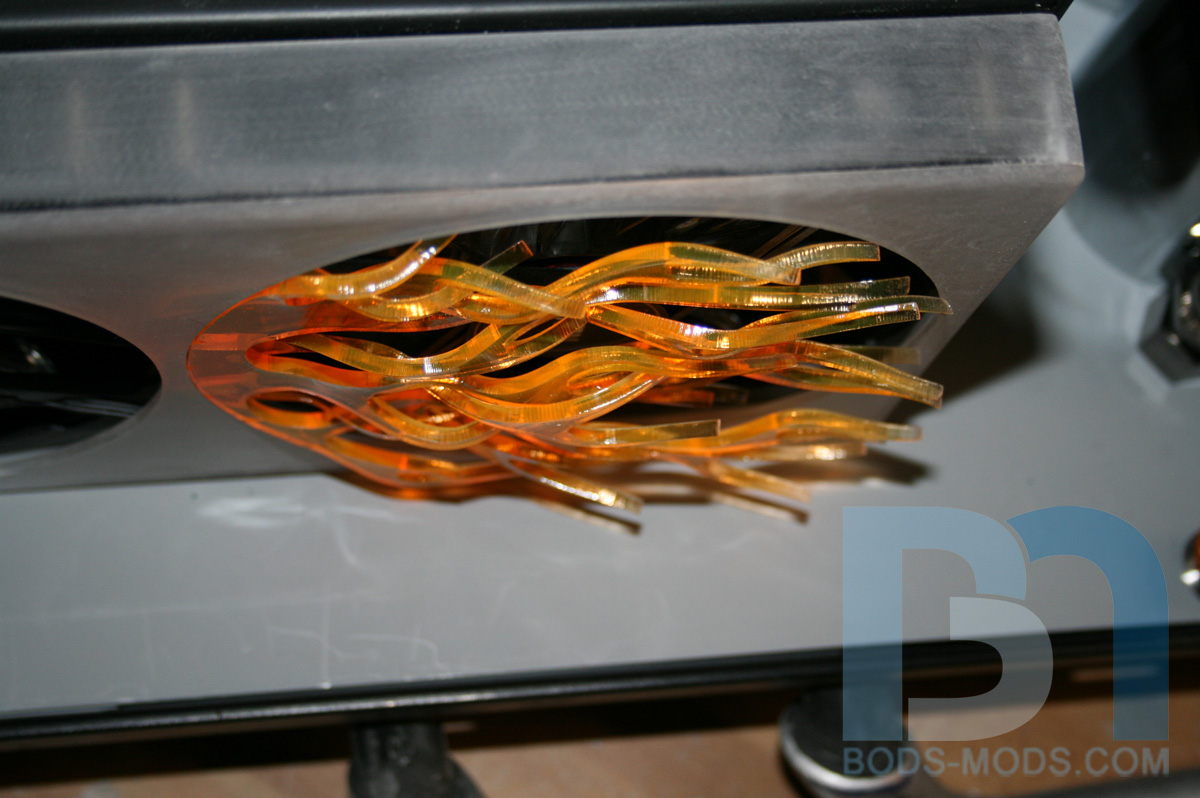
Looks great but I'm not done yet! Time to add a second layer...
I had a bunch more extra flames cut so I could intertwine them with the first layer. I took individual licks and bent them according to where I wanted them placed.
Here's two pieces temporarily clamped together.
This took some time, as there was a lot of trial fits and re-bending. I ended up using three separate licks (a double, and two singles) to fill in the gaps, giving it a nice random feel.
A top view shows the depth well.
I'm loving this look!
And now I get to repeat it for the other three fans on this rad, plus the 140mm fan on the rear panel.
Honey Roasted Peanuts Ingredients: Salt; Artificial honey roasting agents; Pressed peanut sweepings.

is really all that needs saying here...
TheMainMan


Cool stuff.
I have a hammer! I can put things together! I can knock things apart! I can alter my environment at will and make an incredible din all the while! -Calvin
 Posting Permissions

 Reply With Quote