Page 2 of 4 FirstFirst 1234 LastLast
Results 11 to 20 of 32

Thread: d_stilgar's HTPC (title anyone?)

  1. #11
    Undead Pirate d_stilgar's Avatar
    Join Date
    Mar 2005
    Location
    Philadelphia, PA
    Posts
    2,987

    Default Re: d_stilgar's HTPC (title anyone?)

    Okay, so it was October of last year when this started and I had no money, but a lot of desire to get it done . . . and then I had no money and and a lot of school work so it was put on hold.

    But this is a good thing because where this project is now is a lot better.

    So, I started this thread showing off my credenza conversion, which I never finished updating, but was completed . . . enough to use for a year or so.

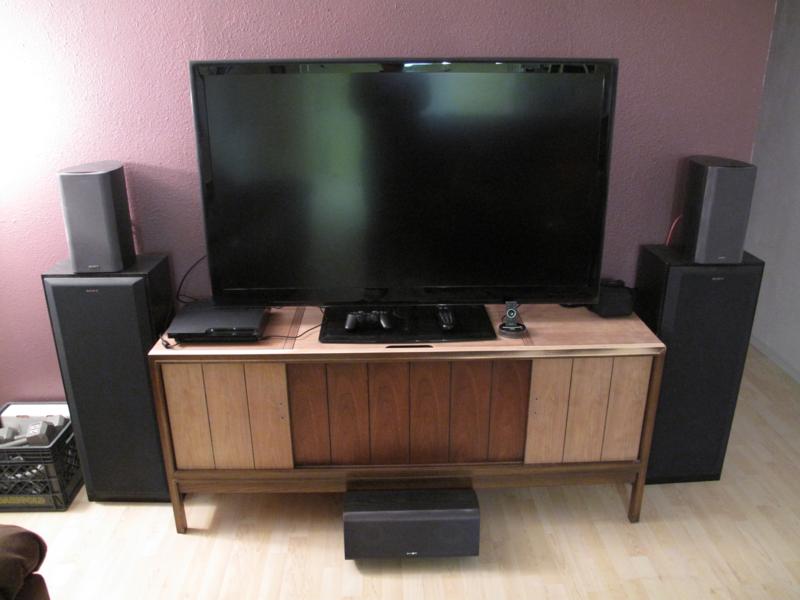
    Well, it's now where my HTPC will be housed. I'm also building speakers back into it, which is a good thing because I've been using the speakers on my 55" HDTV for pretty much the entire time I've had it.

    So, without further ado, I'll just recap everything and get us up to speed on where this is as of tonight.

    A few years ago I bought a 1960s record cabinet for $25 from a guy off craigslist. My wife and I knew we were going to get a new TV that I could mount to the wall, so we knew we were going to get rid of our giant oak media cabinet.

    My wife mentioned wanting to sand it and re-stain the record cabinet to match our bookshelf we had stripped and re-stained.

    I did a lot of early work, ripping out the speakers in the side cabinets and removing the turn table, radio tuner, and amp. Sadly, I took no before or early progress pictures, but it was a fairly handsome piece and real sturdy. Here’s the earliest picture I have, with the doors and top sanded. I have since mounted the TV to the wall and sold the giant speakers I had as well.
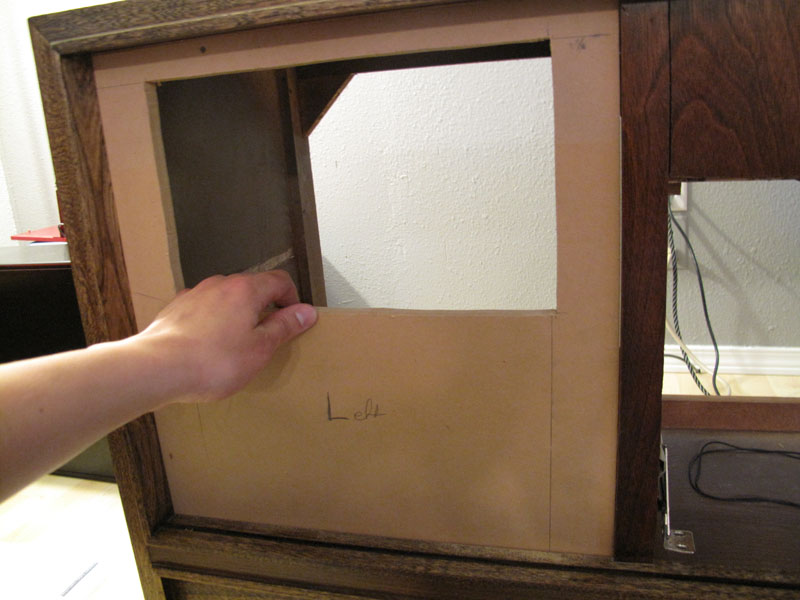

    I really don’t have any images of the early progress. I ripped out a lot of stuff. I knew I wanted to make the center part of cabinet open up. I needed to make it into a door. The sides of the cabinet have doors that slide to open, revealing speakers. The center portion was for the never-to-be-seen amp, and the top door which hinged up to reveal the turn table and radio.

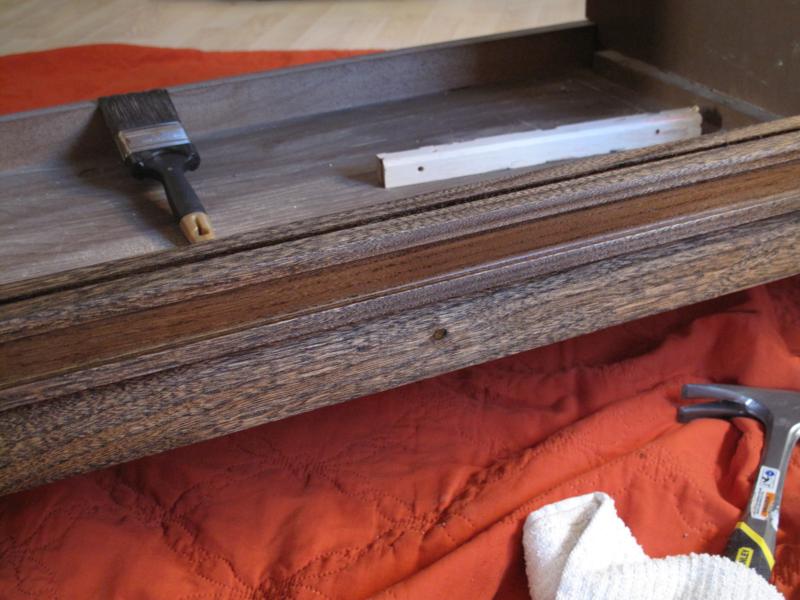
    The front of the cabinet was never meant to be a door and took forever to remove. I spent at least four hours removing screws and taking a chisel to pieces of wood glued in to hold the whole thing together. Eventually I got the front off.

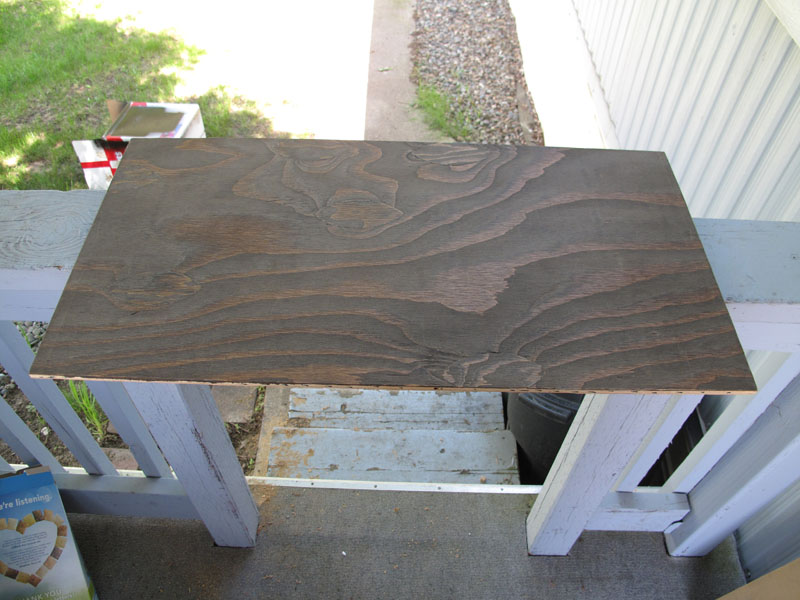
    After that I sanded and stained everything. I won’t go into details on that. It really isn’t that interesting and there’s plenty of places online that will tell you how to do it better than I did. Here’s a picture of the newly stained and sealed credenza with the front panel off.


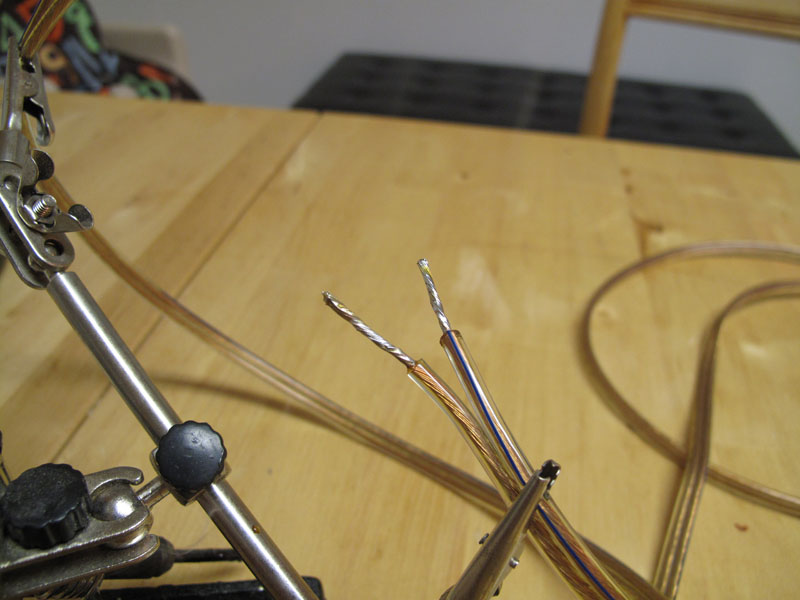
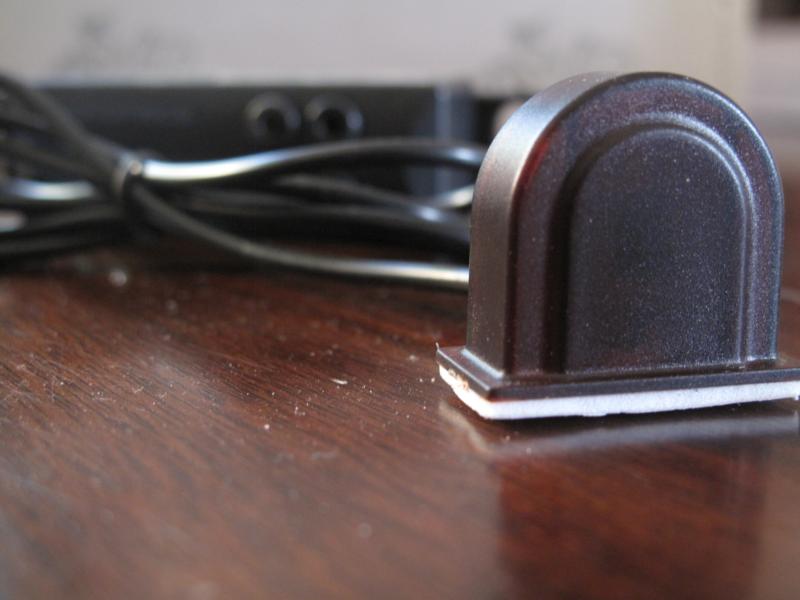
    The first major change is the addition of an IR repeater. The cabinet originally had a little light bulb in it that would light up on the outside of the cabinet to indicate that it was on. I decided that placing the IR receiver there would be the most inconspicuous. I ordered a repeater from monoprice.com (awesome site for all your AV cable needs) and got to work.


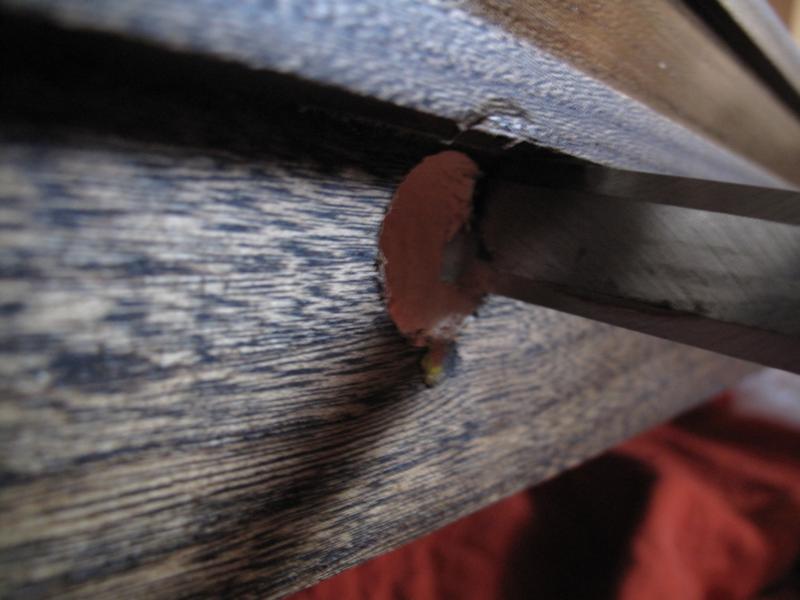
    Close up of a little piece of plastic that brought the light from the inside of the case to the front. The bulb sat behind piece of translucent yellow plastic and in the case.
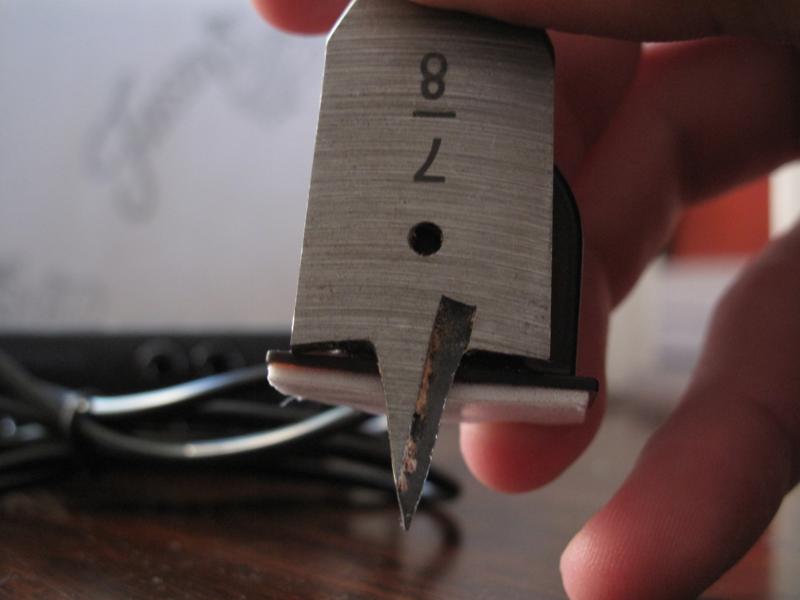

    The IR receiver


    The closest bit I had was 7/8 of an inch.


    After drilling I chiseled out the rest. It was fine tuned with a dremel and sanding bit. Then I took the dremel to the IR receiver to cut some unnecessary bits off it as well.


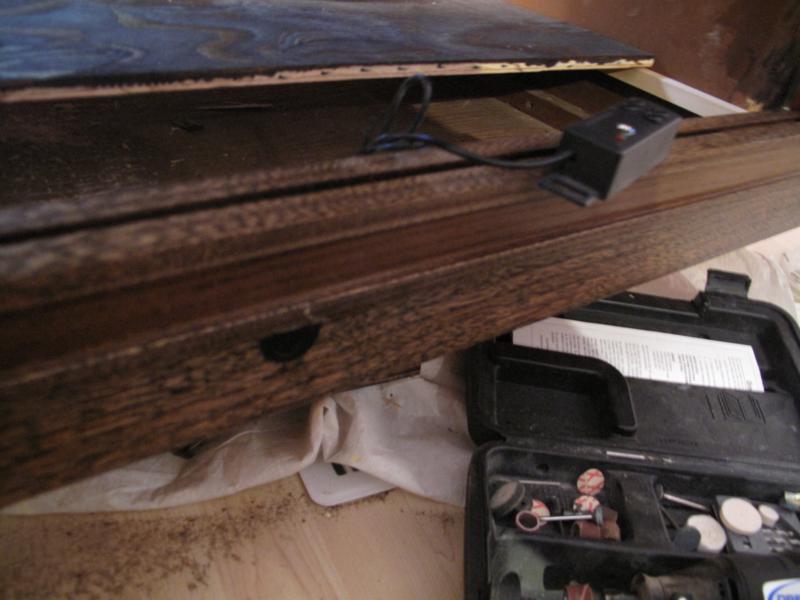
    It was getting dark out at this point, so I don’t have any good close pics of right after getting the receiver in place, but here it is with the controller and repeater housing.


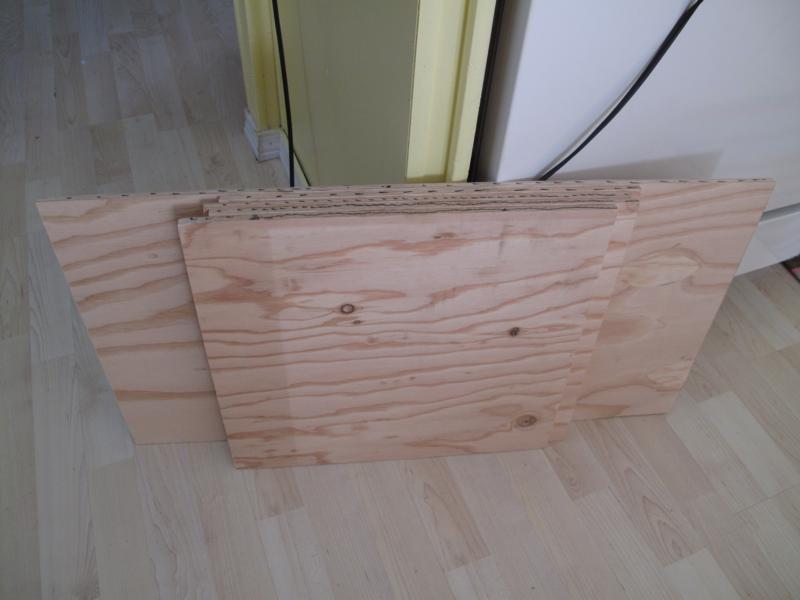
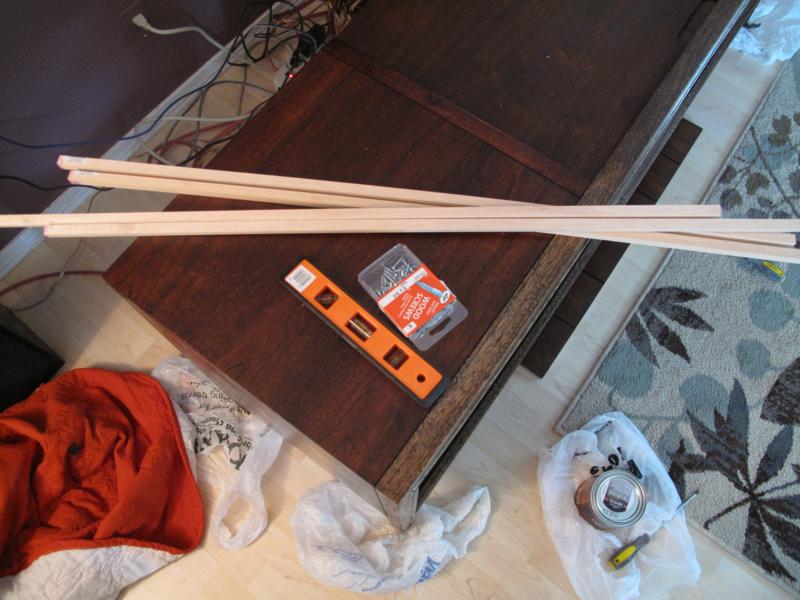
    After that it was time to add some shelves. I got 3/8 inch plywood and cut the shelves to size. They weren’t exact, but close enough, and refined with my scroll saw.


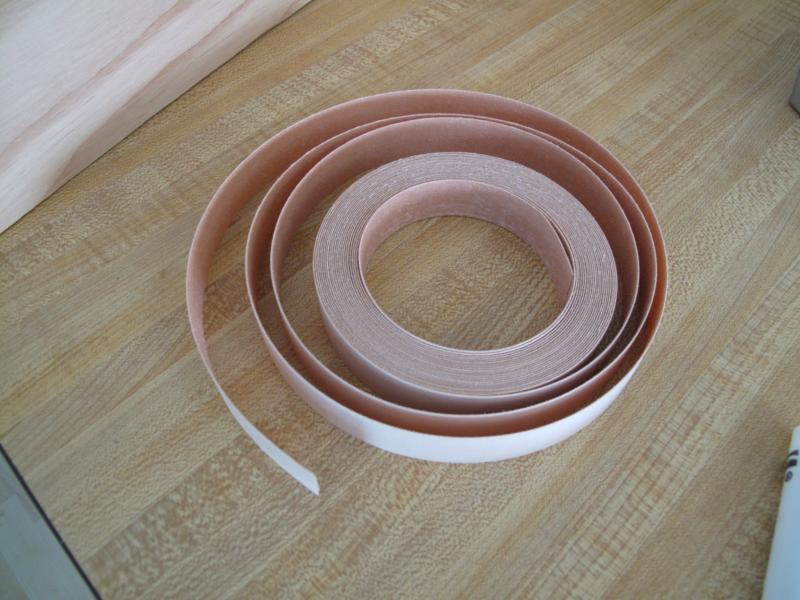
    I got a birch veneer to apply to the edges so they look nice. This is ironed on and a glue on the back adheres to the face of the shelves.


    I then got a level and some pieces of wood to cut the shelf mounts. These were screwed and glued in place and the stained shelves were put on top.


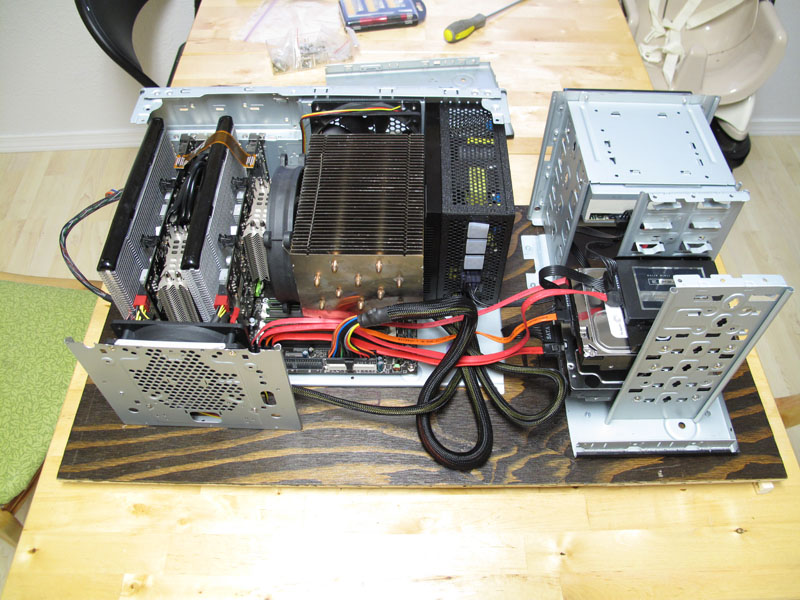
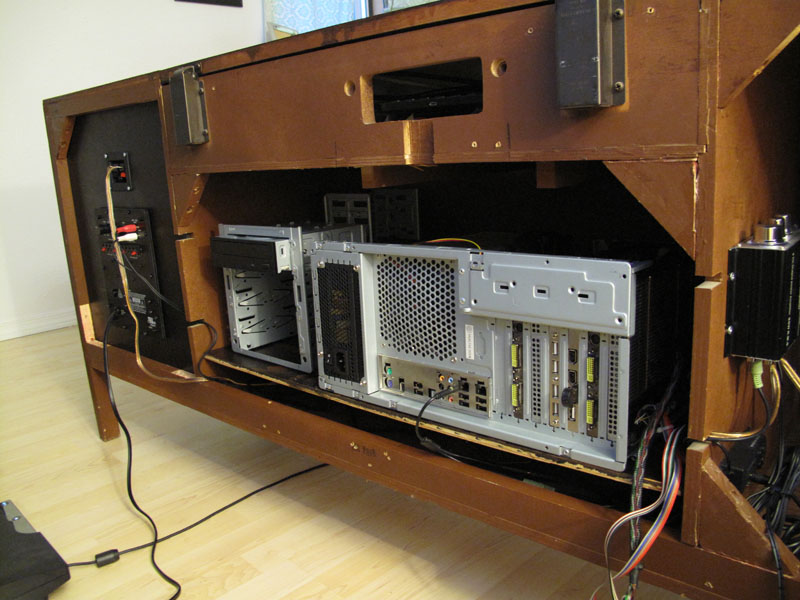
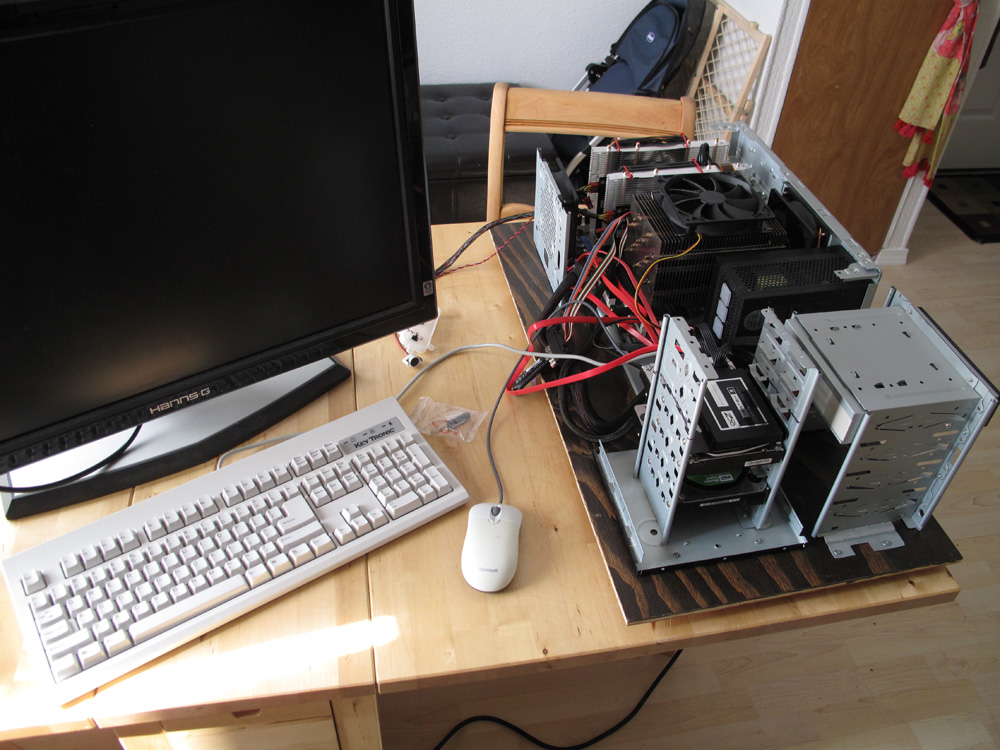
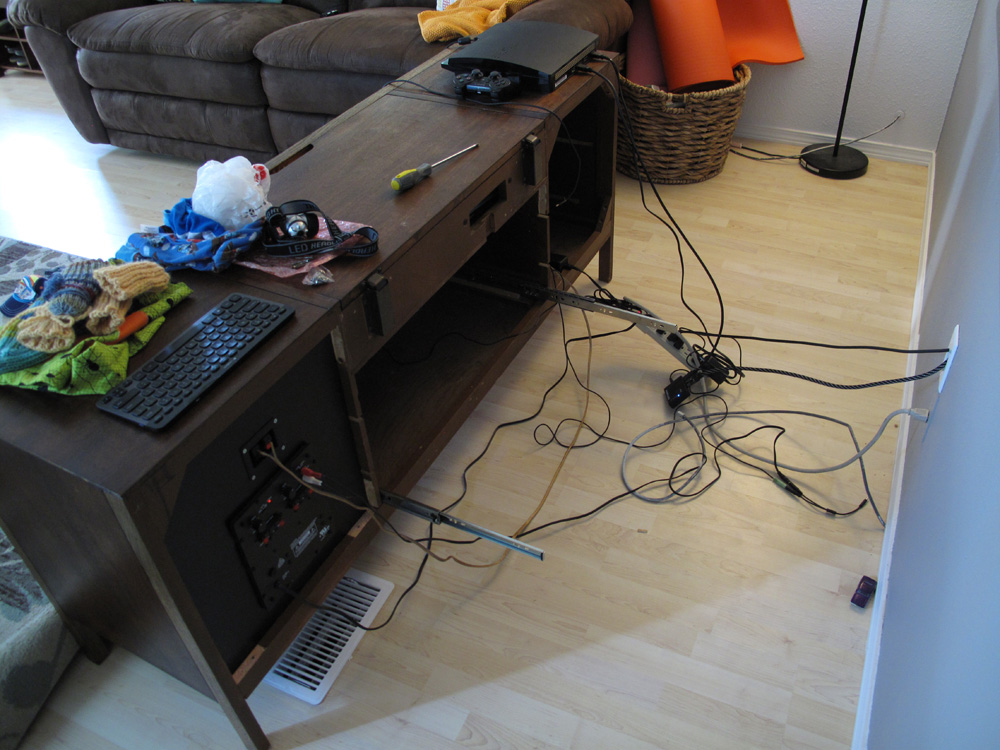
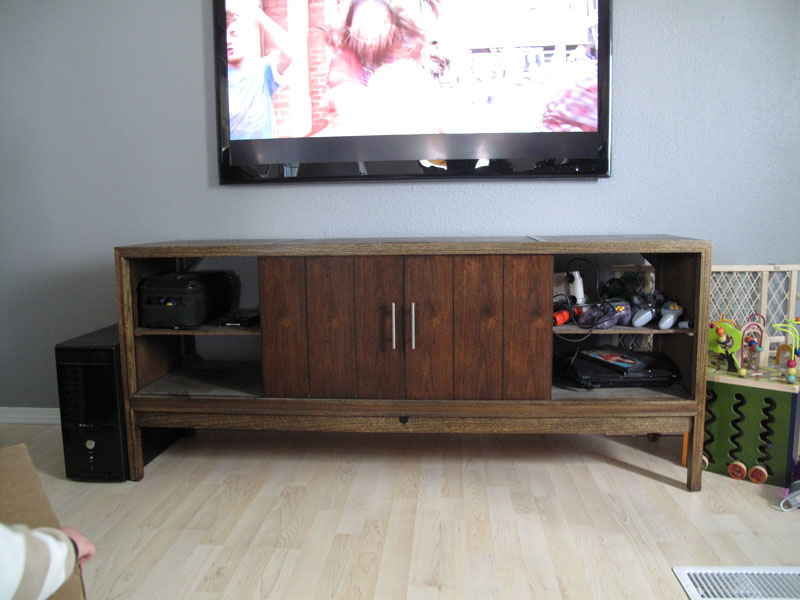
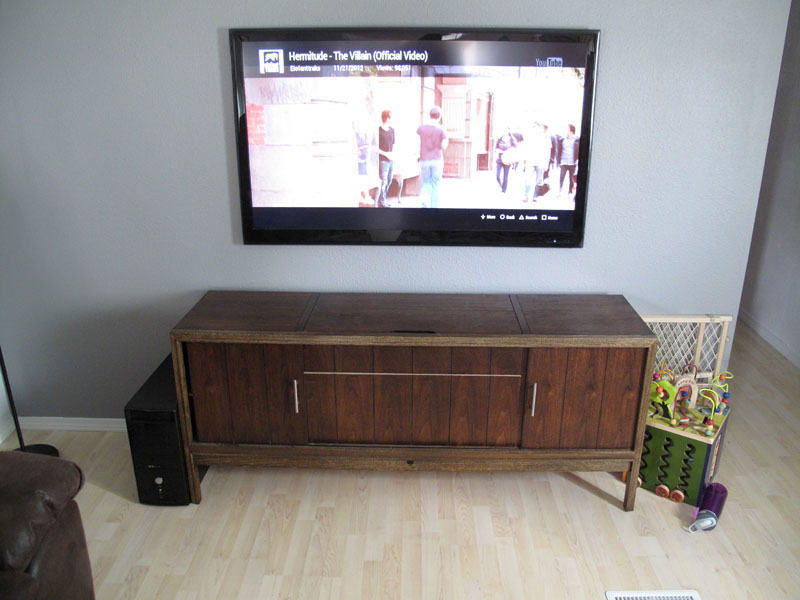
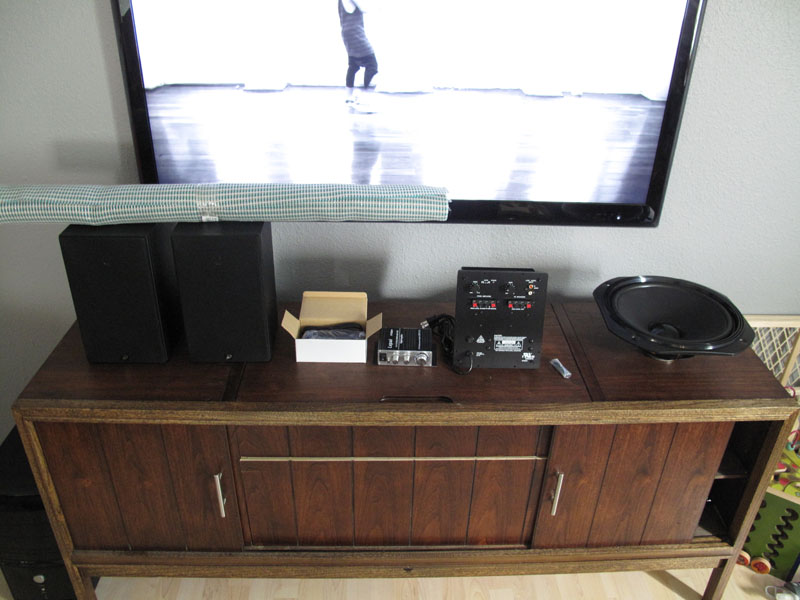
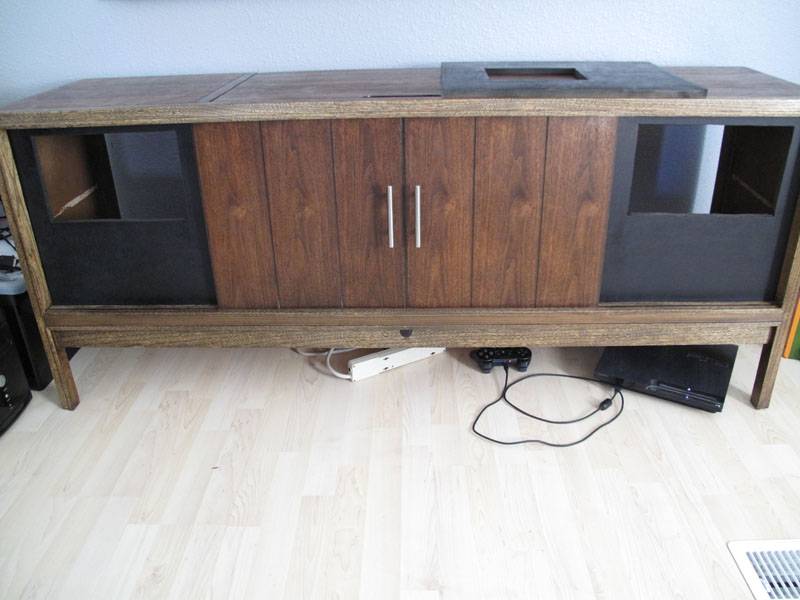
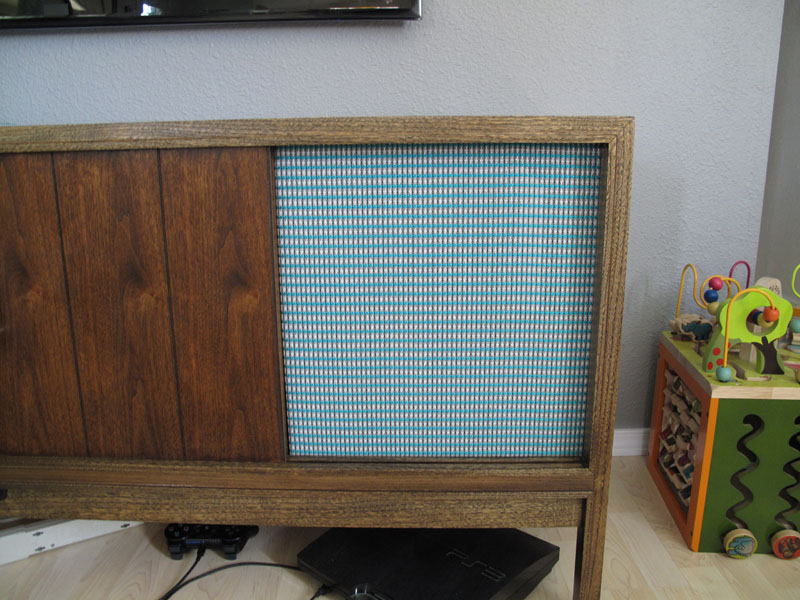
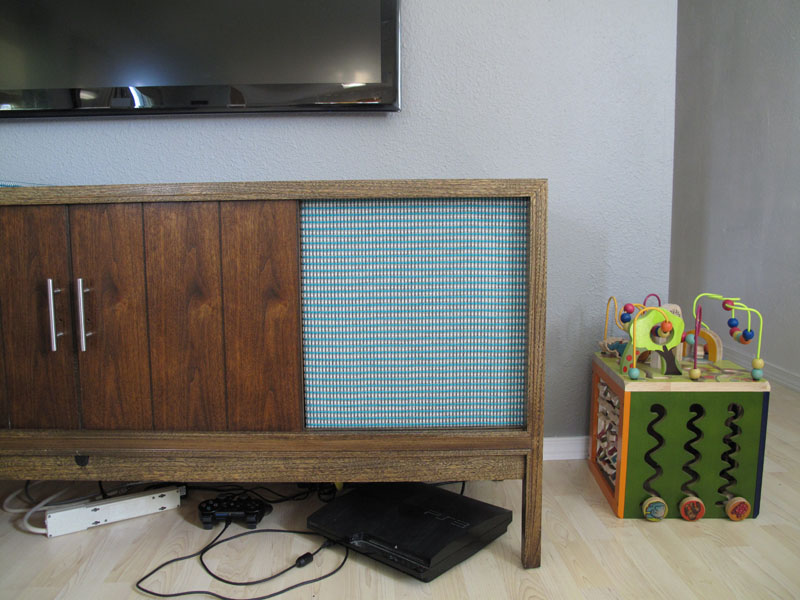
    Here's how it stood for the past year or so. It was nice having the shelves and especially getting rid of the giant speakers, which overwhelmed the room. But this last winter I put a HTPC together and it's been sitting next to the credenza, being ugly. So it's time that I get back to work and make this into a HTPC case.


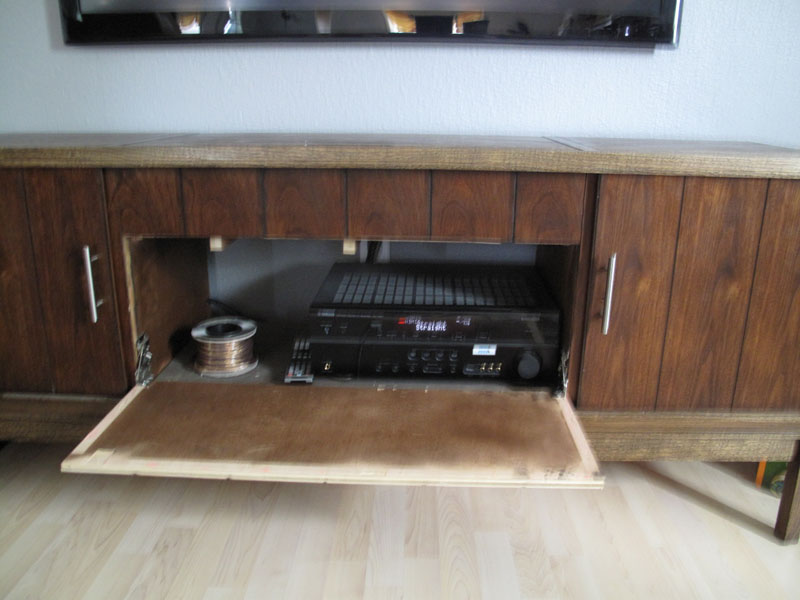
    A blurry picture of the front door open to reveal a really nice receiver and some speaker wire. I sold the amp for $250 and a $40 Best Buy gift card to fund this project. Considering that I bought it for $250, I thought I did pretty well.


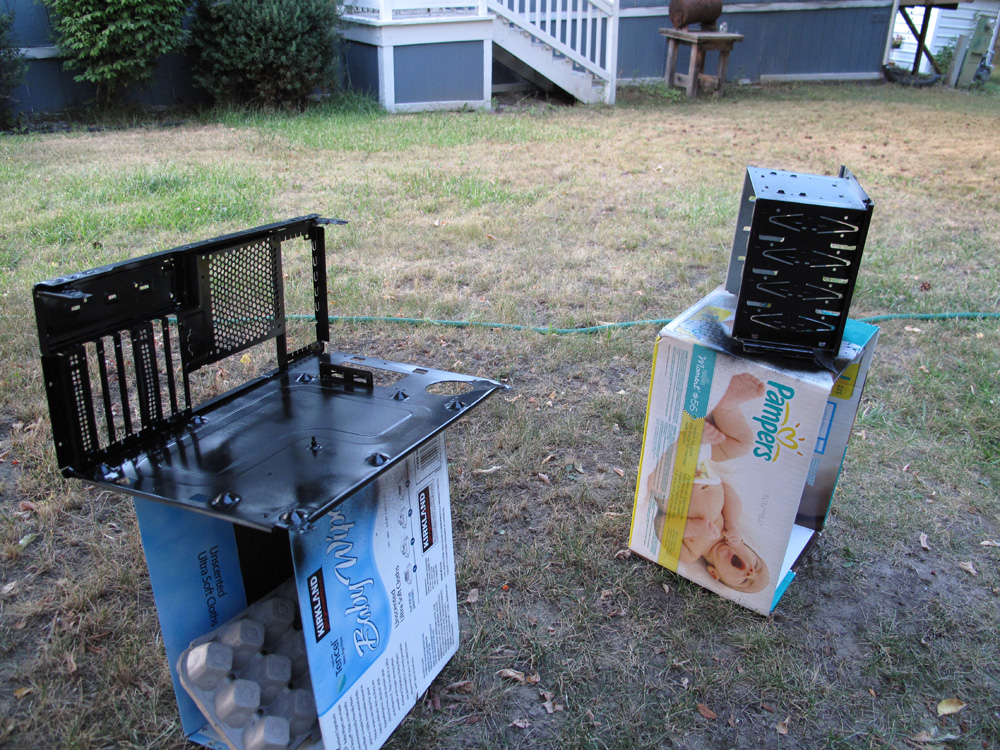
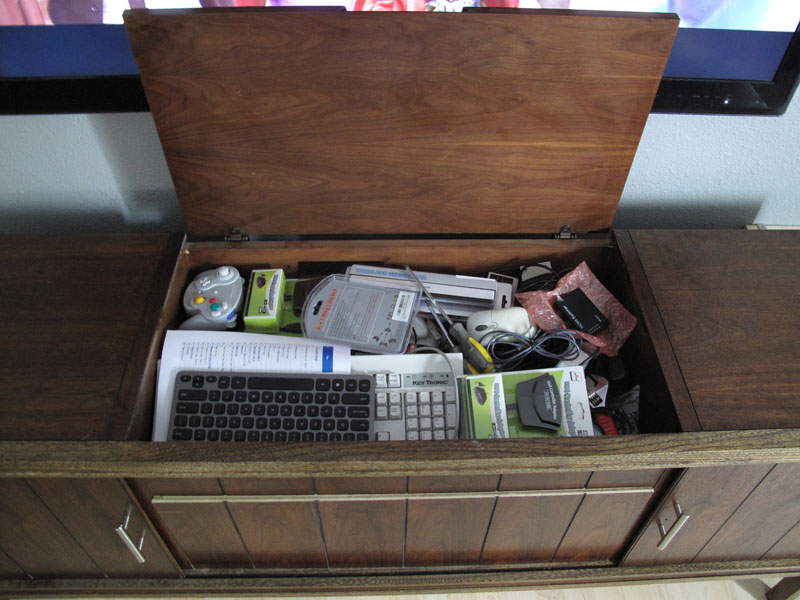
    In the top of the cabinet are a lot of goodies for this project that I've been slowly collecting for a few months. Mostly they are USB controller converters. I'll get hyperspin running so I can play all my favorite old games with their original controllers.


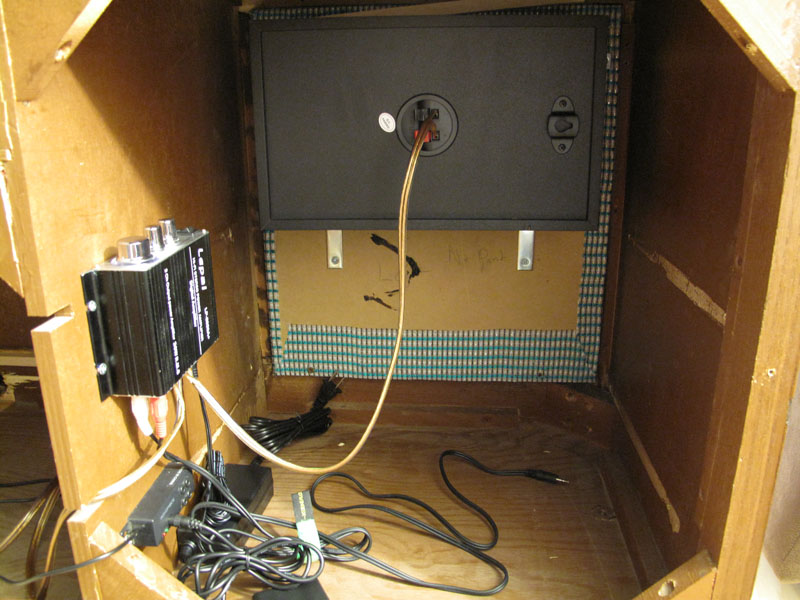
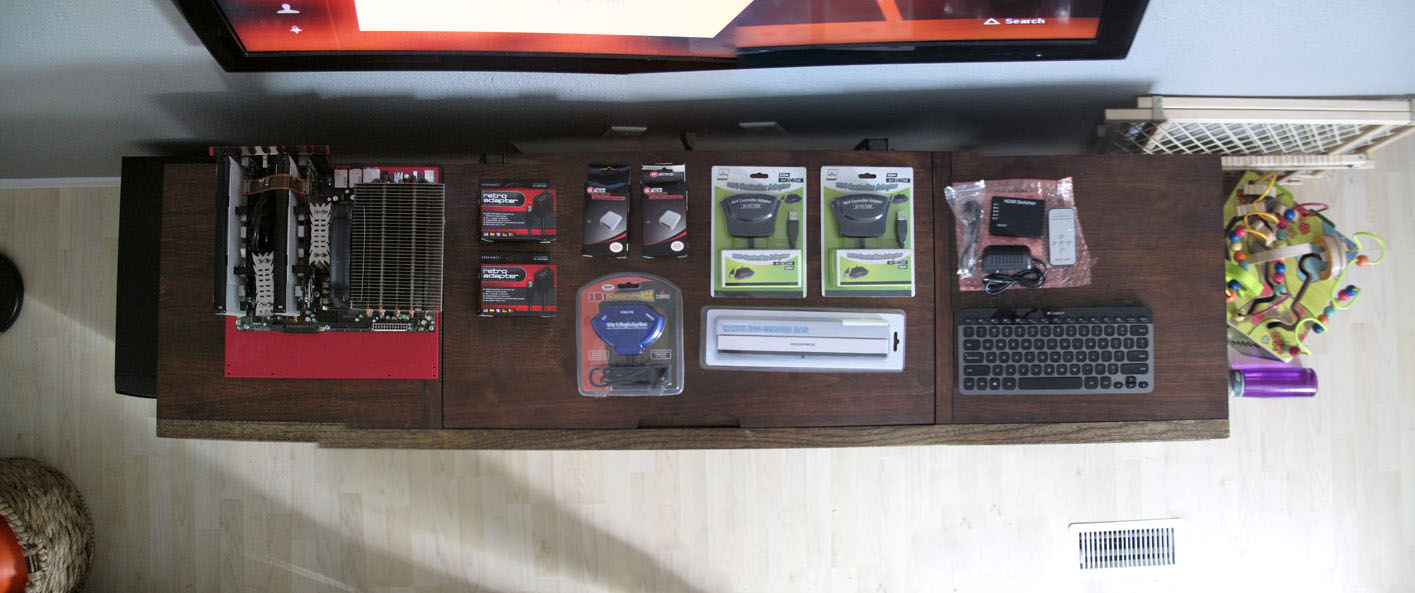
    If I take all the junk out we can see what's in there a bit better. On the left is the HTPC mobo in a lian-li motherboard tray. It won't stay there for the final mod, it was just an idea.


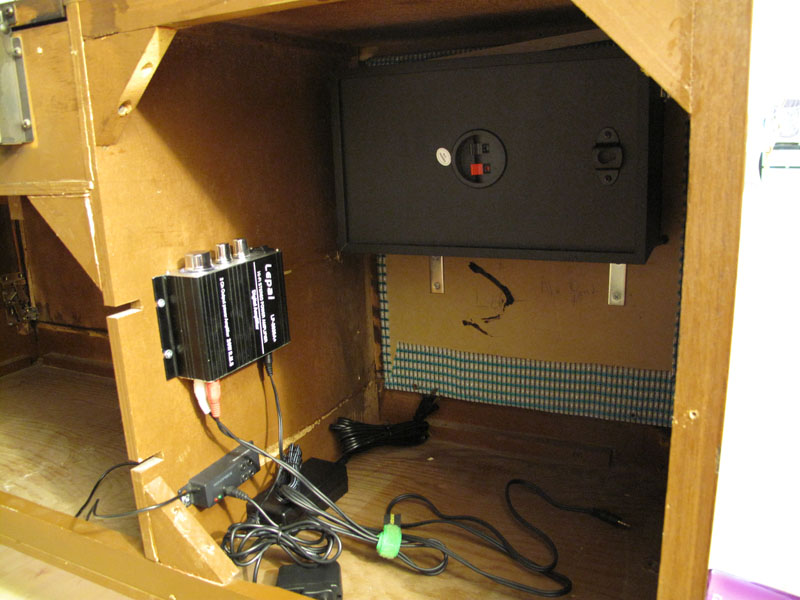
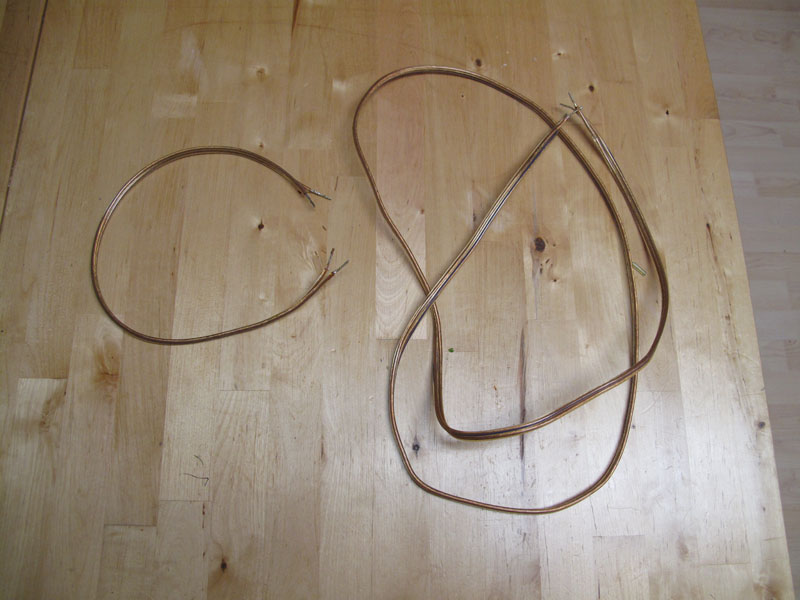
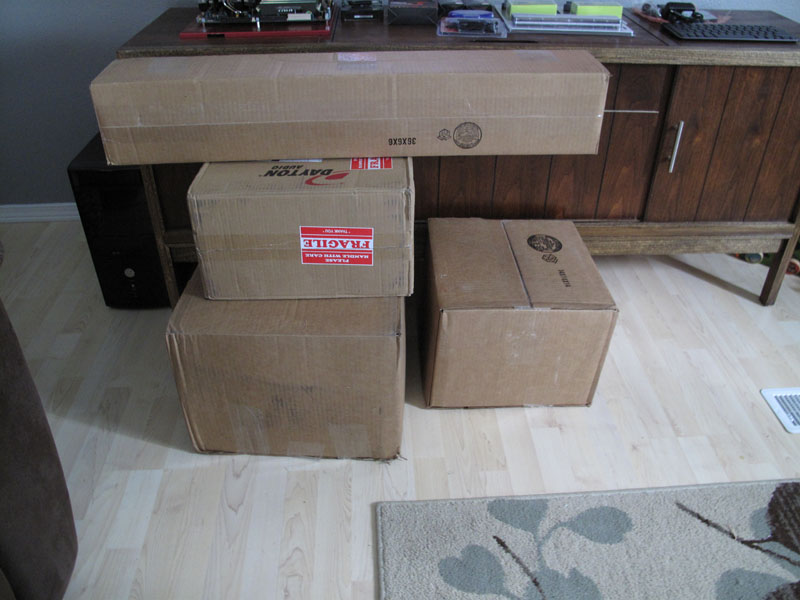
    With the money from the sold amp I got some speaker components to rebuild the media cabinet back up.
    What could this be?


    In the boxes we have:
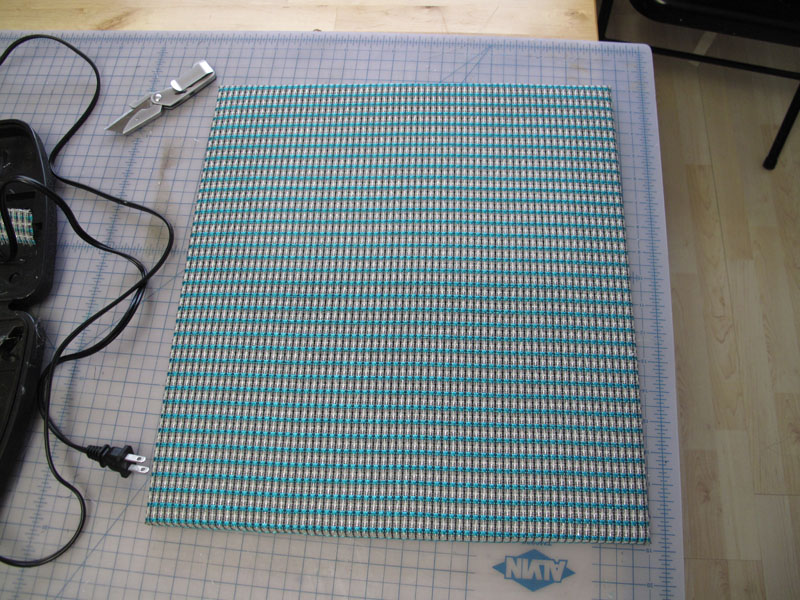
    1 yard of speaker grill cloth
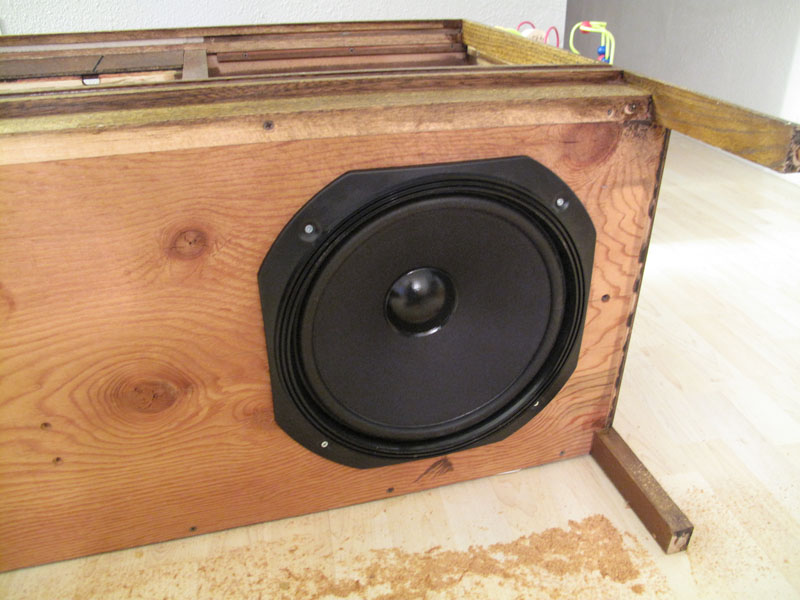
    12" sub woofer (tiny magnet, but it only cost $14)
    Pair of Dayton B652 2-way bookshelf speakers (cheap man's hi-fi)
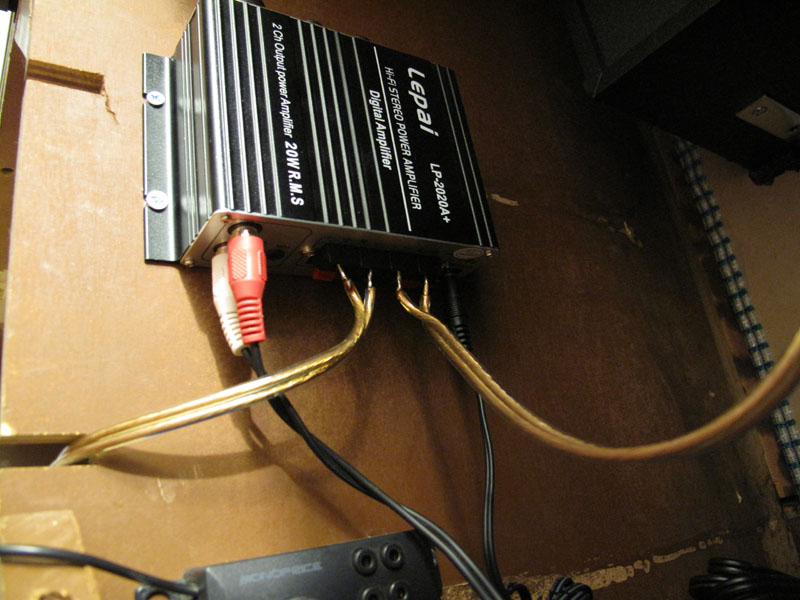
    Lepai LC-2020A+ Class-T amp (cheap man's hi-fi)
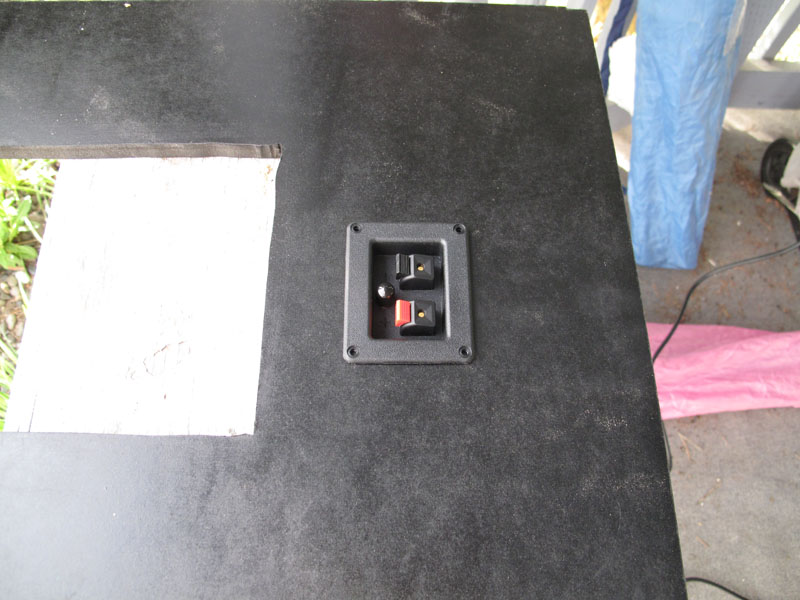
    70W sub woofer plate amp

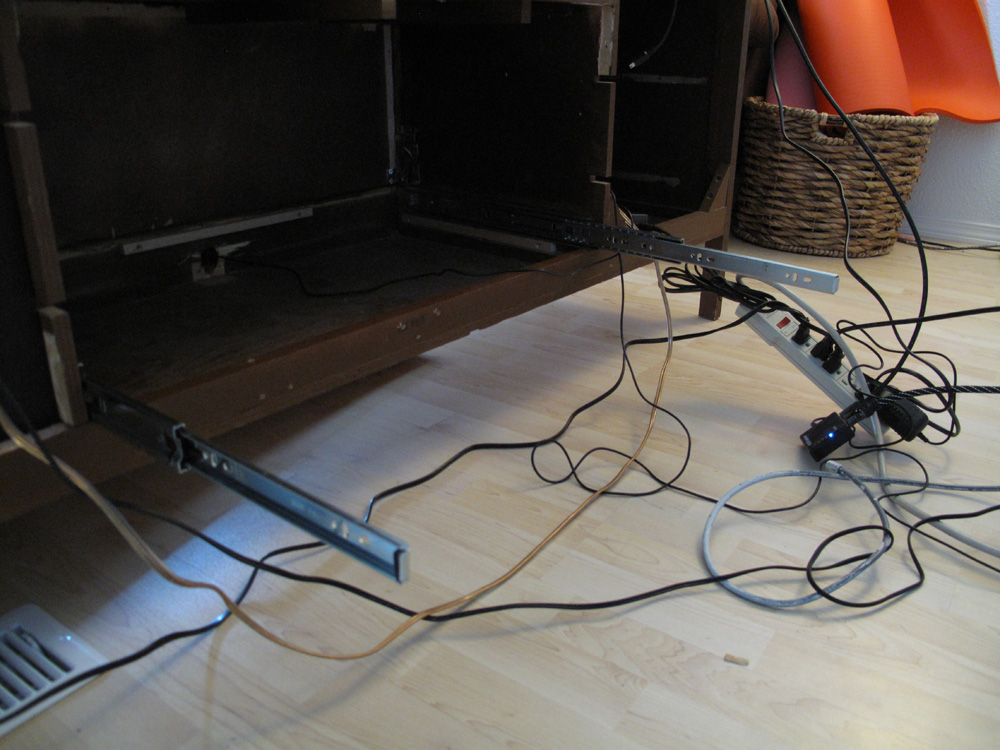
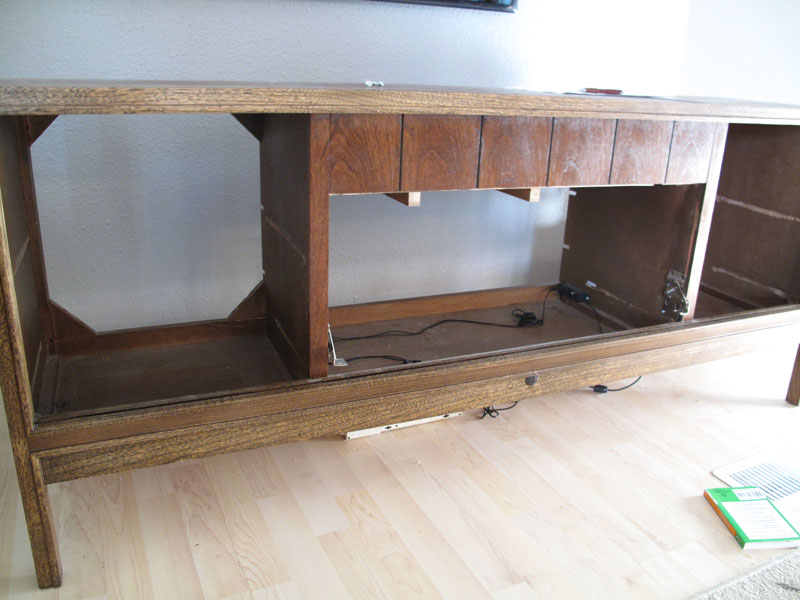
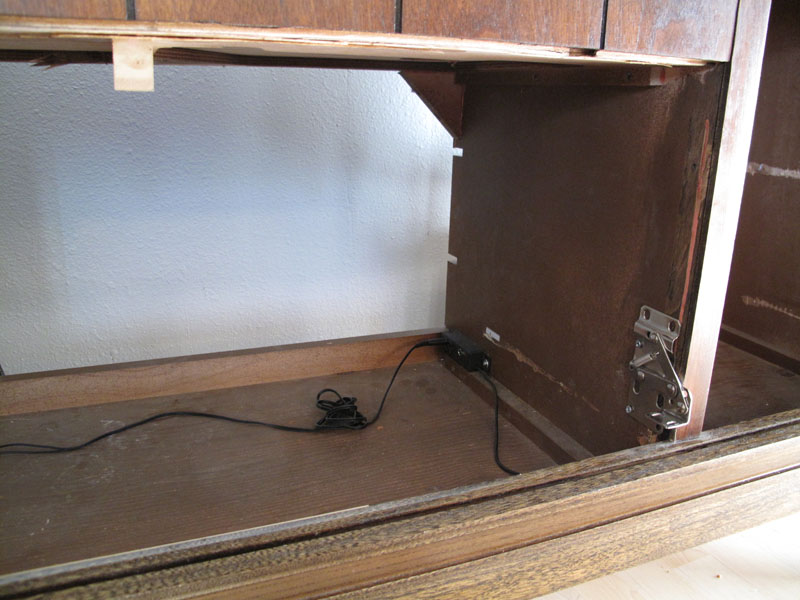
    After getting lots of goodies I started to dismantle the cabinet again. Deja Vu, anyone? I removed the door I had built (and never fit right, going to fix that this time around), the side doors, and the shelves as well as their supports.


    It's starting to feel like a clean slate again, which is really nice. It was getting too filled with crap, and the shelves hadn't been sealed with poly so they just collected dust like mad.

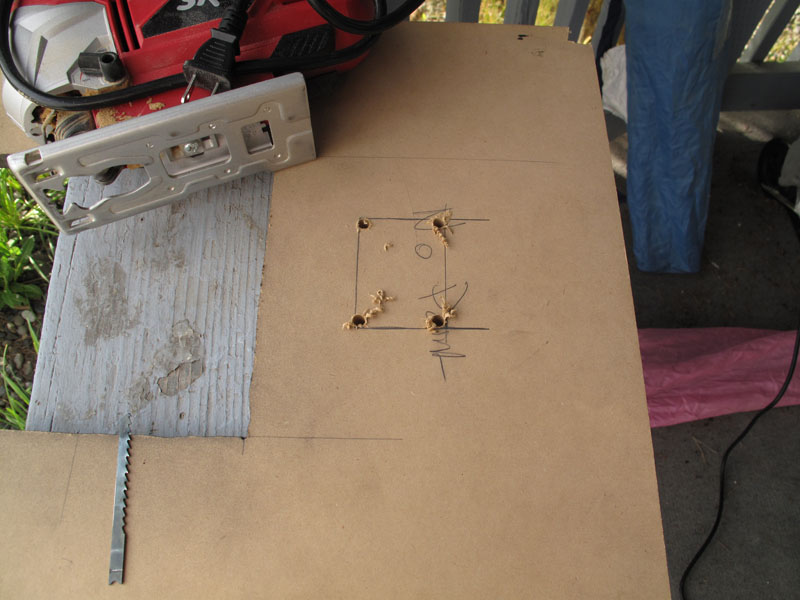
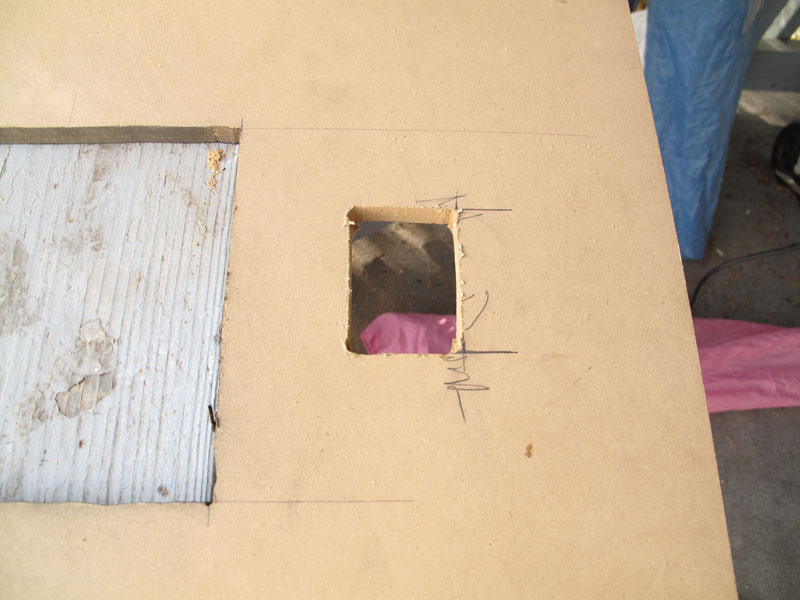
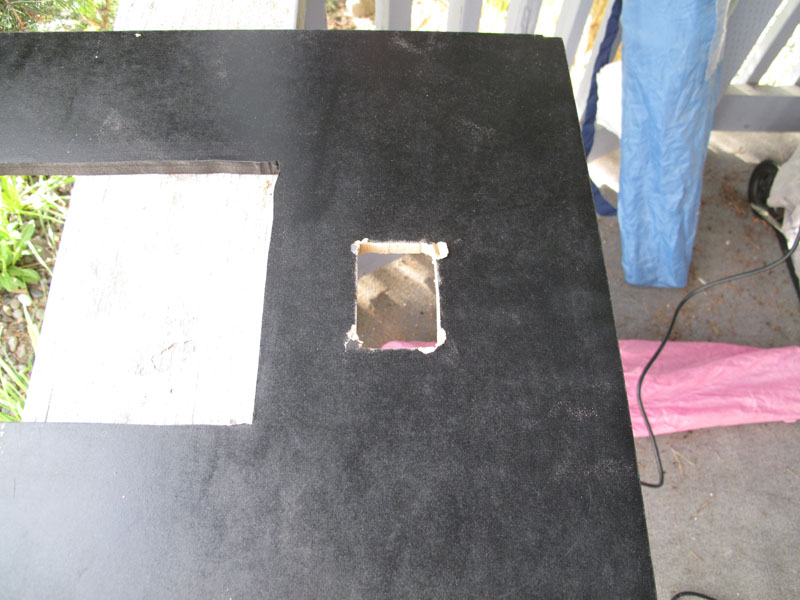
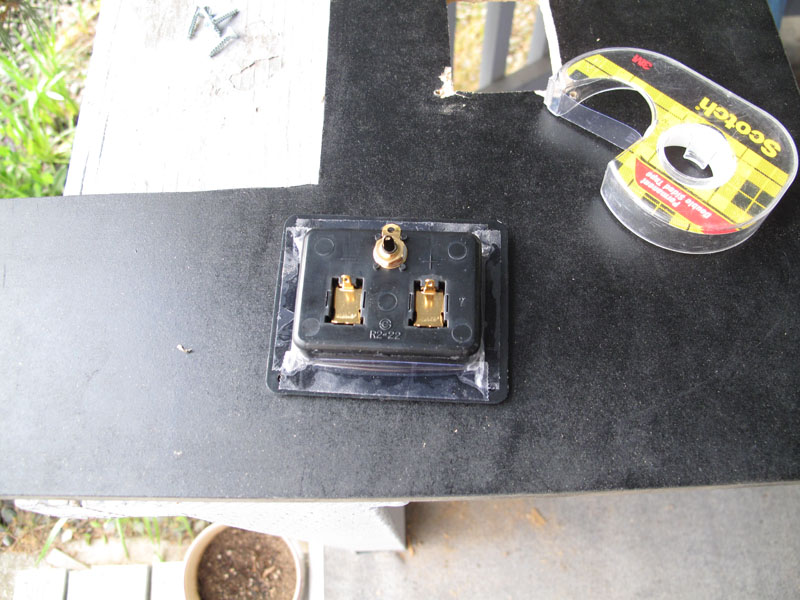
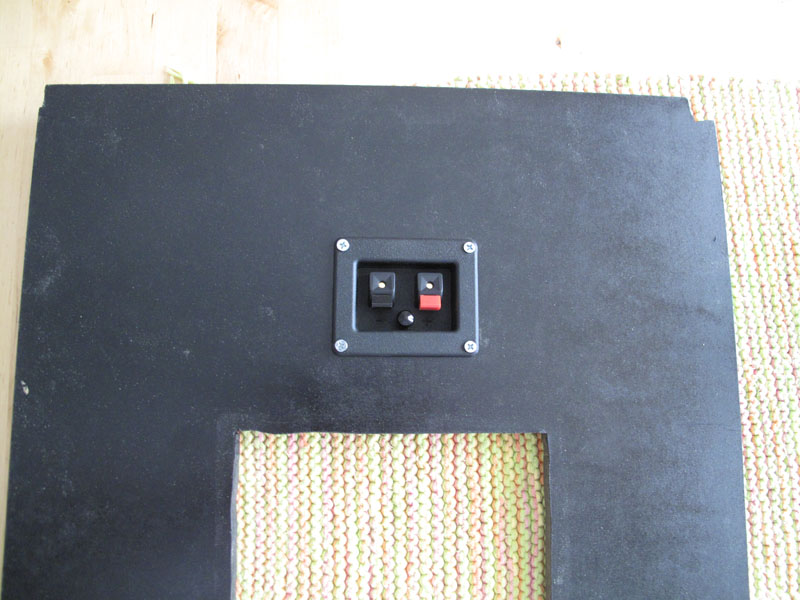
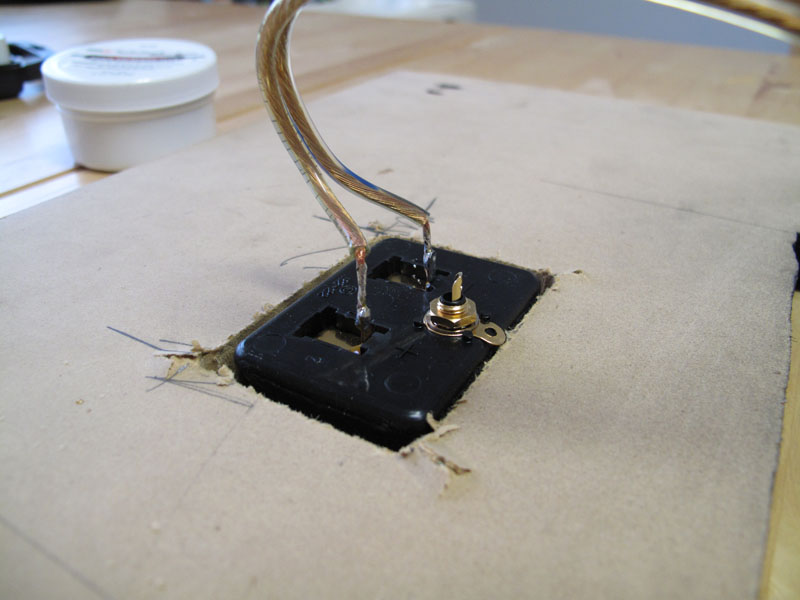
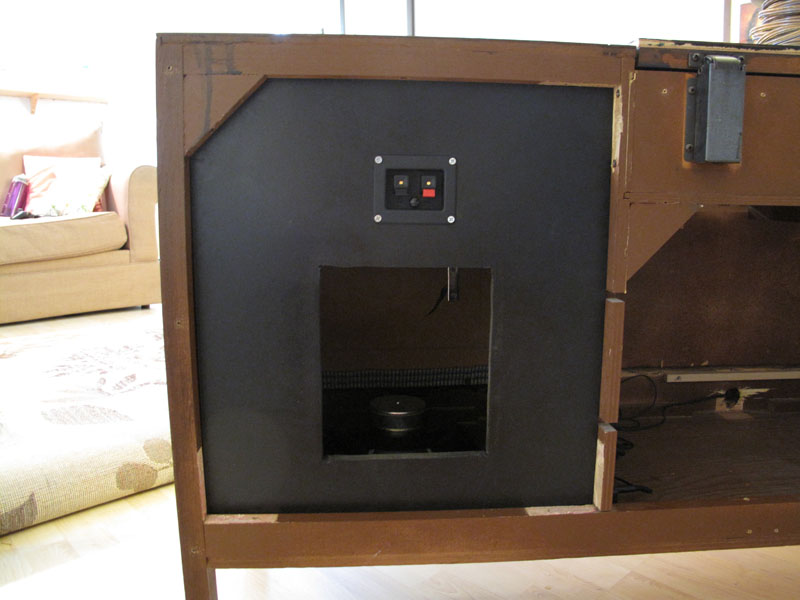
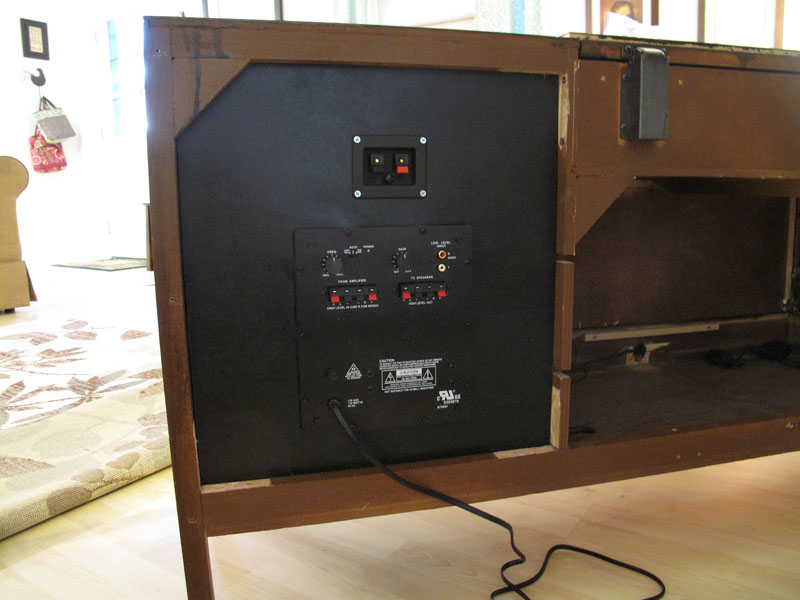
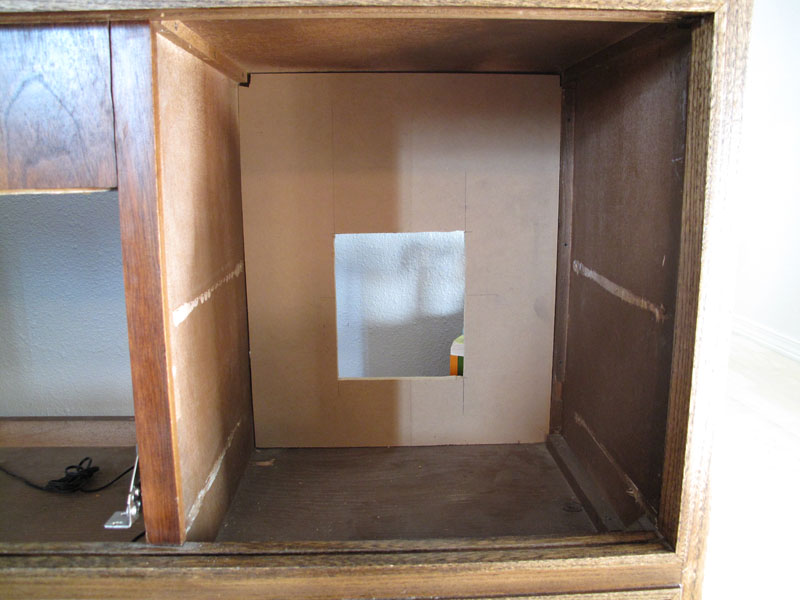
    I then got some 1/2 inch MDF and cut a back plate for the right speaker enclosure. The hole in it will hold the plate amp and the whole piece will seal the back of the speaker box. The sub woofer is really cheap, so a closed box is the best option for it.


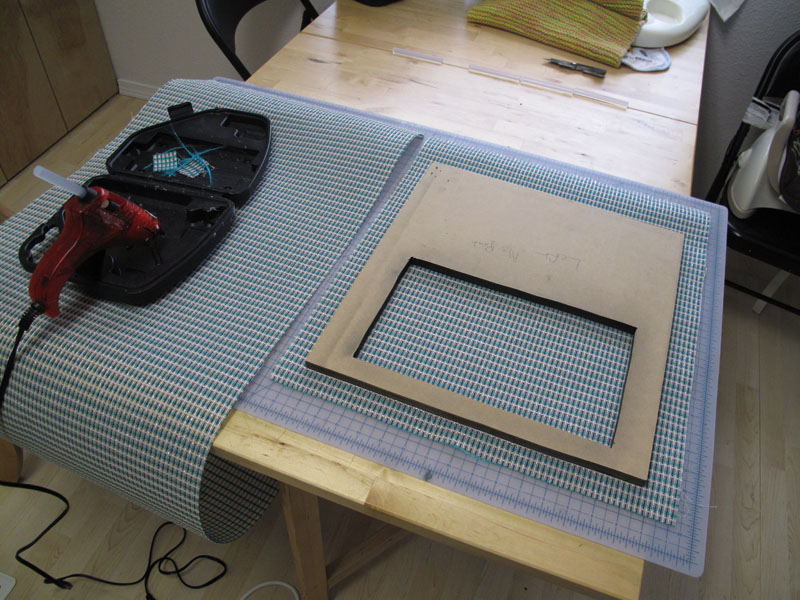
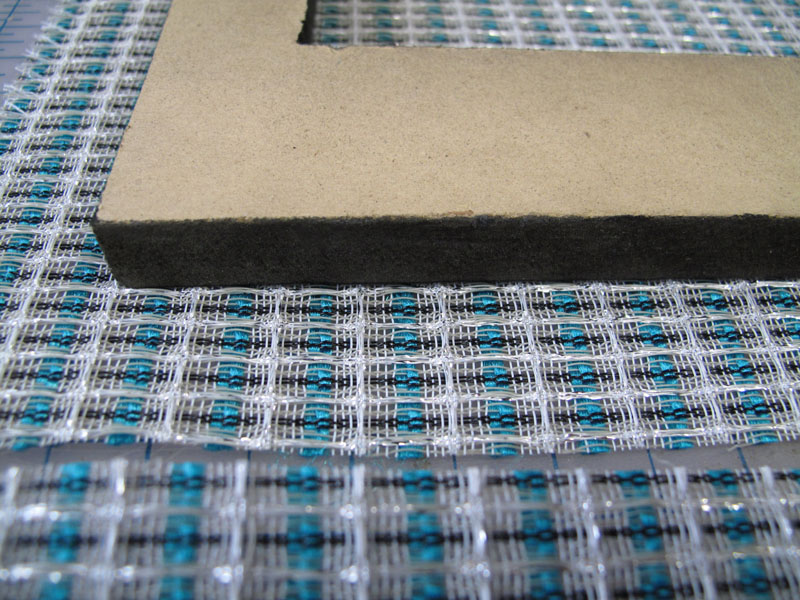
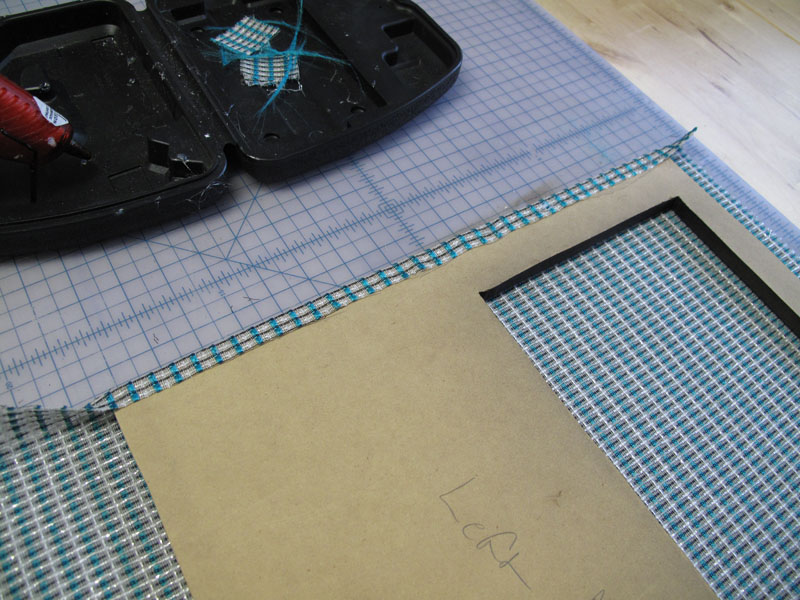
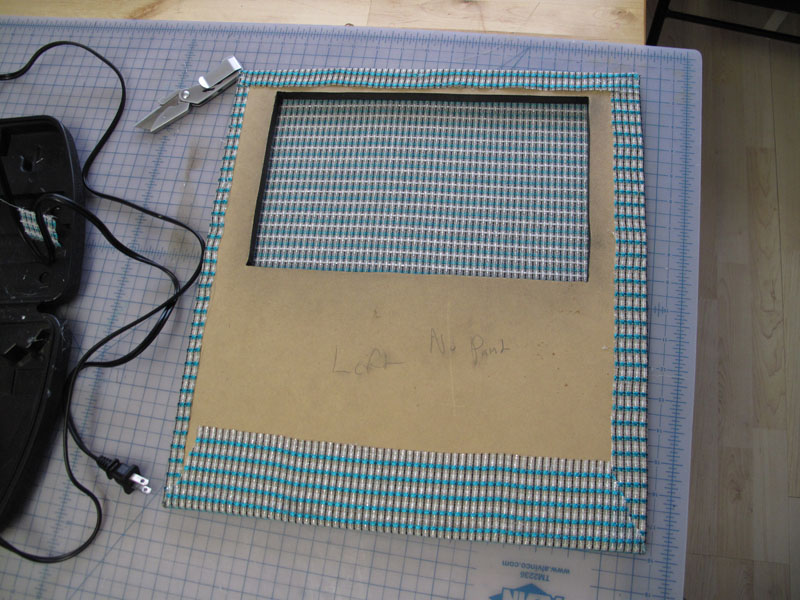
    I then cut a piece of MDF for the left and right speakers. I'll paint this black and cover it with speaker grill fabric. If I had more money I'd make this so the fabric grill was removable, but I don't really have the money to get the parts I would need, and this will be faster in the end.


    After checking to make sure it fit in the cabinet, I checked the hole to make sure the speaker fit. It was perfect!


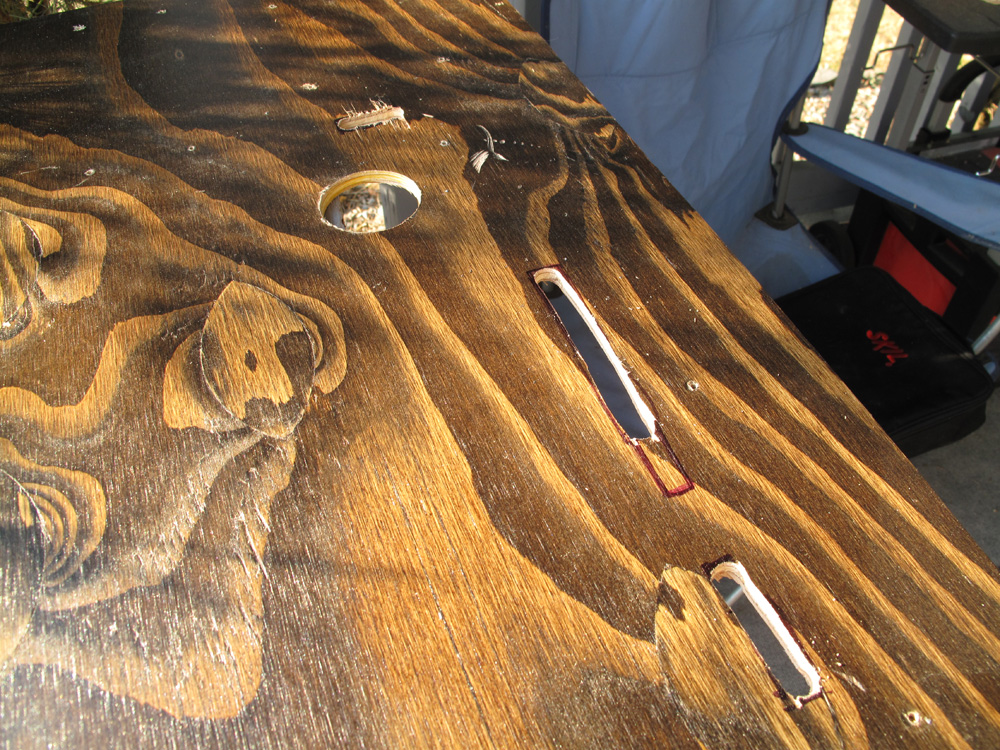
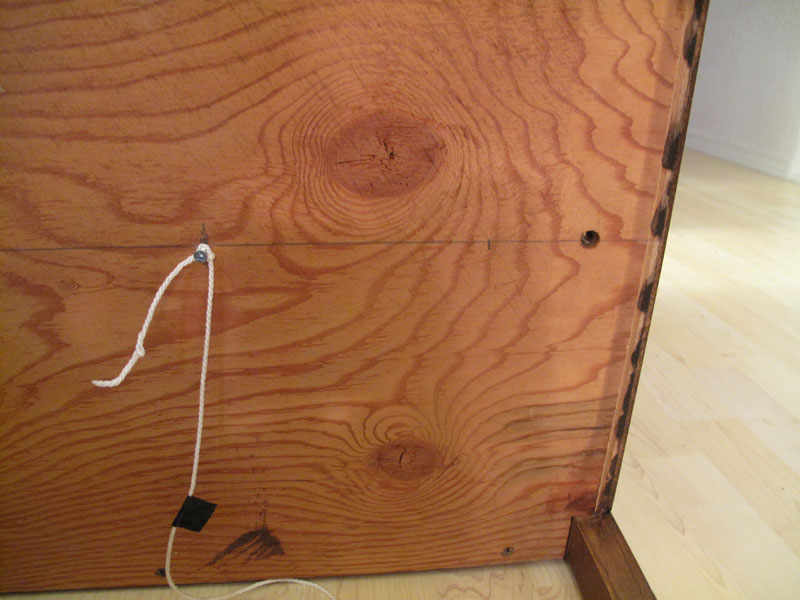
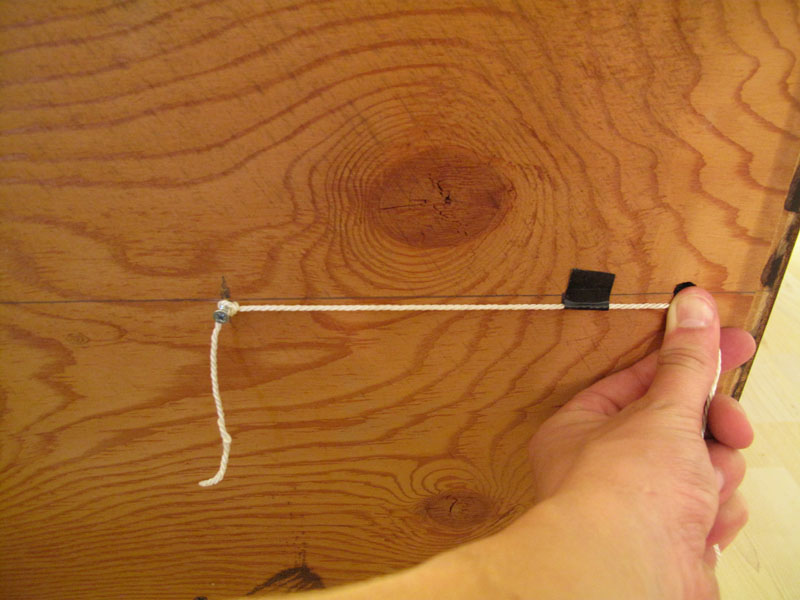
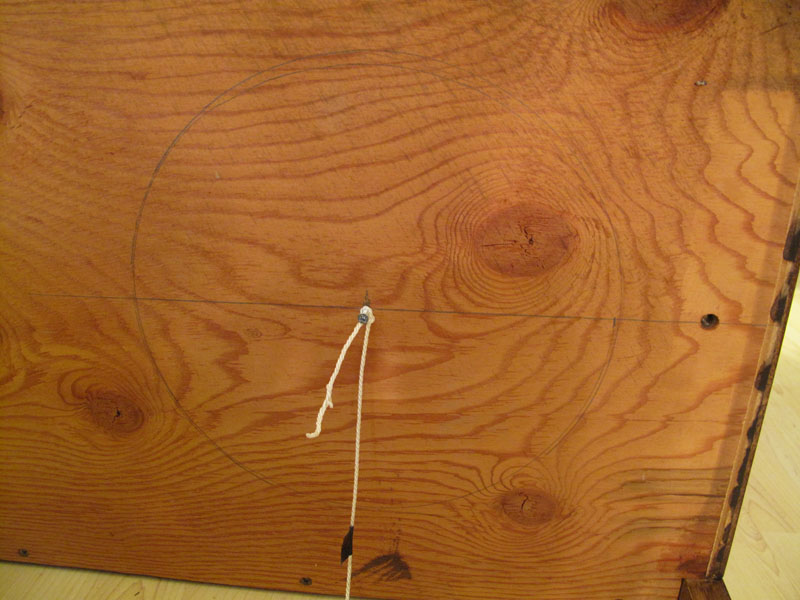
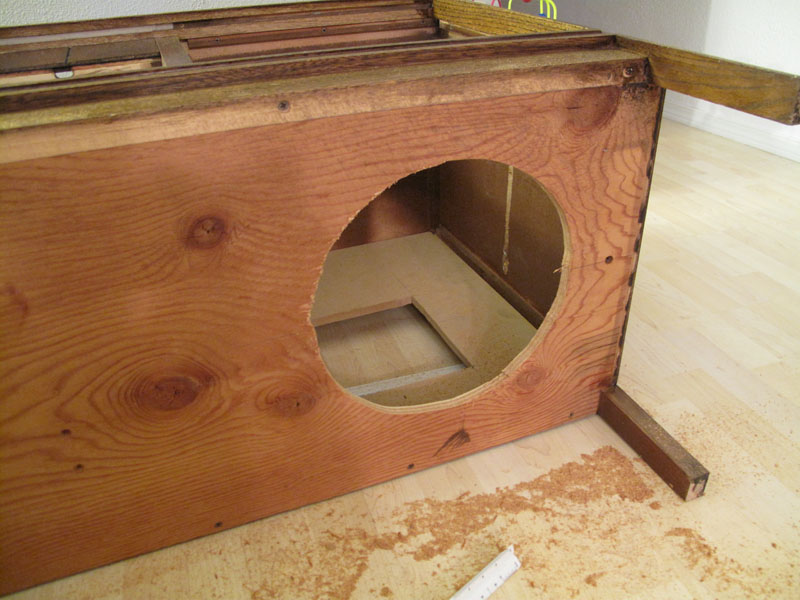
    Next step was to cut a hole for the sub woofer. The mounting diameter was 10 and 3/4 inches, so I put a screw on the bottom of the cabinet and tied a piece of string to it, then measured out 5 and 3/8 inches from the screw and put a piece of electrical tape there.


    The tape made a little corner where the lead of my pencil could rest while I pulled the string around. After tracing I double checked the diameter. It was perfect!


    I cut out the hole with my jig saw. My son was already in his crib in his room crying from us putting him to bed, but this scared him really bad and he was screaming after I finished. Oops. At least the hole didn't need any adjustments.


    I then put some foam tape on the inside of the sub to make an air-tight seal and mounted it in the hole.


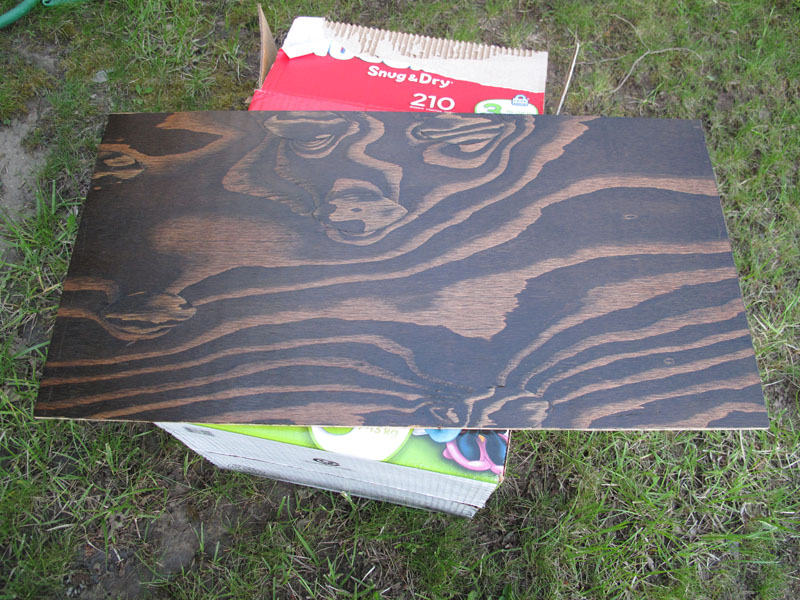
    It was dark out by this point, but I still went outside and painted the pieces of MDF. No pictures because of the lack of sun, but I'll get them up tomorrow.

    More to come!

  2. #12
    Water Cooled Stonerboy779's Avatar
    Join Date
    Jan 2012
    Location
    Melbourne, Australia
    Posts
    557

    Default Re: d_stilgar's HTPC (title anyone?)

    Love the unit. Had forgotten about this and hope ya can eventually find a title for this.

  3. #13
    Over 75 Custom PC's in 20 years TheGreatSatan's Avatar
    Join Date
    Apr 2005
    Location
    Southern IL
    Posts
    6,633

    Default Re: d_stilgar's HTPC (title anyone?)

    Where did you find a Musketeer?
    WH1T3 0U7
    *******************************
    Modified Thermaltake View 37
    Intel 9900K, MSI Z390A, 128GB (32GB x4) GSkill Royal 3200MHz, RTX 3080 Vision, EVGA Nu Audio, 1TB Silicon Power SSD, EVGA 1300G2, ID cooling 360mm AiO, LG 3440 x 1440


  4. #14
    Undead Pirate d_stilgar's Avatar
    Join Date
    Mar 2005
    Location
    Philadelphia, PA
    Posts
    2,987

    Default Re: d_stilgar's HTPC (title anyone?)

    Quote Originally Posted by TheGreatSatan View Post
    Where did you find a Musketeer?
    I've had them for years and years now. I bought three of them for $30 a piece a long long time ago. I've just been hanging onto them. I'm not sure whether or not they'll make it into this build. It would take a lot more time and money than I really have right now. I've had other ideas for them too, and now I also have two Lamptron FC10 fan controllers. Someday all this diesel-punk hardware will make it into a really insane build. For now I'm just hanging onto them.

    This morning the first thing I did was take the painted pieces of MDF and do a little mock up of how they'll be mounted. The black paint is just so I don't have brown MDF showing through the speaker grill fabric, so the paint job didn't have to be particularly pretty.


    The next step (after my son went down for a nap) was to stretch and glue the speaker grill fabric. Speaker grill fabric is acoustically transparent, mostly due to the fact that it's full of holes. This means that a fair amount of light gets through it as well. This fabric in particular stretches in a strange way and has a very specific pattern, so I had to be very careful in how I stretched it.


    I'm sure there are better ways of attaching the stuff, but for me hot glue was going to do the trick. It "dries" as fast as it cools down, which means if I use my hands and fingers as little heat sinks, I can cool it really quickly while sending myself to the emergency room. But in all seriousness, I don't have a ton of money and these will never be seen from behind, and the fabric will be held in place by tension after the grills are mounted, and since I had hot glue on hand, it meant I was using hot glue.


    The first step was to square the fabric to the MDF. I decided it was easiest to line it up with the grid of silver stripes, so I did this with the top and innermost side.


    To glue it down I would lay down a line of glue then carefully fold the fabric over and press down, trying to not touch the glue . . . which is exactly what I was supposed to be pressing the fabric against. I inevitably spent a lot of time pushing down on the fabric and having the glue ooze up onto my hands.


    Four sides and a little trimming later it looked like this.


    I did a quick test to see how things were lining up. I chose to have the teal stripes in the fabric run horizontally to reinforce the strong horizontal datum the credenza already established. (Does that sound like the sort of BS an architecture student would say? It is.) Of course, that decision was made before I started gluing.


    I didn't have everything I needed to continue on the speakers, so I decided I would fix an issue I had with the previous iteration of this media cabinet. Before, I had cut and stained shelves, but never put any poly on them, so they were dust magnets.


    I'll be reusing the center shelf (hidden behind the front of the cabinet) for the HTPC. I'll mount it to rollers like a kitchen drawer, so that I can pull the whole computer out to work on it instead of having to bend all in the back of the credenza, which would be horrible and annoying. But I didn't want it to collect dust like before, or at least be easily cleaned with a can of air, so I did a quick sand and cleaning of the plywood and put a million coats of poly on it.


    After my wife got home from work I went to the store and got some L-brackets and mounted the speakers to the speaker grills. It's not pretty, but it doesn't mess with the acoustics of the speakers and nobody will see it. Here's the left speaker.


    The right speaker will be shared in the same compartment as the sub woofer, so unlike the left speaker it needed to be air tight when mounted. I got some black caulk from the store that smelled like tar. My wife is still complaining (justifiably), but I needed black so that it wouldn't be seen through the grill cloth.


    I then mounted the speakers with their grills. For the right speaker I sealed all around with the black caulk. This added to the smell of asphalt-roof-on-a-hot-day which made my wife really happy. At this point I knew that there would be an issue when I went to put the rear piece of MDF in. It wouldn't fit with the sub woofer in place. However, when I went to remove the sub woofer I realized just how strong the foam tape I used was. There's no way that sub is coming off now. The good thing is that I found another solution. I was able to remove the corner supports for on the bottom of the cabinet. The just support the cabinet in shear, and the mdf plate will serve that same purpose, so it's fine without them and now the back will fit.


    So, here it is with the speakers mounted. I think it's looking pretty decent, and I'm excited to hear how the sub sounds after it's all sealed up. I tested it without the box and it was sounding pretty good already, so after getting in a proper box it should be awesome.


    To the left of the credenza you can see a big pile of crap that still needs to be mounted, and I haven't even really gotten to the HTPC part yet. Hopefully I finish this before I leave for London in a month.

  5. #15
    The floppy drive is no longer obsolete. AmEv's Avatar
    Join Date
    Nov 2010
    Location
    Idaho, USA
    Posts
    3,052

    Default Re: d_stilgar's HTPC (title anyone?)

    Lookin' good! May just have to come and see it myself
    Two years. They were great. Let's make the next ones even better!

    Tri.fecta

  6. #16
    Water Cooled Stonerboy779's Avatar
    Join Date
    Jan 2012
    Location
    Melbourne, Australia
    Posts
    557

    Default Re: d_stilgar's HTPC (title anyone?)

    Hmmm not a fan of the blue or rather the strong teal limes aha ha
    Would have loved to see a cream or something with maybe brown lines through it.

  7. #17
    Undead Pirate d_stilgar's Avatar
    Join Date
    Mar 2005
    Location
    Philadelphia, PA
    Posts
    2,987

    Default Re: d_stilgar's HTPC (title anyone?)

    Today my I took my family out to Plummer, ID to ride the Centennial Trail on Lake Chatcolet. We did 28 miles and my 11 month old son was a champ in his little trailer. Project logs aren't for talking about travel or whatever, but it's just so gorgeous up there.


    When I got home I got straight to work. Since the right speaker will be sealed in a box with the sub woofer, I needed a way to extend the speaker clips to the outside of the box. I got a little clip thing at Radio Shack that would do the trick. It cost $5 but this is one of those things that I would rather not be super ghetto.

    I measured the cut out and driller some holes.


    Then I cut between them.


    Holy crap it really beat up the side I already painted!


    I'll just cover it up with this. :worried: :p


    To mount it, and hopefully make a better seal, I used some double sided tape around the inside of the plate.


    Then I drilled some pilot holes and screwed it in. Would be nice if I had some black screws around here somewhere.


    I then soldered some speaker wire to the inside, and tinned the other ends so I can plug it into the right speaker.


    I put some caulk on the top and bottom of the MDF then slid it into place. The plate amp hole allowed me to reach in and plug in the speaker wire inside. It also allowed me to get a bead of wood glue around the perimeter of the MDF plate, but I couldn't see what I was doing so after I put foam tape around the inside perimeter as well. There wasn't a great way to fasten the MDF with screws without making it really ugly, but considering it was a really tight fit on friction alone I'm not too worried.


    After that the last step was to mount the plate amp for the sub woofer. I plugged in leads inside and then screwed it in. The plate amp comes with a double layer of neoprene to seal it, which is nice because it means I can get inside if I need to work on something, or if I want to add acoustical cotton or whatever inside at some point.


    On the right side I screwed the Lepai amp to the credenza behind the left speaker. This box will end up housing a whole bunch of cords and will inevitably get kinda ugly. I'm not sure at this point what my plan is to try and hide it or make it look better. Twist ties, zip ties, velcro, and staples will all be used, but I might still hide it all under a sheet of plywood or make an entire back plate for this side with a hinge or something.


    Next step before I could test the speakers was to cut speaker wire to the right length. Some people like to get nice banana clips and stuff, but to me it's too expensive. However, I hate just twisting the copper and sticking it in the little sockets. It always unravels and gets crappy, so I just tin the ends.

    While the iron heats up I strip the ends, twist them, dip them in flux, and stick them in the clips.


    Then I just get enough solder on the end to hold all the individual pieces of copper together. This is way cheaper than getting clips and it solves the problem of bare copper coming undone and eventually being unusable.


    Here are two finished wires, one short, one long.


    Next step was to plug them in and fire it up.


    I had tested the speakers before with a different amp and wondered what all the fuss was about since people have been raving about them online as being a "cheap man's hi fi," but after coupling it with the amp they were using and adding a slightly stronger low end from the sub I figured it out. The speakers sound great. I had them turned up for a little bit, but then my son went down for the night so I had to turn them down. I haven't got the balance between the speakers and the sub dialed in yet, but I'm really impressed so far and I'm excited to have this portion of the project completed.

  8. #18
    Undead Pirate d_stilgar's Avatar
    Join Date
    Mar 2005
    Location
    Philadelphia, PA
    Posts
    2,987

    Default Re: d_stilgar's HTPC (title anyone?)

    Quote Originally Posted by Stonerboy779 View Post
    Hmmm not a fan of the blue or rather the strong teal limes aha ha
    Would have loved to see a cream or something with maybe brown lines through it.
    Yeah, I knew it wouldn't be everyone's favorite, but my wife and I kinda hate gold, and I thought the plain silver was too boring. If there was silver with other accent colors I may have gone that route, but I like the teal.

  9. #19
    Undead Pirate d_stilgar's Avatar
    Join Date
    Mar 2005
    Location
    Philadelphia, PA
    Posts
    2,987

    Default Re: d_stilgar's HTPC (title anyone?)

    June 12th Update
    Alright so it's been like 11 days since an update. I've been waiting for some drawer rollers to come in, but they aren't here yet, but I wanted to get to work anyway on what I could.

    Here's the hardware list:

    Mobo of some kind . . .
    Intel Core 2 Quad Q9550
    Scythe Orochi CPU cooler
    16Gb Ram (4x 4Gb)
    2x Nvidia 9800Gt video cards
    2x Arctic Cooling GPU cooler
    2x 2Tb hard drives
    60Gb OCZ Vertex SSD
    Some cheap $20 case from newegg
    Various Silent fans
    PCI USB card
    Kingwin 500W Fanless PSU


    Here's a fair amount of it with stock collers. It needs to run near-silent, so silent coolers will be aded to everything.


    The case itself is an "HEC" brand cheap steel case from newegg.com. It cost $20, and will be sacrificed for easy mounting of hardware.


    Everything needs to fit on this sheet of plywood. This will be built into an inverted drawer so I can pull the whole PC out of the credenza to work on easily.


    Here's a rough estimation of where I thought things might go. I decided to go extra lazy and recycle as much from the original case with the fewest cuts possible, so it changed a bit from this concept.


    Here's the empty case with side panels removed.


    First step is to drill out all the pop-rivets that are holding the different parts together. I'm going to drill out as few as needed to remove the different sections I want.


    After a dozen or so rivets we get this.


    I put the pieces on the wood and screwed them in place with some wood screws. It's surprisingly sturdy, which is good. I was afraid I might have to actually fabricate something.


    I then mounted all the hardware back into place and marked on the plywood some holes so I can route the cables all underneath later. Since this is all temporary, and I need to test the system, I left it as-is for now.


    I then went behind the credenza and placed the plywood on some temporary shelf supports (that I had removed before :duh: and had to replace) for while I wait for the drawer hardware to come in.


    Bad news is that when I went to turn it on it wouldn't post properly and I started to smell some electronics cooking. After some tinkering it wouldn't even beep or post errors anymore. I'm not sure if it's the motherboard or the PSU, but I have a friend with a spare that I'll be able to get tomorrow so I can test that. Either way it's no fun not having it work right off the bat. I hate spending money, especially when I don't have a lot.

    June 13th Update
    Quick update, I got a spare PSU from a friend today and it still won't boot or do anything. The good thing about this is that I know it's the motherboard. The bad thing about it is that something was broken regardless, and that sucks.

    Quick edit and update: I am looking to get a cheap replacement LGA 775 board if anyone has one. I emailed EVGA about my board. It seems it is out of warranty, but probably only because I failed to register it within 30 days of purchase. Lesson learned. I asked if there was any chance for a replacement board or a steep discount and linked to the work log here. Maybe they'll have pity. Odds are greater that links within messages are automatically removed. We'll see what happens!

    In any case I'm not going to hold out trying to find another solution.

    June 18th Update
    Quick pictureless update:

    I won a 650i motherboard off ebay for pretty cheap. It will be here soon. But I also might be getting a striker extreme for cheaper from someone on another forum who just wants to see it in a good home, so I'll have a few options here soon to get this thing back on track.

    The bad news (for this project) is that I leave for London in two weeks and will be gone for five weeks, so there won't be any updates until I get back. Maybe I'll check in here and someone will want to do a meetup or something.

    August 25th Update
    Okay. It's been two months, but I left at the end of June for a study abroad in the UK and was gone until August 6th. You can see some photos from that trip here.

    The 650i motherboard I purchased was a bust. I could never get it to post no matter what hardware configuration I tried. It was probably just a dead board, which is lame. However, I got another board from a guy on HardForum for $50. It's a Asus P5n32-E SLI, an absolutely awesome board worth way more than the $50 I spent on it. It's really why I love communities like this.


    I tested that everything was running, but the setup was an ugly mess for sure, so I marked where I would want some holes, took everything off the piece of plywood, and went outside to cut holes.

    First was cut with a hole saw. I probably could have used a smaller hole cutting bit, but everything fits without too much hassle, so I don't really mind.


    After that I removed the motherboard tray and cut the holes for the rest of the cables to be mounted through.


    Since I had all the metal off the plywood, I gave it all a few coats of black spray paint. I could have cared a lot more about the quality of the paint job, but school starts Monday, and really I'm going for a case that looks "better," not "amazing."


    While the paint dried I went back to the credenza and put in a few heavy duty drawer slides. When the case is done I'll be able to pull it all out easily in case I need to work on or access something.


    Once the paint was dry I screwed all the metal bits back into the plywood.


    I then remounted the hardware and routed the cables under the plywood.


    It's not finished, but it's getting much better. I still need to . . .

    [ ] Mount the plywood board to the drawer rails
    [ ] Make a better power/reset situation
    [ ] Configure the software for playing Roms
    [ ] Build some sort of . . . something for the USB controller adapters I have

    However, it's getting really close to done and I'm excited. Hopefully over the next few weekends I can button this up and call it finished.

    Sept 10th Update just for TBCS
    I've been using the PC now for a few weeks. It's still running awesome. I've got some new goodies for it as well, so I'll take some pictures soon and post an update. I still need to do some stuff to call it "done," but it works. I really should make a video at some point too . . .

    The bad this is that I'm two weeks into Fall semester of my last year of grad school and I don't think I've ever been as busy with school as I am now. Life seems to be an 8AM to 12AM existence of non-stop school work, real work, family responsibilities, and house chores. Some of those things are more fulfilling than others, but all of them have to be done, and I can't do anything else until I feel ahead in those things.

    But it's great to be back at TBCS!

  10. #20
    Undead Pirate d_stilgar's Avatar
    Join Date
    Mar 2005
    Location
    Philadelphia, PA
    Posts
    2,987

    Default Re: d_stilgar's HTPC (title anyone?)

    Update!

    So, I've never been so busy with school. I seem to say this a lot, but this semester is just full.

    I'm doing a pretty major research project (probably could be doctorate level stuff really), which is going fairly poorly since I don't do any of the research/findings that I'm wanting to do and instead beat my head over cruddy software all day long trying to get equipment calibrated so I can actually get started. I probably put in 2-3 hours a day on this, and I have other classes . . . homework, normal-busy architecture grad school stuff on my plate as well.

    And the computer has been running fairly well . . . so I've just let it be.

    But then my wife was working out and jumping all over the place and the screen went yellow then black, or at least that is what she tells me. She says the sound worked for a bit, and then the whole thing shut off.

    I haven't been able to get a video signal out of it and I really have zero money to put into it especially without knowing what is wrong.

    Things I have checked:

    - HDMI switch. Other things plugged into it work, which means it isn't the TV either.
    - A loose or bad connection. I checked that everything was plugged in and tried a few different things with the video cards to see if one was loose or bad.
    - When I boot the computer I get no video signal. When I hit the power button to shut down it turns off immediately. This means that it isn't making it past a post or error screen, even if it is trying to output a signal.

    Things to try:

    - Bad video cable from the PC. I have a DVI to HDMI cord. This could be the issue, although I really doubt it.
    - Video Card. The motherboard doesn't have onboard video, so it could just halt if the video card is bad. I have a spare crappy something sitting around. This would be the best thing to go bad since the computer has dual 9800GT cards which would be easy and cheap to replace with a modern mid-low end card.
    - CPU. I have a spare cheapo LGA 775 chip here somewhere. I can try installing it to see what happens.
    - Ram. I can remove sticks and just try one at a time. Maybe one went bad. It doesn't feel like a bad ram problem, but you never know.
    - Motherboard. I just got a new motherboard, so I really hope I didn't somehow kill it as well. All my fans are low speed. It's possible that there just isn't enough air getting to the north or southbridge and it fried. It's possible that's what killed my other motherboard. If the motherboard is dead then this computer is finished until after I graduate and can spend a little money on something. It's lame, but that's the way it is.

    Either way, if I get some time I'll continue to tinker with the credenza and other details of the build. There are some things that seem so obvious to me now that I should have done from the start. Hopefully I'll do them and post some pictures at some point.

Posting Permissions

  • You may not post new threads
  • You may not post replies
  • You may not post attachments
  • You may not edit your posts
  •