Page 3 of 12 FirstFirst 12345678 ... LastLast
Results 21 to 30 of 113

Thread: Project: L3p L4n

  1. #21
    ATX Mental Case
    Join Date
    May 2011
    Location
    Netherlands
    Posts
    141

    Default Re: Project: L3p L4n

    Small update from Picasso

    Carefully removed the tiny sharp edge with an old knife.
    This way I get a sloping edge of +/- 0.3 mm.


    Selected the right "black" out of 4 colours to get the best matching colour.
    It became Revell mat black #6


    The edges of the Bitspower mesh with Revell shiny black #7


    Actually not my kind of job, too shaky


    But i did it!


    Tomorrow the fanguards back in.


    And waste some time on this


  2. #22
    ATX Mental Case
    Join Date
    May 2011
    Location
    Netherlands
    Posts
    141

    Default Re: Project: L3p L4n

    Lovely weather yesterday, so went out to lap my Cpu

    This time I'm going to lap it faster then normal.
    How to with extensive explanation can be found here:
    http://www.l3p.nl/other-builds-mods/cpu-lapping/


    Cpu still WITH warranty here


    All you need..


    Finding a way to protect the backside of the Cpu since Intel doesn’t
    give a nice protection cap any more on boxed s1155 Cpu’s.


    So we use marking / painters tape.


    I’m using some rubber tape too.
    This way you have a better grip and don’t get sore fingers.


    Starting with P400.
    Only a few “wipes” and … gone warranty.
    The sanding with P400 is the most important and longest step.
    Some people tape the sandpaper to the mirror, but if you hold it tight with your other hand you don’t have to.
    Just go from left to right on the paper.
    Don’t press on the cpu, just use the weight of your hand.
    Every 2 minutes turn the cpu 90° clockwise.


    2 Minutes with P400.
    Nothing to see yet.


    7 Minutes with P400.
    You can see clearly this Cpu isn’t flat.


    Another 3 Minutes with P400.
    Total 10 Minutes.


    Another 10 Minutes with P400.
    Total 20 Minutes.


    And another 10 Minutes with P400.
    Total 30 Minutes.


    You can see the IHS is completely flat copper now.
    Now the real polishing comes.


    10 Minutes with P600.
    Total 40 Minutes.


    Skipping P800.
    Straightly to P1000.


    10 Minutes with P1000.
    Total 50 Minutes.
    You can see it’s already starting to mirror.


    Further on with P1500.


    10 Minutes with P1500.
    Total 1 hour.


    P2000.


    10 Minutes with P2000
    Total 1 hours and 10 Minutes


    Now we need to change our strategy.
    First of all clean the mirror and the cpu.
    This is because the old copper particles can ruin your polish job by rubbing them into the IHS.
    Now you don’t go from left to right with the cpu.
    Just move in a circle for 2 minutes and then turn the cpu 90° clockwise again.


    10 Minutes with P2500.
    Total 1 hours and 20 Minutes.


    You can see the copper dust already starts to oxidise.


    5 Minutes with P2500.
    Total 1 hours and 25 Minutes.
    Almost done.


    Another 5 Minutes with P2500
    Total One and a half hour!


    Pictures are clickable for full resolution.


    Back to the case tomorrow

  3. #23
    ATX Mental Case
    Join Date
    May 2011
    Location
    Netherlands
    Posts
    141

    Default Re: Project: L3p L4n

    No replies at all :/

    Ordered something last week i could really use today


    First some holes for the buttons of the pump/fan controller.


    Tape so it won't move.


    And some holes with 3.5mm.


    Wow, it fits


    Sanded the frame so i can paint it.


    Oops almost forgot i also had to paint the edge where the plexi goes.


    Glued the plexi.


    Bitspower fanguards back in after the paintjob.


    And some glue.


    Rub it in with a wet finger.


    Believe me this glue doesn't let go


    Next problem, what to do with this..


    Ah we'll see


    Hmm... needs more cutting.


    Losing the sharp edges and create some nice roundings.


    Paint it black.


    Also glued the frame for the pump/fan controller.


    Second part of the ex-5.25" slot.


    Let's stick the Dremel in there too.
    (Not easy to hold a Dremel in one hand and a cam in the other )


    And more polishing.


    Making it rough so i can paint it.


    And some fitting.


    Painted.


    Lots of work for something you hardly see back, but im satisfied for today.


    Time for BBQ!


  4. #24
    Its not cool till its watercooled. Fuganater's Avatar
    Join Date
    Oct 2007
    Location
    Kinshasa, DRC
    Posts
    2,843

    Default Re: Project: L3p L4n

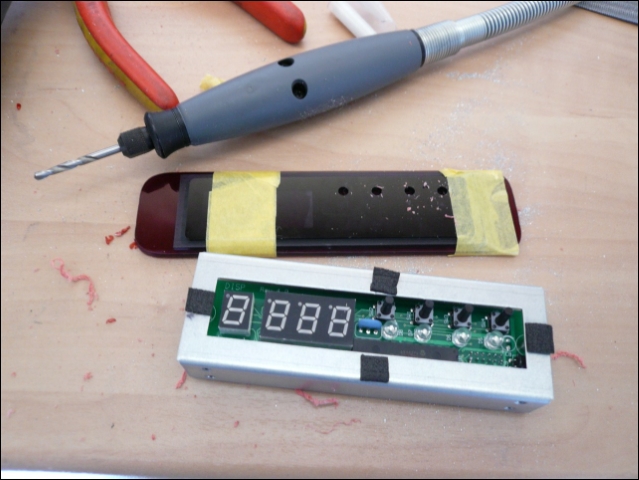
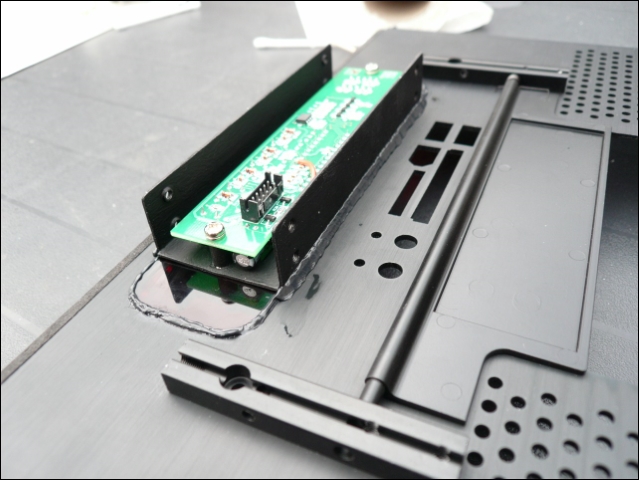
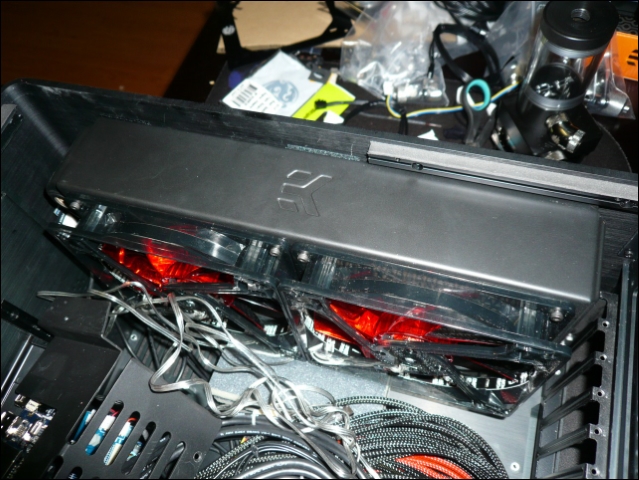
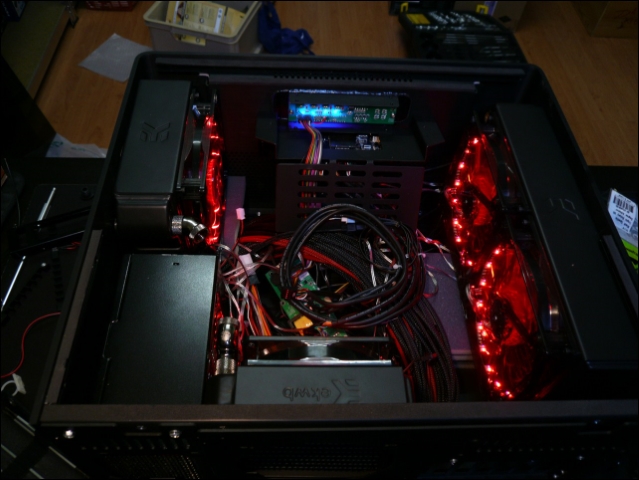
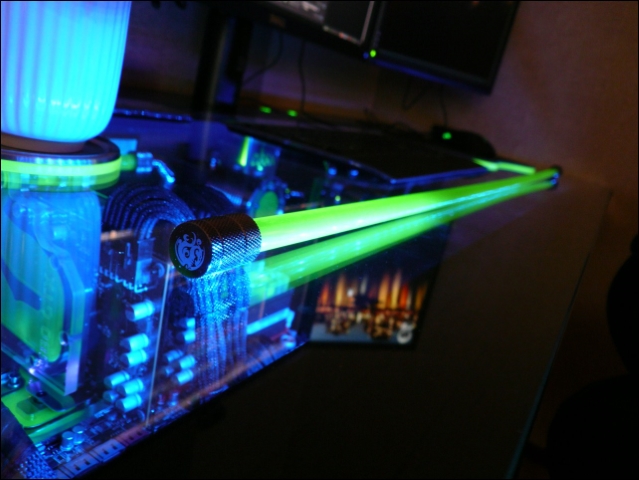
    Been watching this. Love the fan/pump controller. Looks really sharp so far.

  5. #25
    Why must hard drives fail together? TheMainMan's Avatar
    Join Date
    May 2008
    Location
    Canada
    Posts
    804

    Default Re: Project: L3p L4n

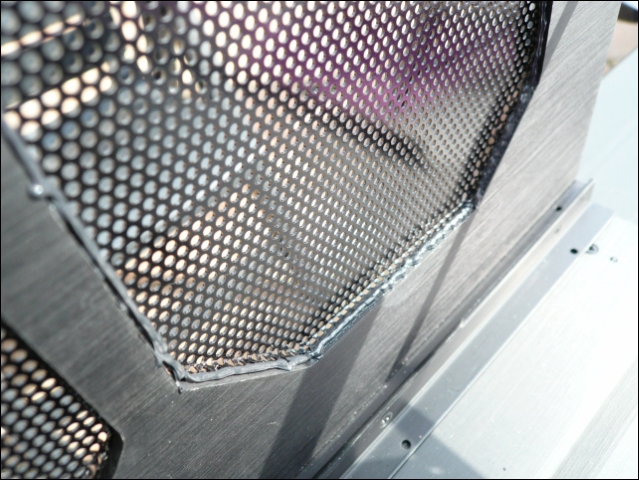
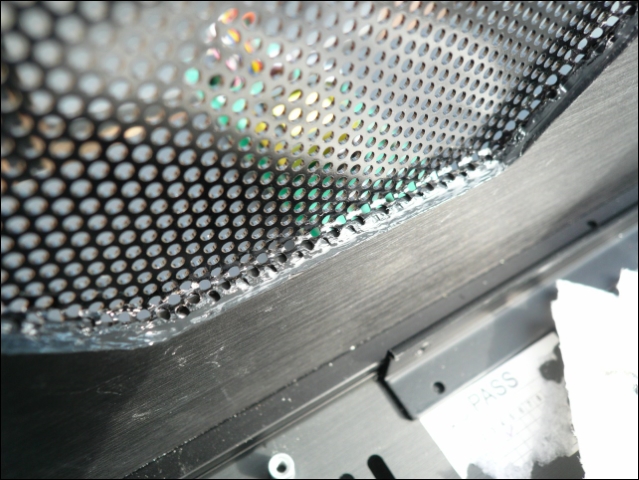
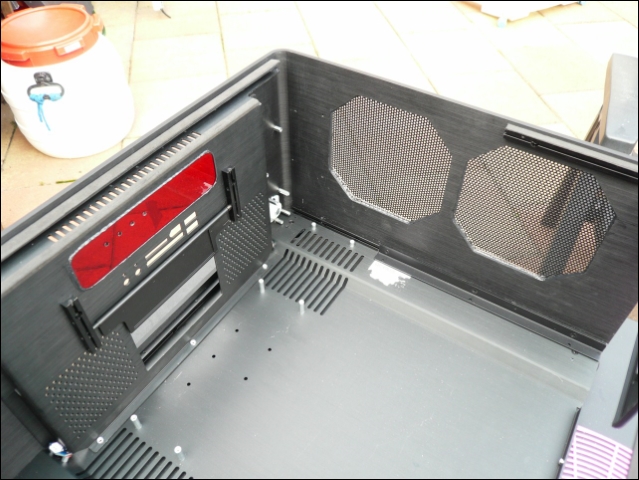
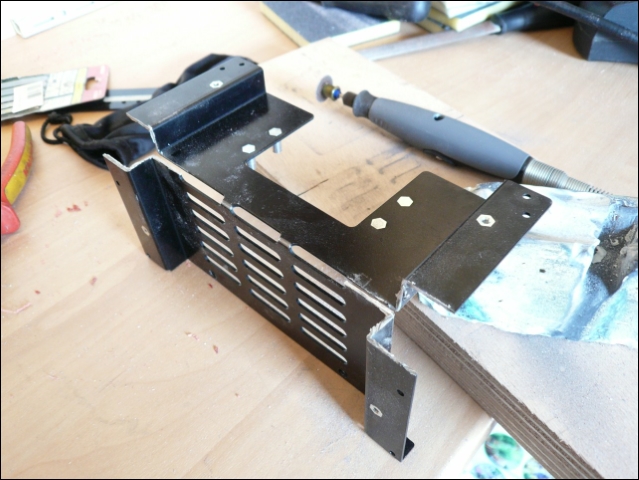
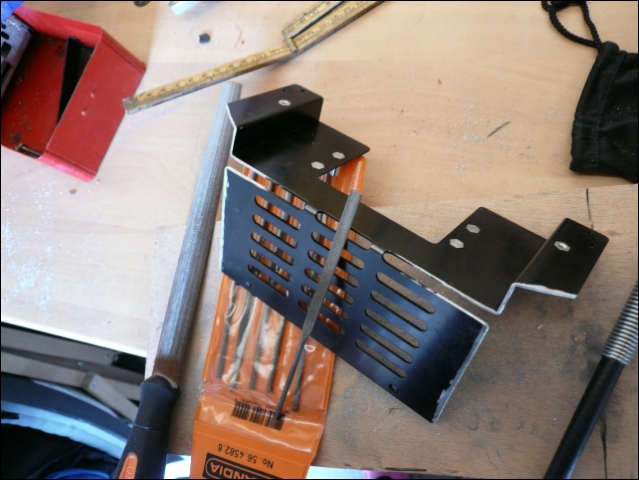
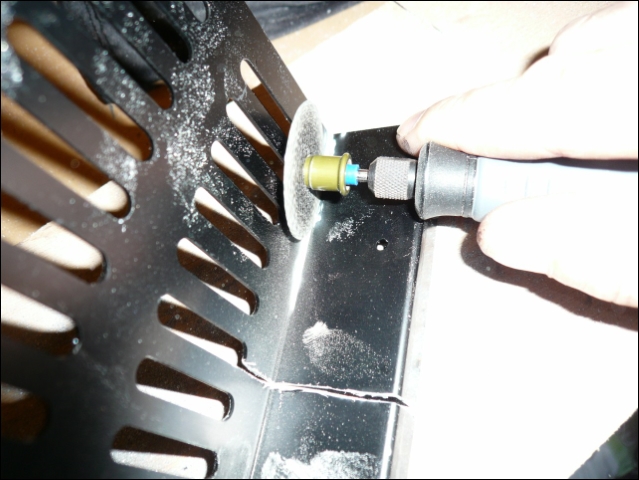
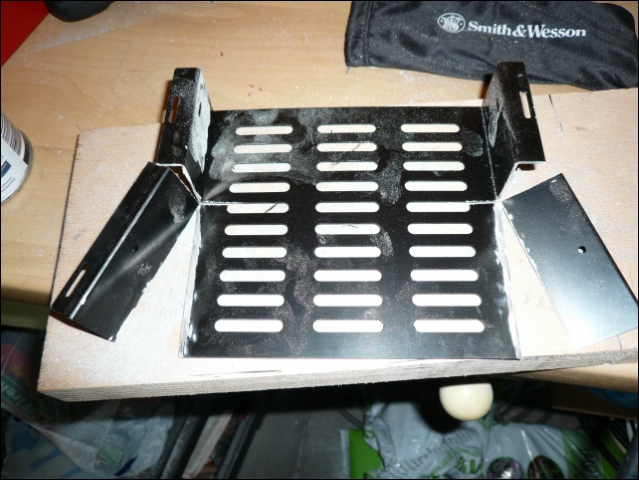
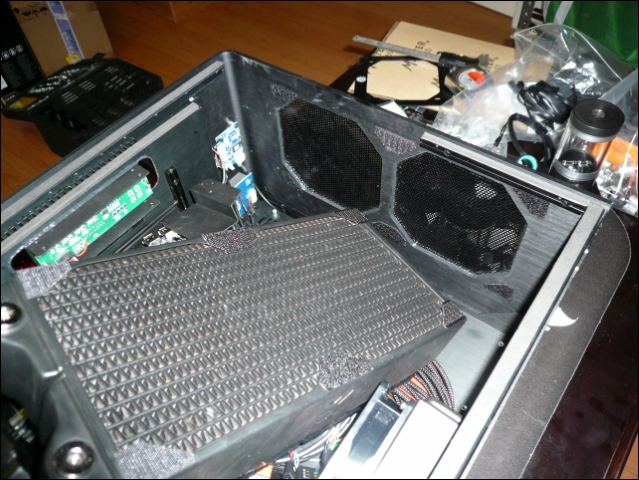
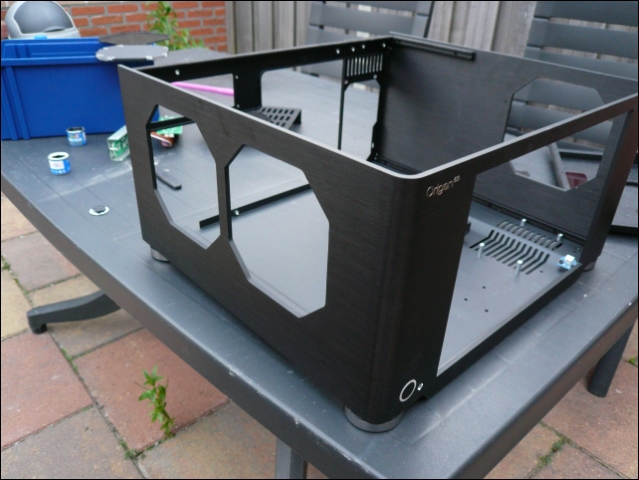
    That plexi work looks really slick. Nice work on re-using the 5.25 slot as a protection cage.
    TheMainMan

  6. #26
    ATX Mental Case
    Join Date
    May 2011
    Location
    Netherlands
    Posts
    141

    Default Re: Project: L3p L4n

    Thanks guys

    Assembled the case again this week
    Quite some work cause of the lcd screen

    After that tested if the Velcro would work out.


    Works great, i think it can hold me too


    Pulling it off again wasn't that easy


    Placed the other stuff again too.


    Don't want too much lights on the outside, i like it this way.
    Maybe some red glow from the bottom...


    Maybe the top casewindow will be blood red plexi too.


    Here an airflowtest with the new fanholes.


  7. #27
    rawrnomnom diluzio91's Avatar
    Join Date
    Jan 2010
    Posts
    2,471

    Default Re: Project: L3p L4n

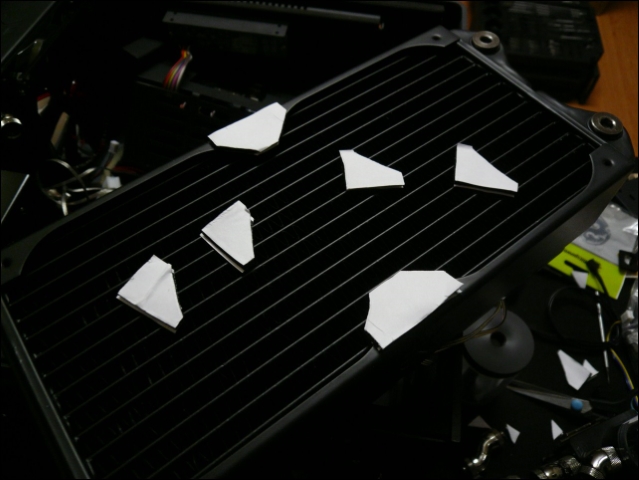
    I would urge caution with velcro, At the least I would advise reinforcing it with some 3M double sided tape. The mod looks Awesome! keep up the good work.
    Not dead yet

  8. #28
    ATX Mental Case
    Join Date
    May 2011
    Location
    Netherlands
    Posts
    141

    Default Re: Project: L3p L4n

    Thanks for the warning

    The velcro doesn't have to hold the rads weight, just to hold it on it's place.
    The rad itself wil be standing on a few layers of rubber tape.

  9. #29
    ATX Mental Case
    Join Date
    May 2011
    Location
    Netherlands
    Posts
    141

    Default Re: Project: L3p L4n

    Finally some news!

    Been busy at work lately but
    Had a nice cup of coffee with Asus Benelux this week.
    It was really great Rogier!!

    He also brought something nice with him


    Finally!


    And a new tablecloth, my wife really loves it! NOT


    And some pics of the Asus Maximus IV Gene-Z


    I really like the board a lot!


    The first flag.


    Together with my dear old P6T6 WS Revo.


    And my stand with his new look, didn't become a tablecloth after all


    Thanks Asus Benelux and Rogier hope to see you again one day!


    Oh.. and a small test with a 75-slot Bitspower Crystal link


    Also this week some news about Exceleram

  10. #30
    ATX Mental Case
    Join Date
    May 2011
    Location
    Netherlands
    Posts
    141

    Default Re: Project: L3p L4n

    Don't want to tell everything about Exceleram, but i do have to explain something when all of a sudden a sponsor disappears

    After months of contact with someone from Exceleram all of a sudden i didn't hear anything anymore from them.
    I found out by facebook a lot of personnel quit their job there ... inclusive the one I was in contact with ... nice
    After lots of mails i got to hear after 4 months there weren't any samples left, i do have to go on so i decided to thank Exceleram and wish them the best!

    I hope to have some good news in a few weeks!


    So this evening I mounted my mainboard and EK block so i can go on measuring.


    I hate stickers..
    Specially when they don't come off easily


    WD40 ftw!


    And ready.


    Glad i don't have to hide the nice red ROG colours like in my last mod


    EK-Supreme HF Acetal with EK-CPU Easy Mount HF Black


Posting Permissions

  • You may not post new threads
  • You may not post replies
  • You may not post attachments
  • You may not edit your posts
  •