-
Overclocked

 Project Mini Impossible (mini ITX gaming rig) [Completed]
Hi there, this was my second main project I worked on called project mini impossible, it is a watercooled gaming rig based around the itx platform. Here is the mod log.
This is a old mod and if you want to skip to the final build pictures goto the end of the posts..
Welcome to the Mod log of a project I had an idea for going way back a couple of years, I wanted to create a one off PC that featured around a mini ITX mobo. Now while I wanted it to remain small, I wanted to ensure I had a high or high spec machine, also I wanted to ensure it was water-cooled on the graphics and CPU and used a twin 120.2 radiator (not asking for much am I).
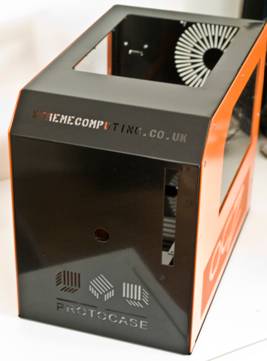
The main problem with this was that despite the fact the hardware was available now, there still was not an enclosure that would suit my needs... then I found Protocase and asked if they would be interested in letting me test their service for this project and luckily for me they agreed.
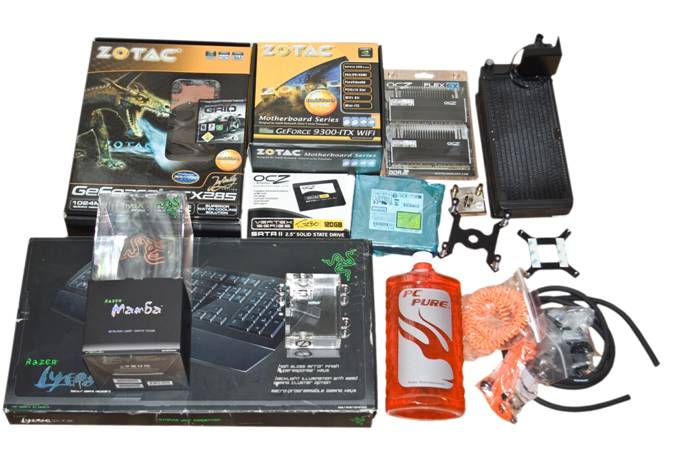
Now I had that sorted it was time to grab hardware for the mod, thanks to kind donations from the various manufactures bellow for making this mod possible.
Special thanks goes to the guys over at immacula for helping source the majority of parts, cheers guys! You know who you are. Now before we move on and get on to the specifics we will talk about the hardware.
Next Instalment Lets see the Hardware chosen
-
Overclocked
Re: Project Mini Impossible (mini ITX gaming rig) [Completed]
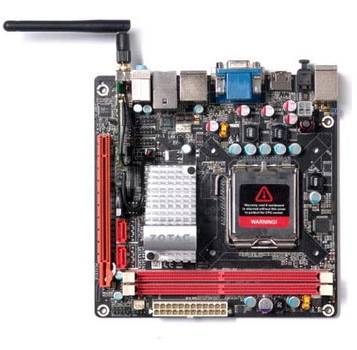
First Port of call on the hardware side was Zotac who had exactly what I needed in the shape of the Zotac GeForce 9300-itx wifi Mini ITX motherboard .
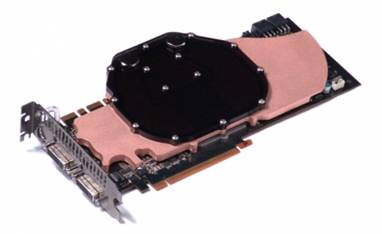
This board was ideally suited to this mod, due to the fact not only did it support Intel 755 quad core CPUs, it also boasts a PCI-Express x16 Graphics slot. This made it ideal for the project as it meant I could use any graphics card. My contact for Zotac suggested the Zotac 285 GTX infinity model that would suit the project as it comes pre fitted with a waterblock and is already Overclocked.
I really had to think about this as the card would add length to the design I wanted to create, but after some thinking decided to make the mod great this will be ideal.
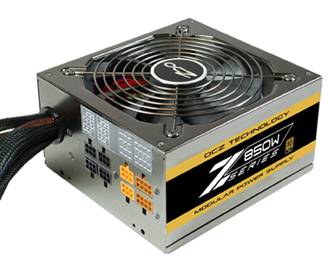
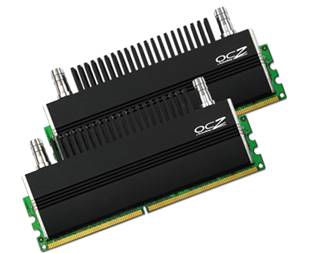
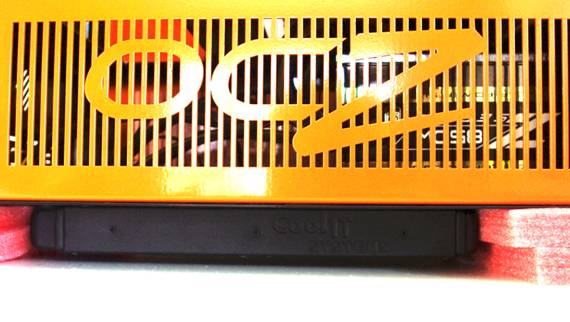
Second Port of call was Memory and Power supply, Naturally I went to the guys I have worked on previous projects with OCZ and decided on a OCZ Z series 850 modular PSU and a 4 Gig set of 1200mhz DDR2 Flex XLC modules.
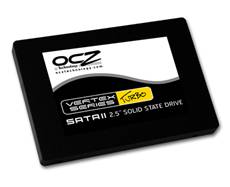
At the last Minute the Surprise edition was a OCZ Vertex Turbo SSD and what a nice addition it will be.
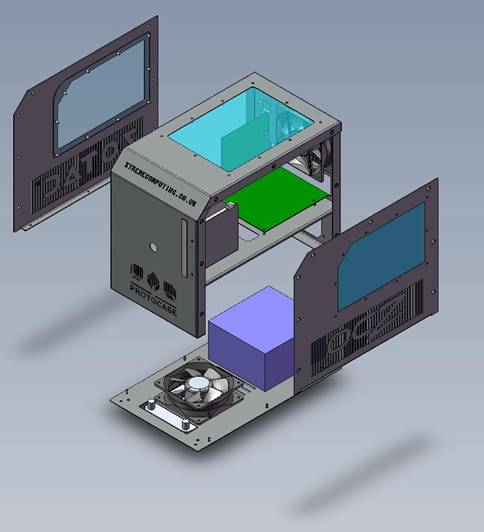
Protocase Offered their skills to let me have the freedom to design my own enclosure to house all these products, for those of you that dont know who Protocase are take a look at the building service they offer for custom enclosures. You can literally have almost any design built, but I have to warn you it is not cheap. And no I have not got a picture as the case was is design stage at time of writing this.
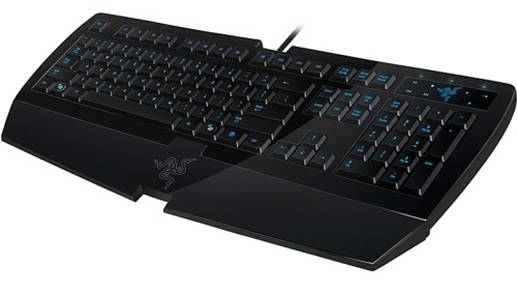
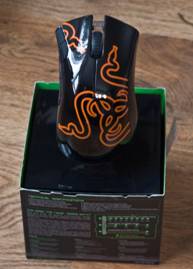
Razor also kindly offered to supply me with a Mamba Wireless/ Wired mouse, and a Lycosa keyboard, both of which will be sent off to be airbrushed to match the theme.
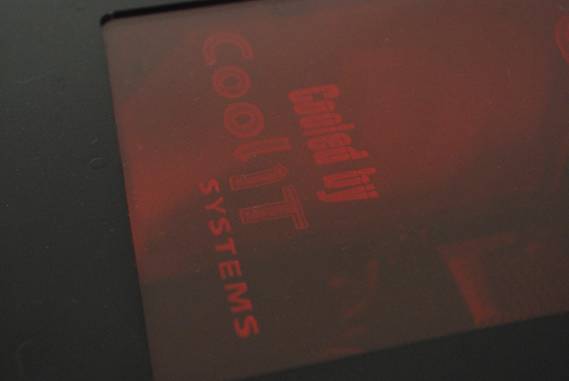
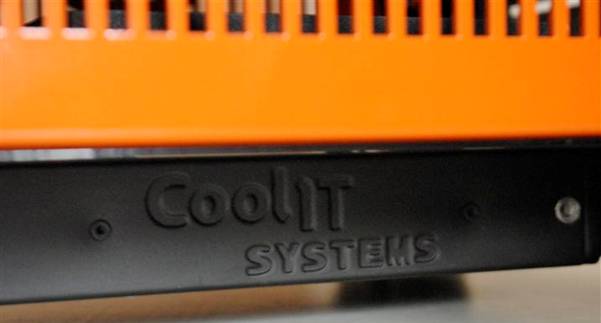
On the cooling front, Cool IT stepped in and supplied a custom dual radiator kit for the mod, yes that is right we are going to squeeze a 120.2 radiator and CPU block into the mix, to help cool it all, it Even came with a pump fitted, it will be interesting to see how this performs as it comes from their OEM side.
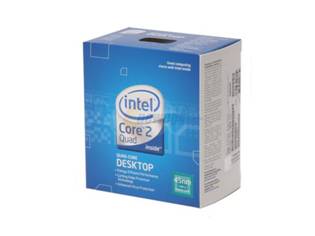
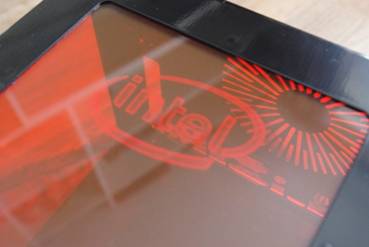
Of course none of this would work without a CPU and they guys over at Intel supplied us with a Q8200 to suit the Zotac 9300 itx mobo.
Lamptron, we managed to grab some 4 UV tubes, orange strip lights and of course a orange ring switch, all of which was needed for the mod.
pioneer who I have worked with in the past, to provide me with a slim DVD drive, they sent over one of the new slot loading types which suited the mod perfectly.
Finally I had to order some parts and spares of my own, this included some UV orange acrylic, some black tinted acrylic, a few extra water cooling parts and a swiftech mini reservoir from watercoolinguk. Oops I think you can see in the group shot the mamba has already been airbrushed oops again, more on this later.
Next Update we will be looking at my Design and Concept of the Case
-
Overclocked
Re: Project Mini Impossible (mini ITX gaming rig) [Completed]
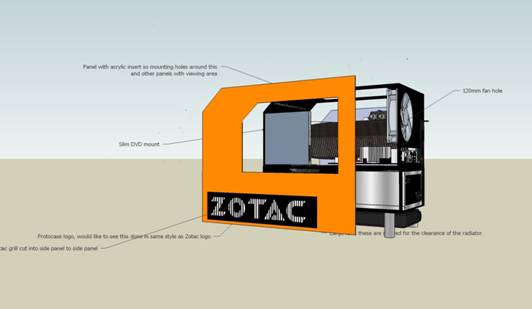
Well to put it in a nut shell I was very excited about the prospect of designing my own case, but that is where the excitement stopped.... yes that is right it stopped, you dont actually realise until you actually start designing on google sketchup how hard designing a whole enclosure from the ground up is.
Here take a look at one of my early designs....
Well erm yeh as you can see it is a bit pants dont you think, I did lol.... planning a mod, to fit a mini ITX based system was.. well quite a task, I have to tell you I went through about 10 designs before I realised I best go about this simple and design the section for the mobo and Graphics card first, then move onto the rest. Here is how I got started.
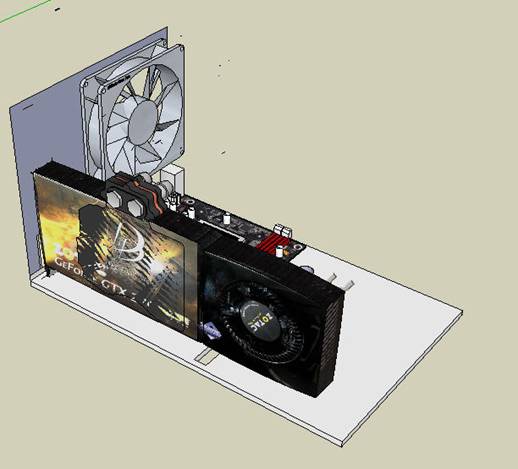
Now I Had the basic design that would hold the motherboard and Graphics in place it was time to work around it,
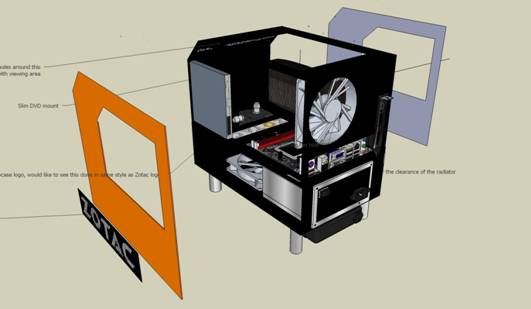
This was the first section of the case I came up with, There were 2 problems though, first was the curve and of course second was the fact I needed HDD space, DVD drive space and radiator space to name a few, also I dont think that the curve will be able to get a laser cut done in it. So I added some changes and a lower section.
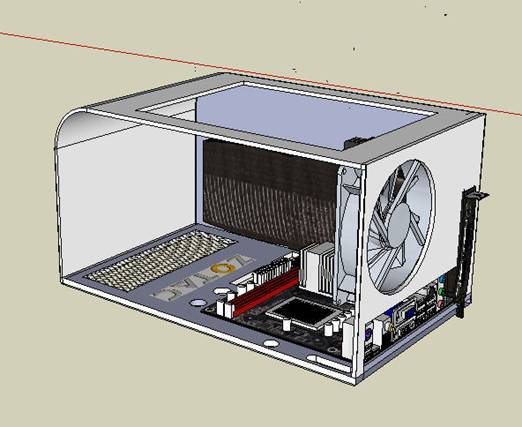
After a few months tweaking and pulling, deleting and repositioning this was the final design I came up with, take a look at the pictures bellow to see how this looks from different angles.
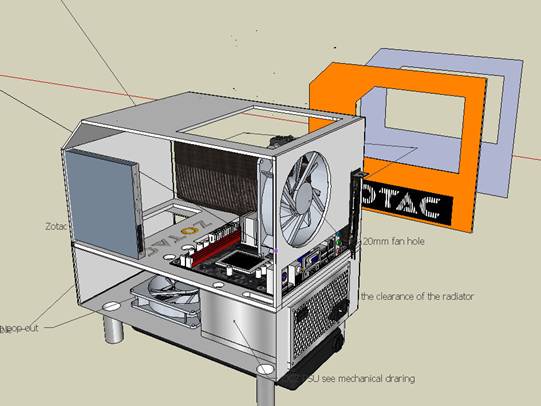
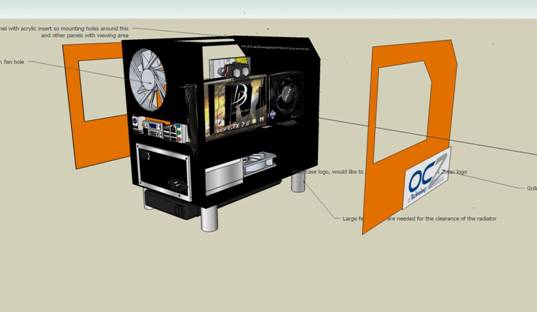
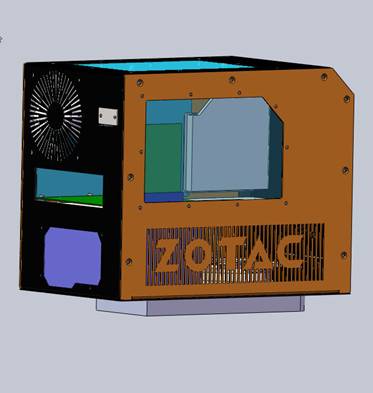
Well I never claimed to be a Designer you know but working with Protocase has its advantages. Now I have done the design it was sent off to Protocase for some tweaks before final product will be made, It took a month or so and a few emails to and throw to get a final design done. Here is the final mock up before the case was made.
Just a little bit of re coloring here and there and we have our final mock up of the finished item for me to approve, here are some shots of how I was hoping to get it to look after powder coating it.
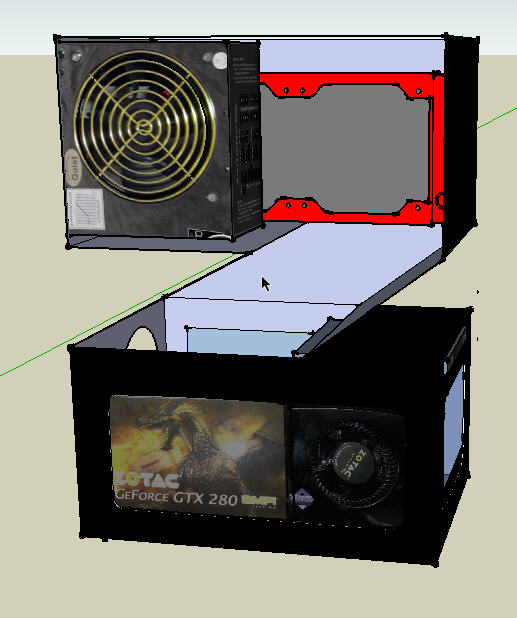
As you can see the Case plan was done positioning of the main components are exactly in the places I wanted, there are other things I had to take into account for this design and that was having enough room for res, pump, lights and of course power cables of course coming out of a full size PSU.
I am personally happy with it, why it is slightly bigger than I had intended (for some idea of size those are 120mm fans in the case) there would be plenty of room for all the parts. So I agreed to the design and off it went to be made.
While that was going on it was the right time to send the keyboard and mouse off to be airbrushed.
Next Instalment Getting the keyboard and mouse done
-
Overclocked
Re: Project Mini Impossible (mini ITX gaming rig) [Completed]
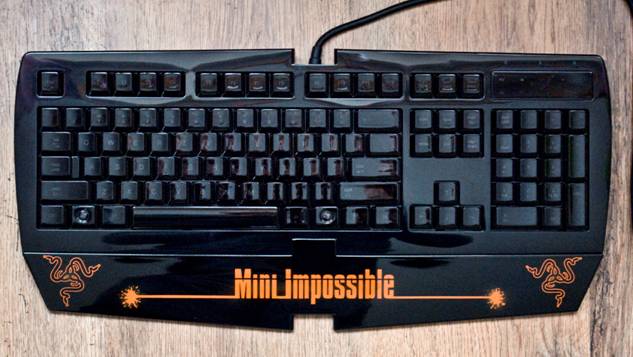
Back again with the keyboard and mouse pics hope you enjoy.
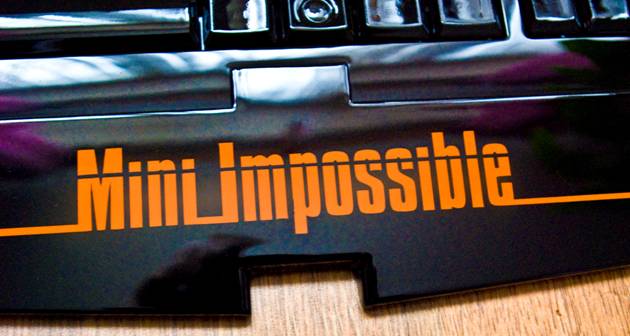
To think of a design to match the mod was a daunting task as well... as the mod was called Mini Impossible I thought I would help tie the keyboard and mouse in by having Mini Impossible airbrushed in the same orange (as close as we could get) as the side powder coated panels with the Mini Impossible logo.
For the keyboard I went for this design (done in photoshop)
I actually had a change of mind on this one and done something similar that looked a bit better in my opinion, plus i wanted the rest to match the black gloss finish on the keyboard itself.
So off the keyboard and mouse went to Rick over at RB customs to do the work, I had decided on a fuse wire theme for the keyboard to give that mission impossible feel, So it would tie in with the mini impossible theme.
Finally the keyboard and mouse turned back up and I personally think they came out great and will match the case really well, take a look for yourselves.
I was pleased with the finish Rick managed to get, after sanding the armrest down, spraying on the logo and wording he managed to match the arm rest to the black gloss on the keyboard and gave it a very nice finish, as you can see in the top picture the design is now more symmetrical and looks better (in my opinion) than the original one I had done.
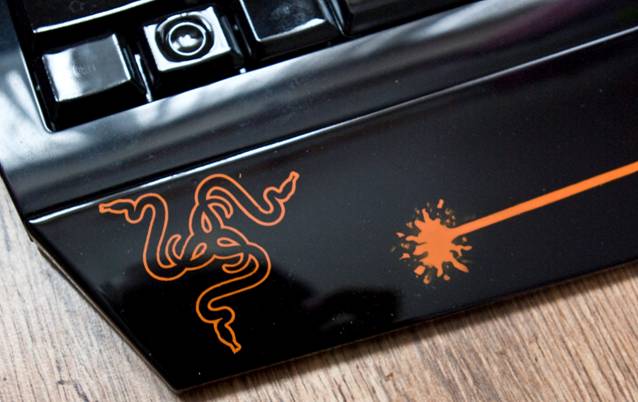
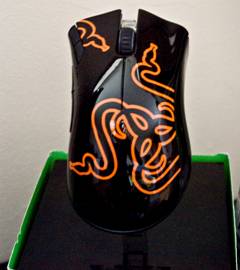
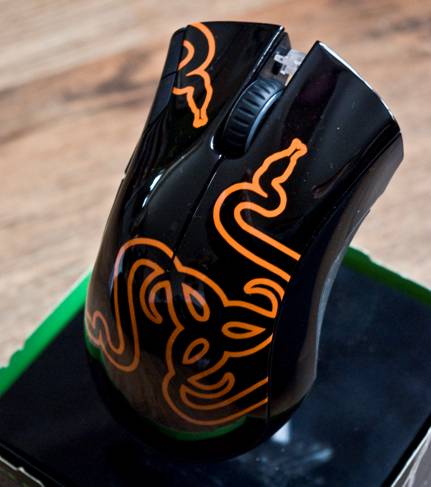
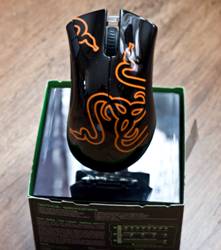
Onto the mouse shall we, after chatting with Rick via various emails I asked him could he do a take on the Razor logo on the mouse and to add to it to finish it off in the same reflective gloss black as the keyboard. I was hoping this would come out well and I was not disappointed.
Overall I am very pleased with the outcome of the keyboard and mouse and they should tie in with this project nicely, the black gloss finish matches the keyboard so all in all a gold star for Rick over at RBcustoms.
Next Instalment The case arriving back from Protocase
-
Overclocked
Re: Project Mini Impossible (mini ITX gaming rig) [Completed]
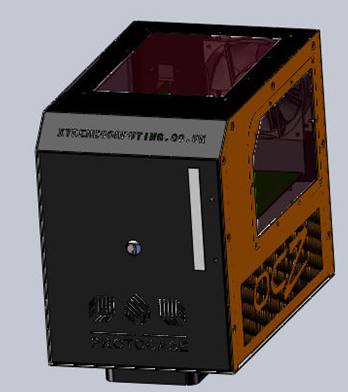
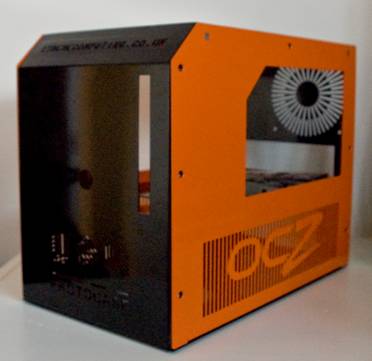
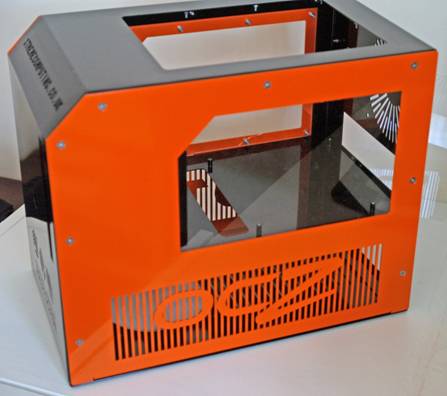
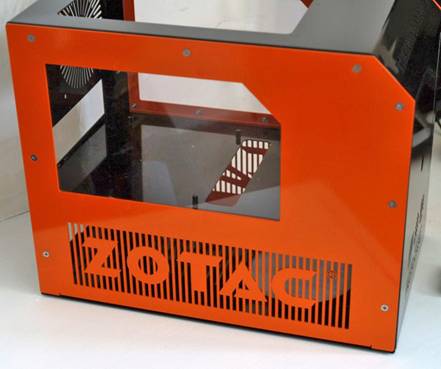
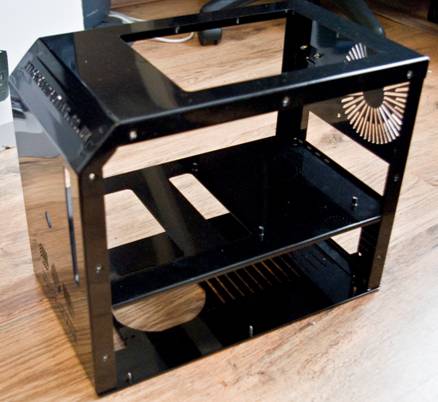
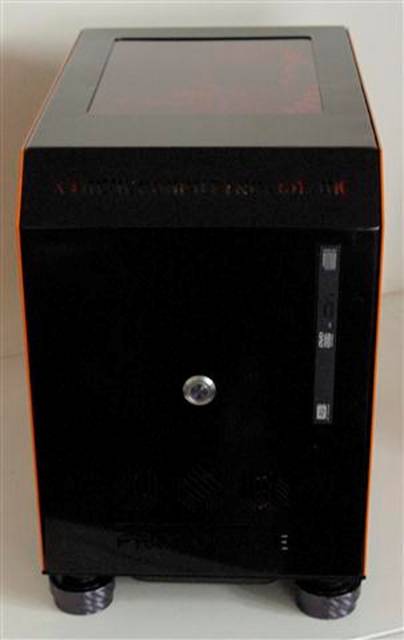
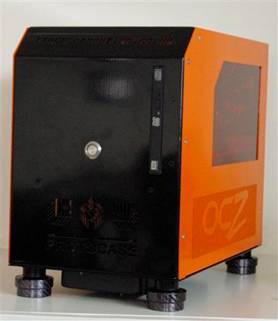
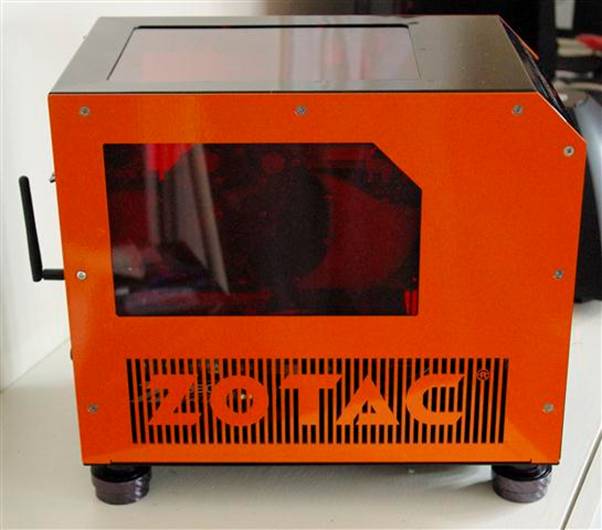
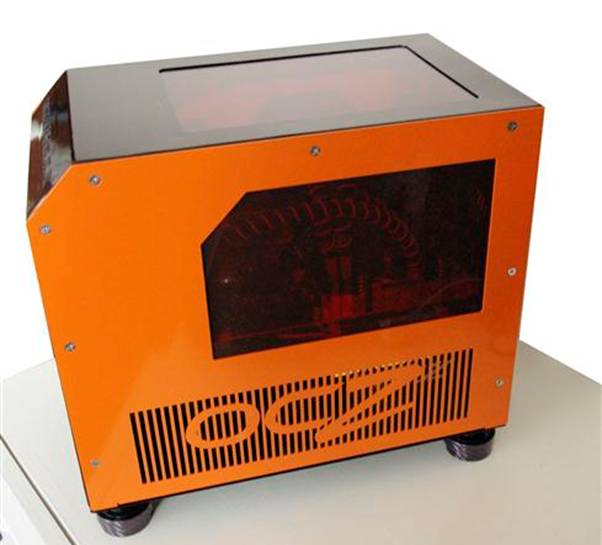
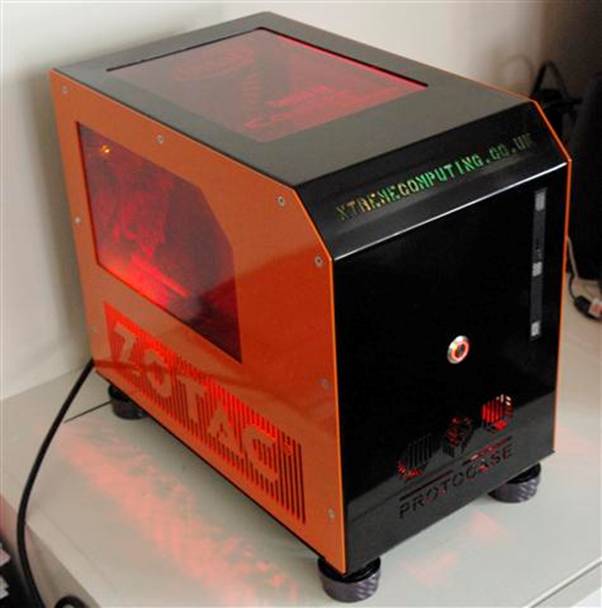
At last I can post some pictures of the case, it turned out good, apart from the fact I had to cut the whole out for the Graphics card ports.. For some reason it was not there, anyway enough of the bad points here is how the case turned out.
The round hole in the front is for a Lamptron illuminated ring switch, I am hopeful that all the equipment fits in, and my measurements on google sketchup proved accurate enough.
I like the way the grills turned out on the sides and the color scheme as well, the little orange and black box is finally coming together after months of planning.
As you can see some hole cutting had to be done with the dremel, I will have to file it down as well, I added the backplate in this shot to give you an idea of size, but the 120mm fan grill should do that as well.
As you can see (well I think so) it turned out like my google sketchup model and was probably as close as it gets, I only have one issue really apart from the missing slot for the GFX and that is sourcing the feet. As the radiation will be positioned under the base of the case I really need the feet to raise this puppy about 2 to 2 ½ inches above the floor to give the radiator some room.
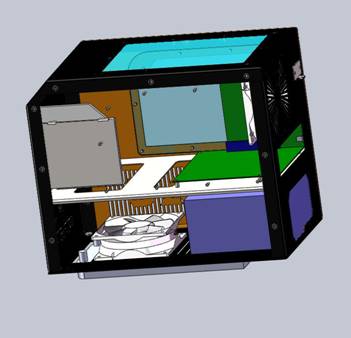
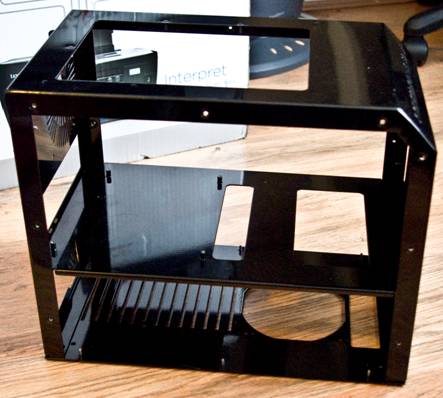
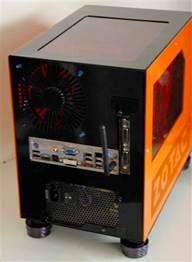
Bellow is how the main section of the chassis looks without the side panels on, this really is going to be an interesting build,
I am still looking forward to it as it gets closer, but I am not looking forward to messing around with pipes in there with my sausage fingers and such little room. The plan is to run the pipe from the radiator to the CPU, Memory, graphics card, and then Res and finally pump.
I am not sure what the next installment will be, be it the Etches for the side windows or the starting to build, but I will keep you all updated. 
-
Overclocked
Re: Project Mini Impossible (mini ITX gaming rig) [Completed]
Well Here I am again with my next Installment, I had planned to start off with a building up part, but I realized I would have to do the top window before putting anything inside.
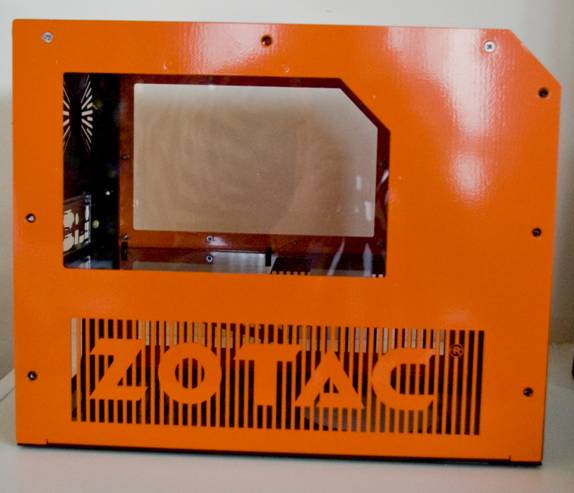
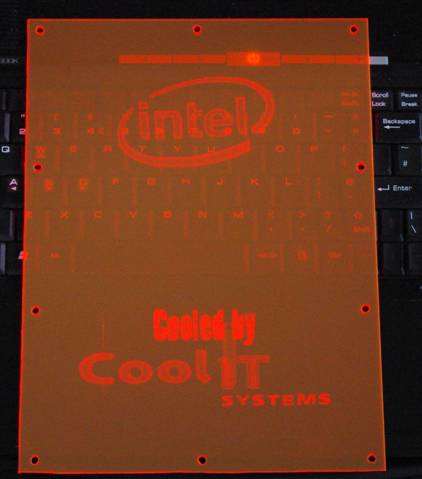
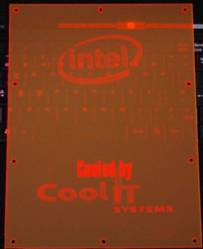
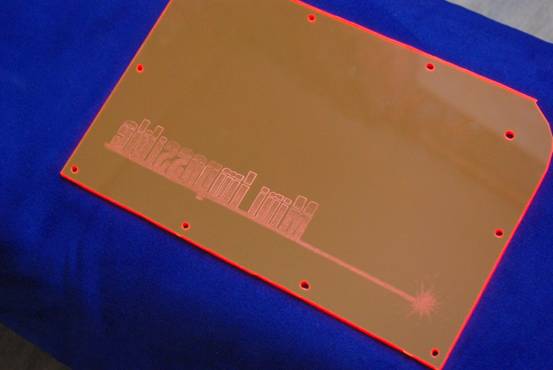
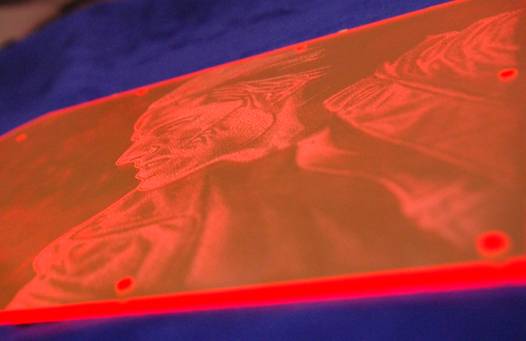
The top window etch was a simple one (if you can call 100s of dots simple) this was done with a UV orange acrylic and a smoke tint in front of it, to give a dark colour when off and a orange glow to the etches.
As you can see it came out pretty well and gives kudos to 2 of the sponsors, this is the window going in the top of the case.
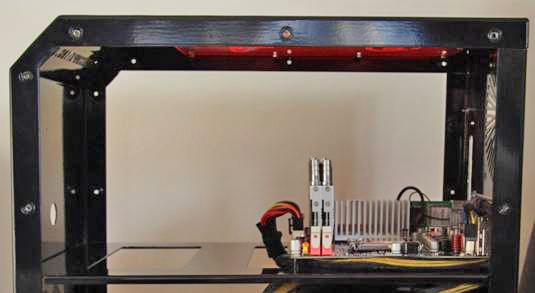
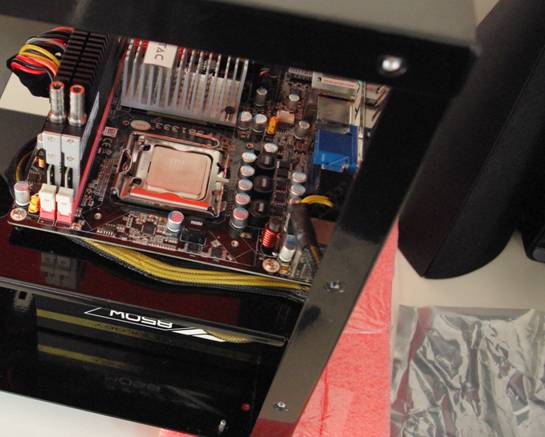
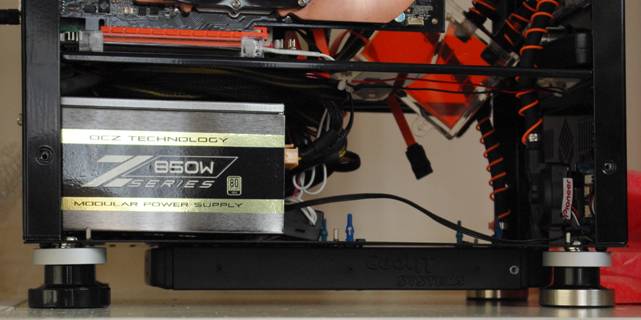
Pressed in and tightened up with nuts to insure in stays in, no that was done it was time to go about putting in the hardware, starting with the motherboard and CPU, PSU and memory.
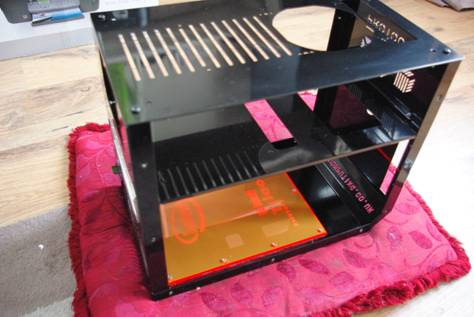
So far so good, now it was time to screw the 120.2 radiator into, place, if you have been following the mod from the start you will know that I am using a Custom 120.2 Coolit radiator with pump attached. So lets take a look at it mounted.
Please ignore the overexposure (hence the bright orange) as I wanted to highlight what is under the case, as you can see I have had to place the case onto some foam to keep the radiator off the floor, that is until I sort the feet out..
As you can see I preinstalled the rubber vibration grommets for the fan (otherwise I would have had one of them homer Simpson moments DOH!!)I nearly done it but only screwed in 2 of the radiators securing mounts
Ill update some more this week, I would of done it tomorrow but I have to take the misses to the tattoo parlor. Stay tuned as I will mock up the cooling with the Graphics card in place in my next update.
-
Overclocked
Re: Project Mini Impossible (mini ITX gaming rig) [Completed]
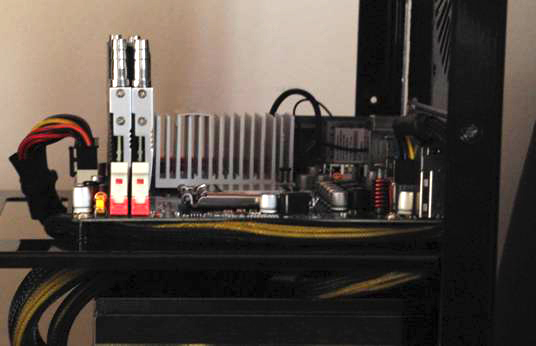
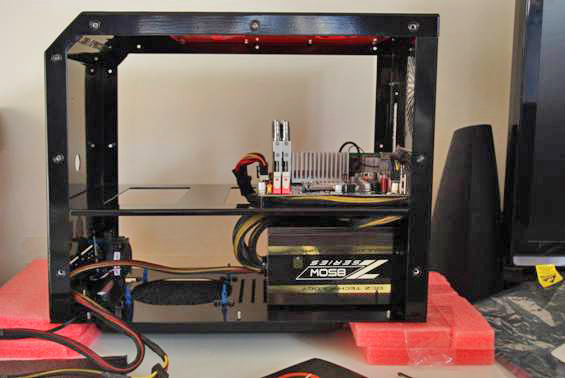
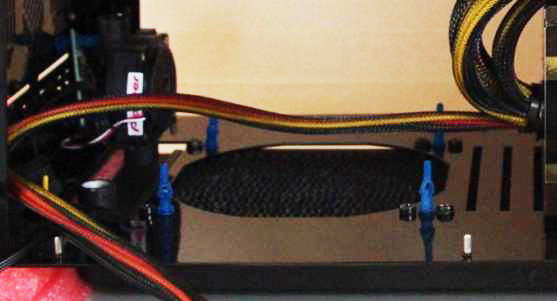
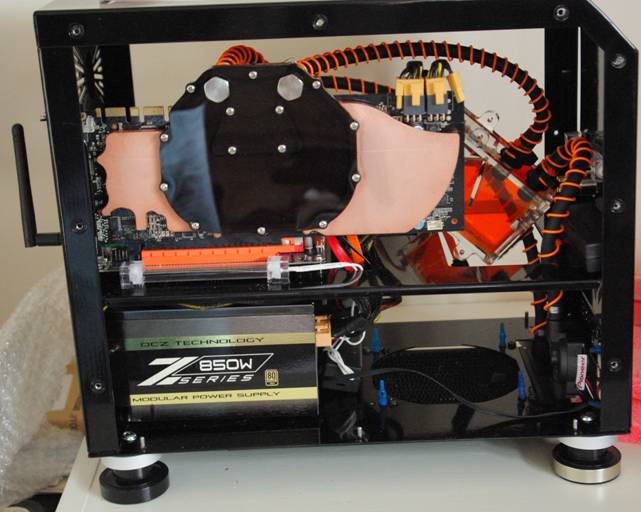
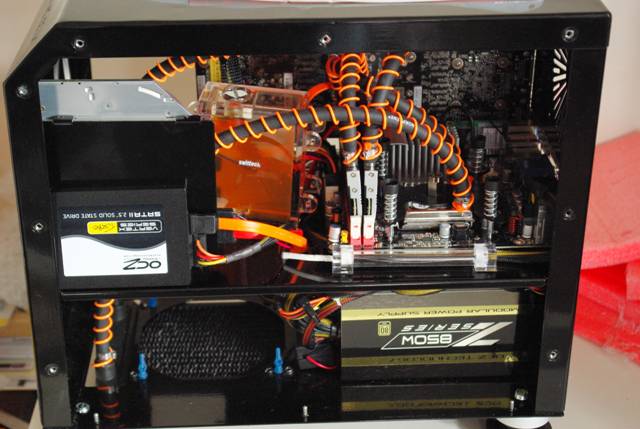
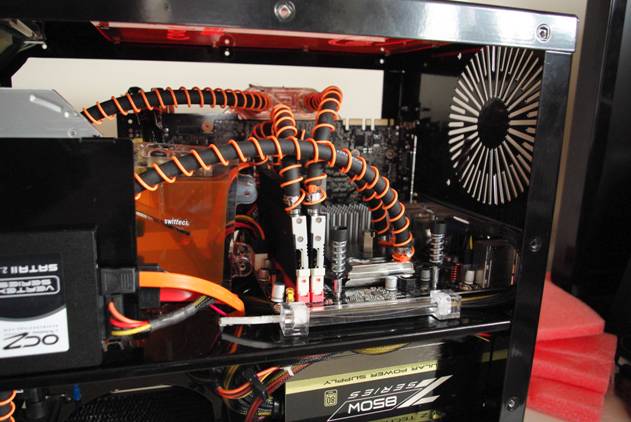
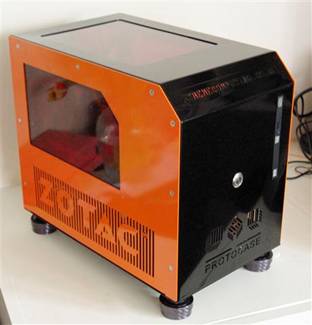
Back again for another installment for the log, this time I threw in most of the hardware as I could and put hoses in without clamps just to get a rough idea of how I want it laid out inside the case.
Now I have a rough idea of how the loop will go, (ignore the large tube, it was put there just for mock up why I waited for more tubing to turn up) the only think I will be changing is placement of the res, due to the fact a Lamptron switch will be in the centre of the front panel and will interfere with it, so ill cross that bridge though when it comes to it.
Now I have the loop right, it is time to get connecting all the parts properly
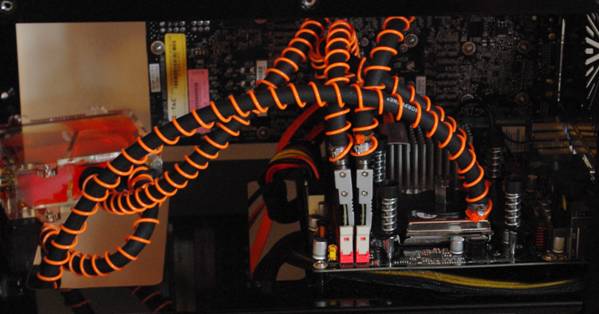
I also as you can see added the UV orange coils around the black tubing, to tie in with the case color, here are some more shots.
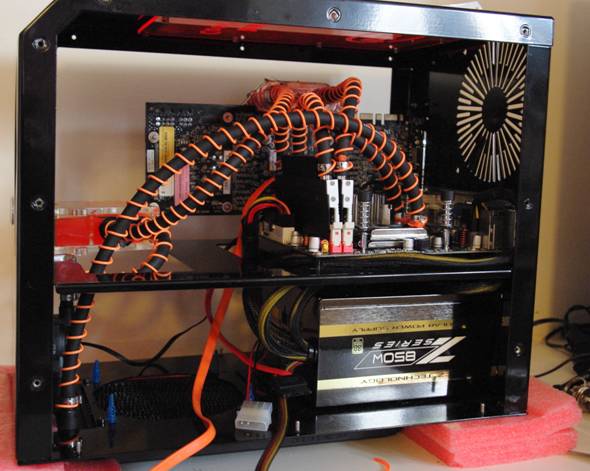
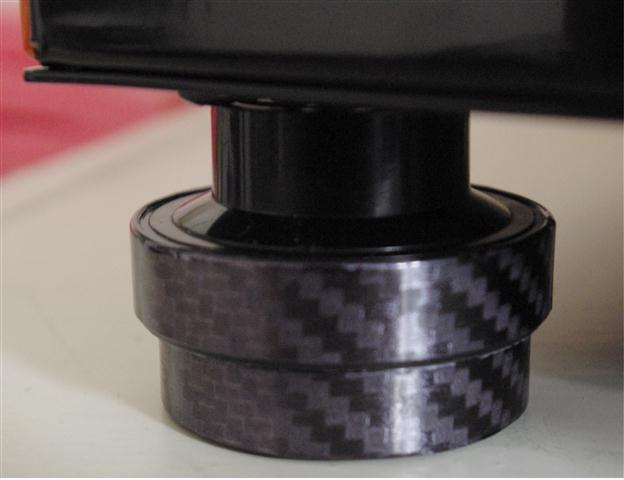
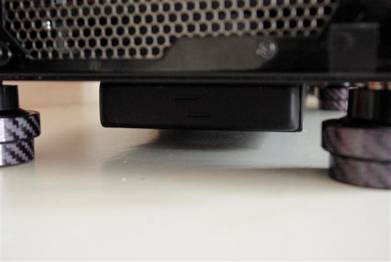
As you can see it is slowly coming together, I just need to wait for black screws for the PSU to turn up, as well as the black fans, oh and the next pictures you will see what happened with the feet and why I say they could of spoiled the whole mod with the way they came out, I was not a happy chappy.
I think you would all agree that those feet are pants and its back to the drawing board on them, time to add in the DVD drive and SSD just so I can get an idea of res placement inside.
I have decided the res will go roughly were you see it, it is the only place I can mount it with long enough hose that want fold or nick, but still be able to maneuver it out for maintenance. Next on the agenda is those pesky feet, damn things, I have ordered some carbon fiber, to help with the rework of them (well the vinyl version that stretches with some hot air)..
So the feet will probably be my next installment, I am hopeful that I can also redo the cable tidying as well, but that might have to wait as some of the pieces I need for that have still not arrived
. Damn royal mail in north London GRRRR.
-
Overclocked
Re: Project Mini Impossible (mini ITX gaming rig) [Completed]
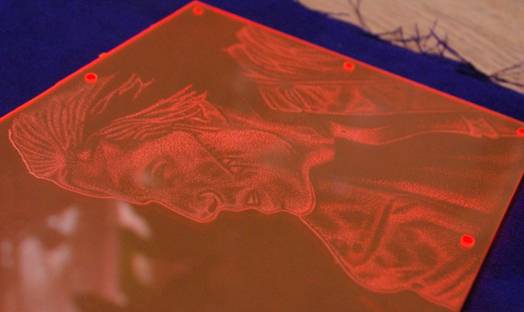
Back again for another installment for you guys, this time we will concentrate on the etches for all 3 windows on the case. I will start off with the roof which you have already seen. Before you go and comment though (if you are going to) I have to be honest and say all I do are the lines, my misses does the dot shading. (lucky me)
Believe it not the lines on writing are the hardest to do, because the outline has to be good, one slip and well the whole acrylic is ruined.. using a rotary tool to do this is recommended, it takes a very steady hand and a lot of pain killers after a few hours.
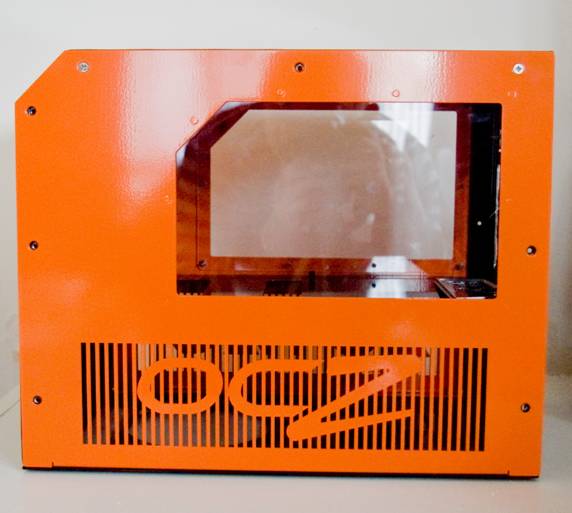
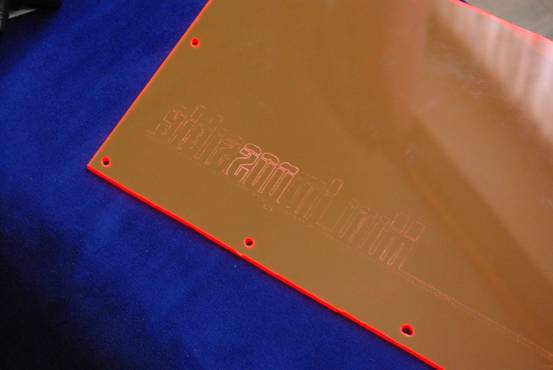
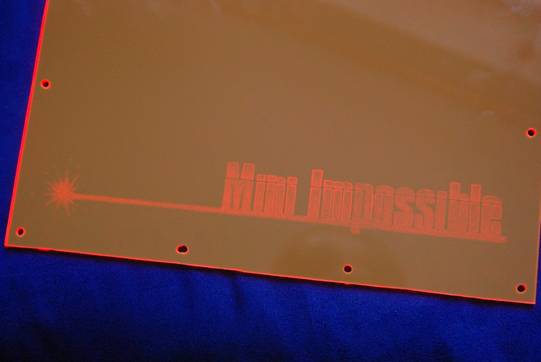
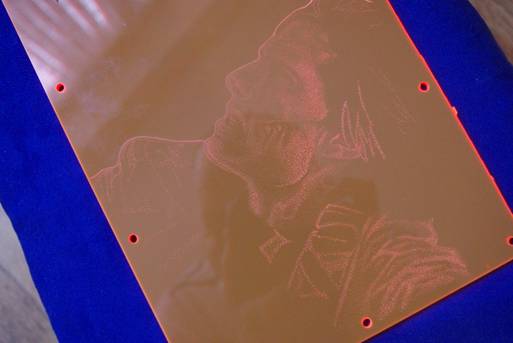
The next etch to do was what I call the hardware side window, I decided to keep this simple so that the inside was still clearly visible so I went with the Mini Impossible logo similar to the one on the keyboard.
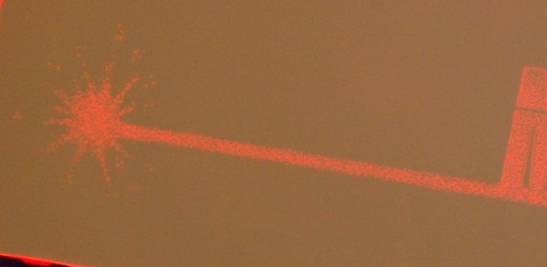
Well you think it is easy, once you have it done, you have to go over it again to ensure it stands out when flipped (the etching always has to be on the inside if you want the lines to glow with UV light. So onto the table again.
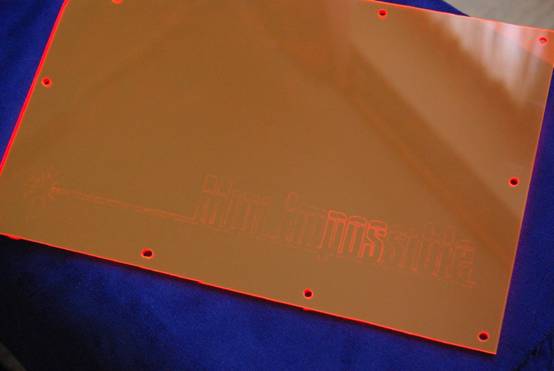
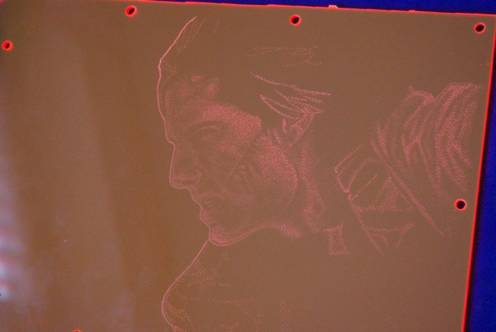
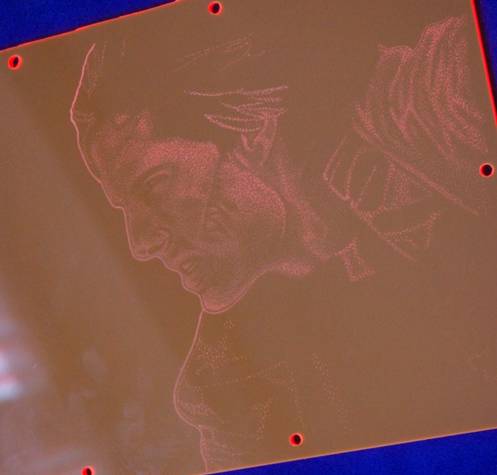
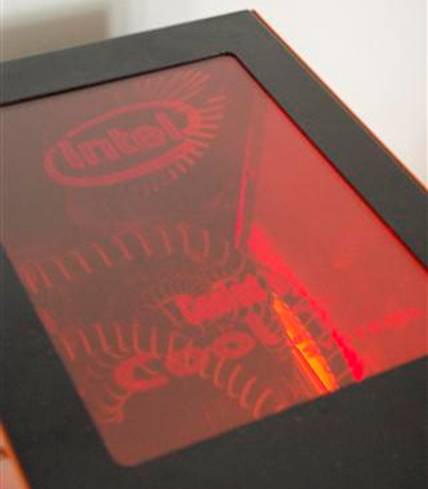
As you can see once flipped it looks a lot better, you may also notice it is made up of loads of dots. The final etch is keeping with the theme, I thought I would show you the image that was worked from first.
We took this image and cut out the writing and a bit off the bottom, I wanted to create a piece of art on the graphics card window, I think it will look a lot better on that side as the Graphics card will give the picture a background to stand out on. Anyway back to the pictures.
Doing something like this is no easy task, it takes hours even on something so small
Again you can clearly see the image is made up of 1000s of little dots to give the shaded feel
I am actually looking forward to getting this finished and in the case to see how it looks lit up, I tried my best to get some good photos to show you the line work and dot work clearer. The only way I could do this was from mad angles so exuse the pictures for that.
Click here if you want to zoom in on this too see how many dots were used, Thats all for now, the next installment will be finally getting the feet right. Until then enjoy the pictures.
-
Overclocked
Re: Project Mini Impossible (mini ITX gaming rig) [Completed]
Just a little post, to show you what i ended up doing with the feet, I actually like the way they come out.
-
Overclocked
Re: Project Mini Impossible (mini ITX gaming rig) [Completed]
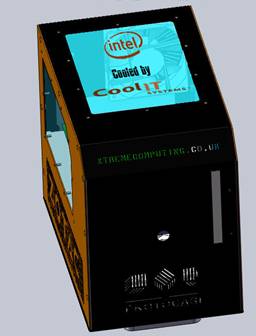
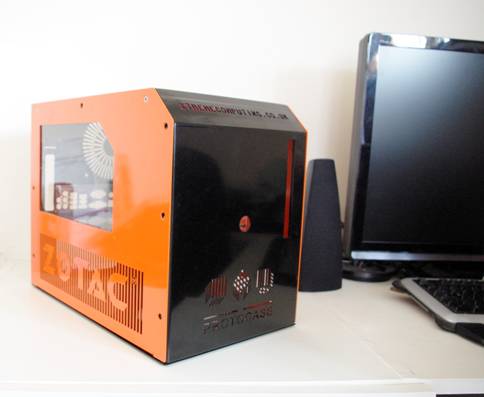
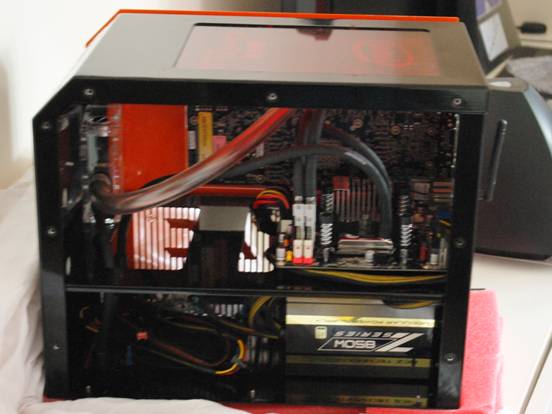
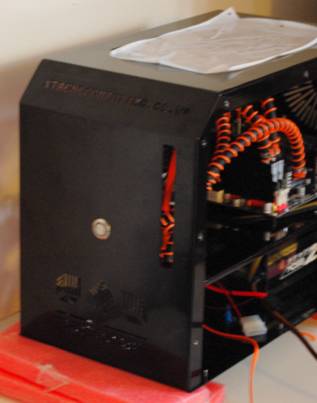
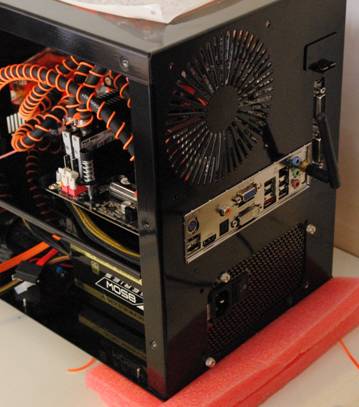
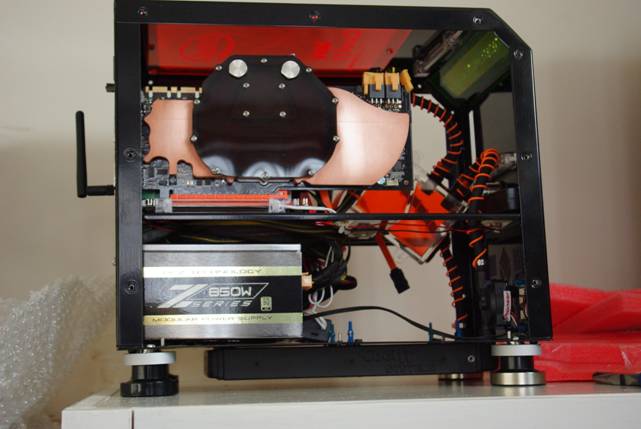
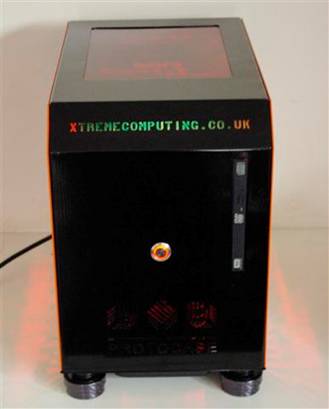
Finally the case was put together and lighting effects added, these are just some of the shots i took of the case, I plan to do some night shots as well to hopefully catch the etches and the lighting in full glory.
As you can probably see from this shot i changed the DVD drive from slot loading, this is due to the slot loading ones front cover jamming in the gap, which caused the drive cover to pop off so i went with the tray one instead.
Anyway enough of the chatter here are some pics...
I thought I would also include some powered up photos as well, I will add more shots when i get some shots done in the dark.
Overall I am really happy with how it turned out, the case is small neat and watercooled, and all in a small package, I would have to say I lurrrvvvve it!
 Posting Permissions
- You may not post new threads
- You may not post replies
- You may not post attachments
- You may not edit your posts
-
Forum Rules


 Reply With Quote