Thanks mate.
Im looking foward to finishing it aswel.


Thanks mate.
Im looking foward to finishing it aswel.
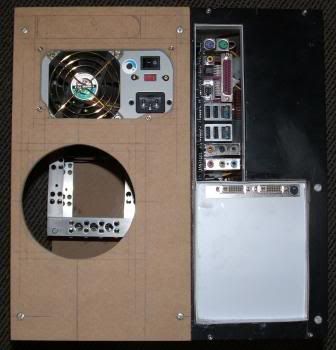
Wooooooo I reached my goal. Everything is in and working. In fact I am typing this on the computer running in the case. I will be taking it all out again tomorrow now that I know it fits though.
Here’s what I did tonight.
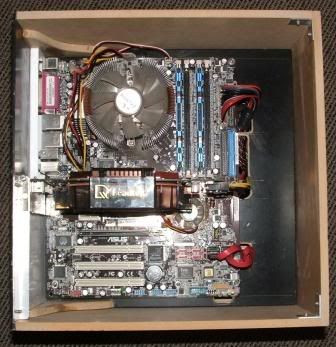
Modified the motherboard tray. Unfortunately this meant moving the motherboard back a little and so I had to re-drill all the mounting holes. No big deal though. After putting everything in I found I need to change it a little but at least its better to find that out now then a couple of days before the event once its all painted.
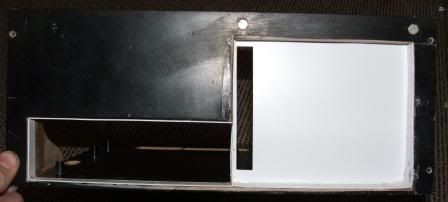
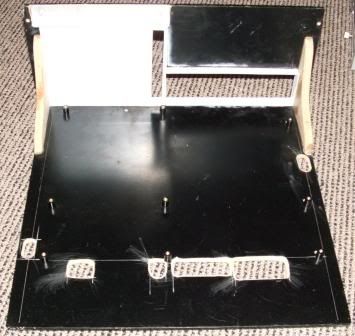
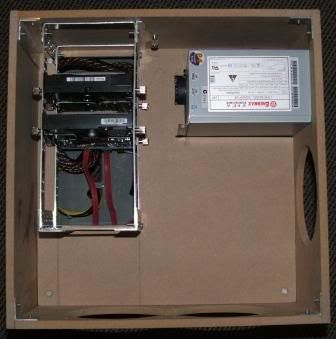
Here are a couple of pics with everything in.
The wires don’t look to messy. Unfortunately the wonderful engineers at Asus decided it was a good idea to put a molex plug right next to the top PCI-E slot for the SLI or something. I will have to do something about that wire as it looks very ugly strung across the motherboard.
Also on the topic of wires. I don’t like how you can see some of the wires behind the hard drive rack. This wouldn’t be as noticeable it was full instead of just having two drives but I will still do something about it if I get time.
Just a back view. You can see where I need to change things slightly around the graphics card to make a little more room for the DVI plugs.
That’s all for now people. More tomorrow, I plan to work on this most nights now in an effort to get it all done in time.
Thanks for looking.
damn i look away from the forumn for a while and damn ....
love the case bro.... great idea .....
having a fountain type thing is juz so pimpin ....
great work on all the fabrication .....
i was working on a wood case till i found that my entire stockpile of wood was termite infested ....
end up buying a case.... but it turned out in the end ,....
cant wait to see the finished product


Awesome
Thanks for the comments guys!
Dirty Moogler, thanks man
Haven’t updated for a few days. That’s not because I haven’t been working on it, I have been working on it lots! Just haven’t had any interesting pics to post. Thought I better do a little update now so the next one isn’t so massive.
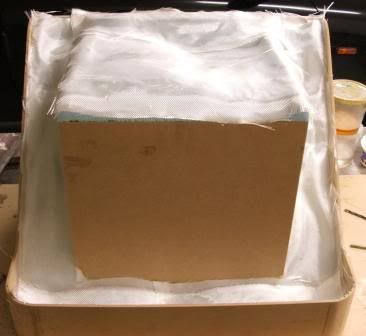
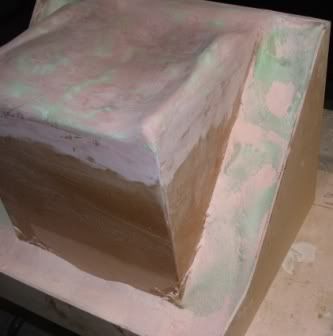
With most of the work done on the inside part of the case it was time to start working again on the outside. First off, I fiber glassed the outside of the foam. Well I hoped to get the whole thing done but I ran a little short of resin so ill have to do the last little bit later on once I get some more.
I cut some mat roughly to the sizes I would be needing. I used 10oz woven cloth, because its what I had lying around. I would have liked to put a 2oz cloth over the top to give a cleaner finish but ill explain why I didn’t later.
Next it was time to wet down the matting. I was a little worried when I mixed up the resin. It was some old stuff I had got off a mate that works with the stuff for a living and it was just in unmarked containers so I wasn’t sure if it was supposed to be 4 to 1 or 5 to 1 mix with resin and hardener. I took a guess and went with 4 to 1, it was good because it worked out about right for the amount I had left of each.
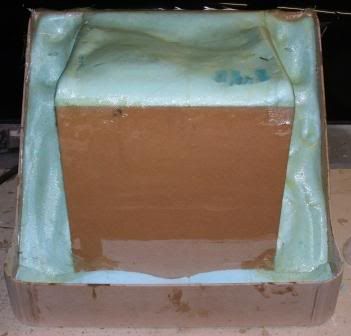
Oh yeah standard health and safety noticeWhen working with epoxy resin It may seem ok to not wear a mask as it doesn’t let off a great stink like the polyester based resins on fillers. IT’S NOT THOUGH!!! It’s just as bad for you so wear a freekin mask! Also it’s best to wear gloves if you can as getting the epoxy on your skin isn’t the best for you either, apparently there’s some harmful crap which can be absorbed through your skin.
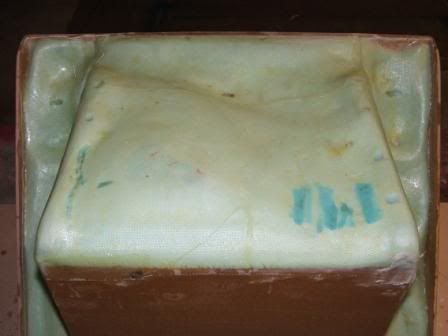
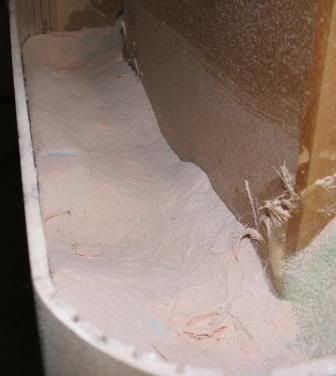
Well my worries of the resin not going off were soon taken away, but this wasn’t a good thing! The resin started to go off as I was working with it. This should never happen with epoxy. If you have the wrong amount of hardener it just won’t go off, unlike polyester resin which just goes off quicker depending on how much hardener/catalysts you use. I figure the resin was just a bit old or something. Unfortunately the matting lifted in a few places due to air bubble I couldn’t get out. I’m pretty sure this was due to the resin starting to go off.
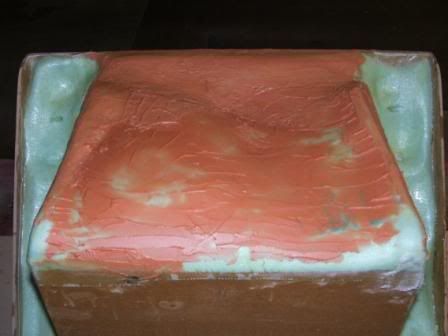
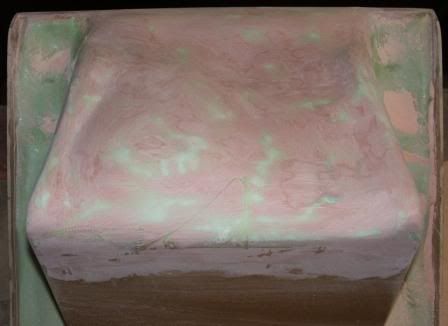
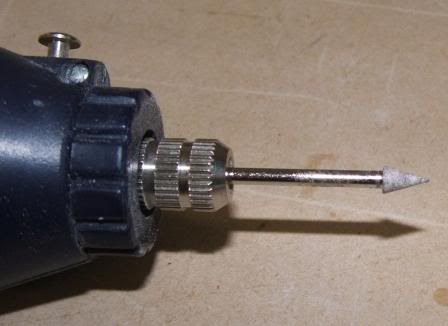
Next was time to start the filling and sanding process. My favorite part… NOT!!!! Little bit of this stuff we all should know what this is
Then sand.
Then I ran out of 60g sand paper so went off to the shop before work to get some.
Skipping a few steps here because they are all the same, just more filling and sanding and this is the result.
Could probably do with a little more sanding to get rid of some of the scratches left by the 40g sandpaper but most of this will be covered in fake sand/rocks so its not a big deal.
Just for fun a few shots of why you have to wear a mask while sanding this stuff.
The piles from the case in the last pics taken out and put next to an crappy old spray can for scale.
Now imagine that in your lungs… bad… very bad!
All for now. I will be starting on the fake rocks and things soon. Look out for an update in the next few days
Lookn good man
Thanks for the comments. I really enjoy reading what people have to say about my work.
Well people it’s finally time for an update. I haven’t done a great deal of work on this in the past few days. At the moment I am up to putting the fake rocks on which could take some time. Anyway no point typing lots about it when pics work so much better.
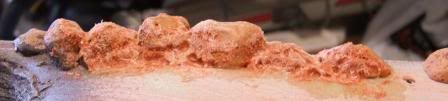
Because I can be fairly impatient when it comes to certain jobs like waiting for glue to dry I used some of my favorite CA glue to stick down the rocks.
Obviously there are gaps which aren’t wanted here. So I went over the gaps with some more filler. I actually used a cores paint brush to apply it to give it a rough texture.
Then a quick and random run over with this. Checking a couple of times to make sure I haven’t taken to much off.
I ended up with this.
It was hard to see what it would actually look like due to the different colours of the ground down filler. So I decided to add a quick coat of what ever paint I had lying around for no reason other then to see how it would look. It will be painted over again in the future.
In future I will be shaping each rock slightly to make it fit better with the one next to it. It’s a long process but it has to be done.
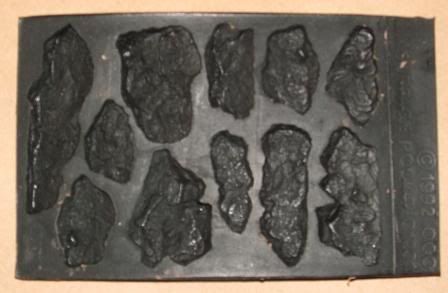
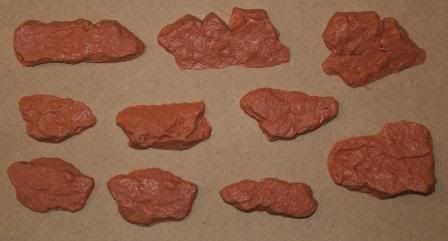
I also got another rock mould so that I could do larger areas without having a heap of joins to fix up later. These ones cover much more area but are a lot flatter.
The mould
The rocks it produces.
At the moment progress is slow on things which are basically the same so I might not update this to often but I will be making progress!
Thanks for taking the time to read this or at least look at the pics


This is looking really really good. I thought you might've screwed up and put some glue on that was melting the rocks, but then I looked further and read it. Looks totally awesome. I would have no patience to do a good job like that.
 Posting Permissions

 Reply With Quote