Project: Large Wooden Tower - Liquid Cooled
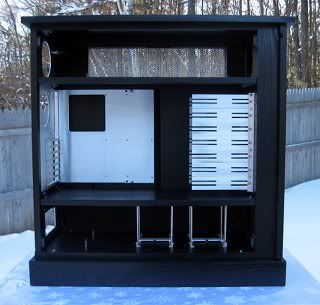
The Large Wooden Tower case build is done:
(That particular case was sized to hold an EATX MB and two 120x4 radiators in the top chamber. However, the basic design of the case could be easily adjusted to accommodate 140mm radiators, EVGA's 4-Way SLI MB, etc.)
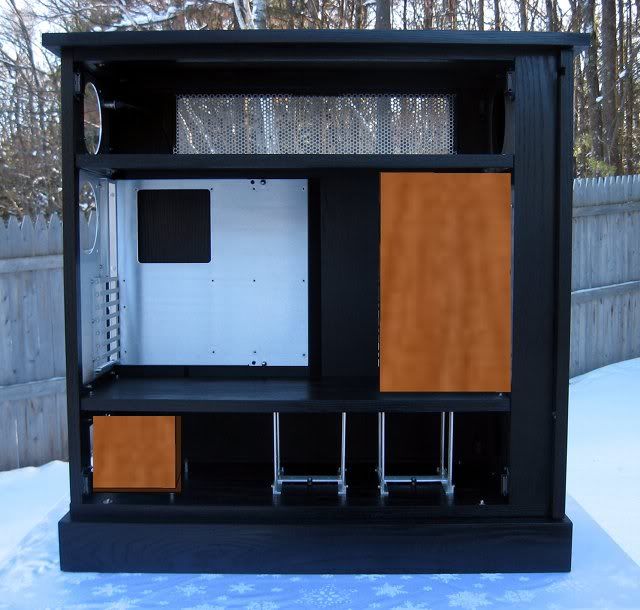
This next phase of the project involves adding the wc-ing goodness. :D But before I can do that the case requires some further customizations involving stealthing the 5.25-inch drive cage and power supply area, as in:
The power supply "cover" is really just a simple two-sided divider.
Stay tuned!
Re: Project: Large Wooden Tower - Liquid Cooled
Beautiful man, keep it up!
Re: Project: Large Wooden Tower - Liquid Cooled
I mounted the quad radiators with a couple of sets of (UN)Designs Rad Brackets.
Eventually there will be two 120mm fans mounted to these case holes that will supply fresh air to the radiator fans (in a push configuration).
Re: Project: Large Wooden Tower - Liquid Cooled
This is just beautiful, good job :)
Re: Project: Large Wooden Tower - Liquid Cooled
This is going to be a fantastic mod, it's a great idea. I love the work so far. Keep it up.
Re: Project: Large Wooden Tower - Liquid Cooled
It looks beautiful; I'm looking forward to seeing more.
Re: Project: Large Wooden Tower - Liquid Cooled
cool woodworking. like the rads! will watch this mod.
Re: Project: Large Wooden Tower - Liquid Cooled
The slot for the radiator tubing was cut into the top shelf with a router, guided by a template.
And a mock-up of how the tubing will eventually be routed:
Re: Project: Large Wooden Tower - Liquid Cooled
This is looking better and better !!!
Re: Project: Large Wooden Tower - Liquid Cooled
The latest task was to fabricate the 5-1/4" drive bay cover. The water cooling pumps, reservoirs and an SSD will all eventually hang off of the cover.
The first order of business was to cut the 5.2mm oak veneer plywood to size. Using my trusty router, this went quickly. (Afterword, I was amazed how badly this cut looks in the photo. Believe me, the final result was a razor sharp edge). There's no better way to cut veneer plywood than with a router.
Next up was to cut some holes in the cover to provide a path for the air coming in from the front intake fan. I had an old template lying around the shop from a previous project, but it was awkward to use on such a small piece of material. I ended up using that template to make another template.
All that's left to do is apply some stain and finish.